
Dek43's post today reminded me that I’ve been wanting to do a post like this for a while. I know we have a ton of members with great photo skills and a bunch of newer members trying to get better as well.
Disclaimer:
1: I don’t purport to be an expert, but I’ve learned quite a lot from this place and practicing on my own diecast photography. I’m hoping there will be comments on this for anything I’ve missed so I can add/update this post as time goes on.
2: This is only if you wish to learn a bit more. This isn’t supposed to be pressure on anyone here to be better. Photography is only one part of this hobby, and to be honest, everyone here enjoys seeing what you’re enjoying, no matter the quality, we’re not sticklers.
So... let’s start!
The Basics:
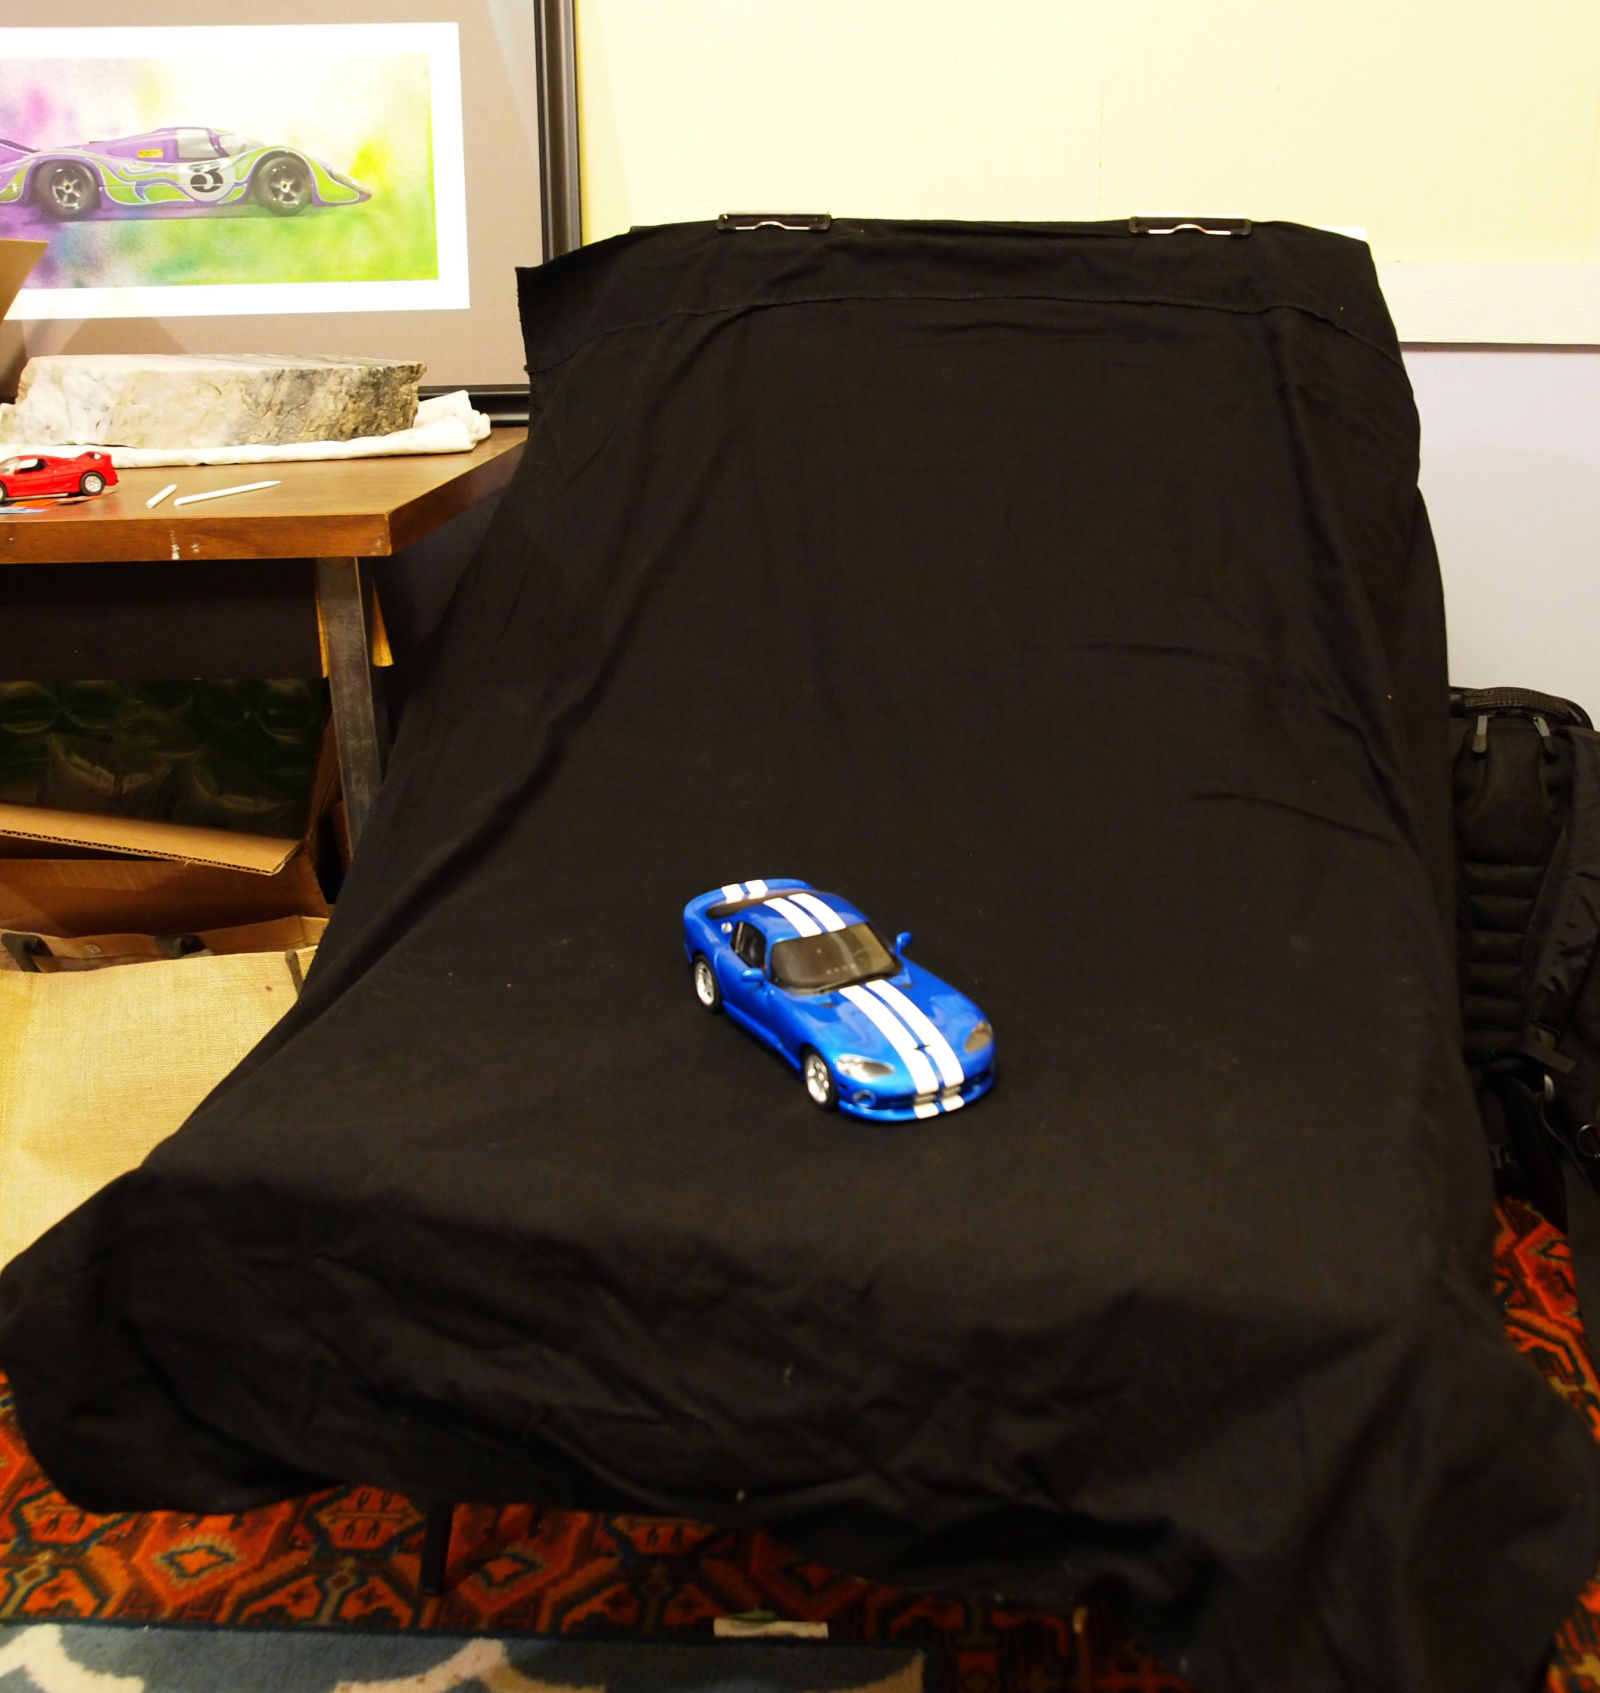
Backdrop. Feel free to get creative, but the gist is this: have a backdrop that’s either interesting (example: outdoors!) or is blank (example: a sheet). Anywhere in between and it can just be distracting. Make sure your diecast fits in the frame of the image for your backdrop. If you use a 8.5x11 sheet of paper for a 1:18 car, you’re gonna have a bad time. You can go all out and get a photo booth, or play it simple, your choice. In my early days I just used a sheet of paper for hot wheels shots and you couldn’t even tell. Feel free to play around with this. People use mirrors, colored poster board, and really awesome dioramas, just to name some. Think outside the box!
Using a piece of paper:
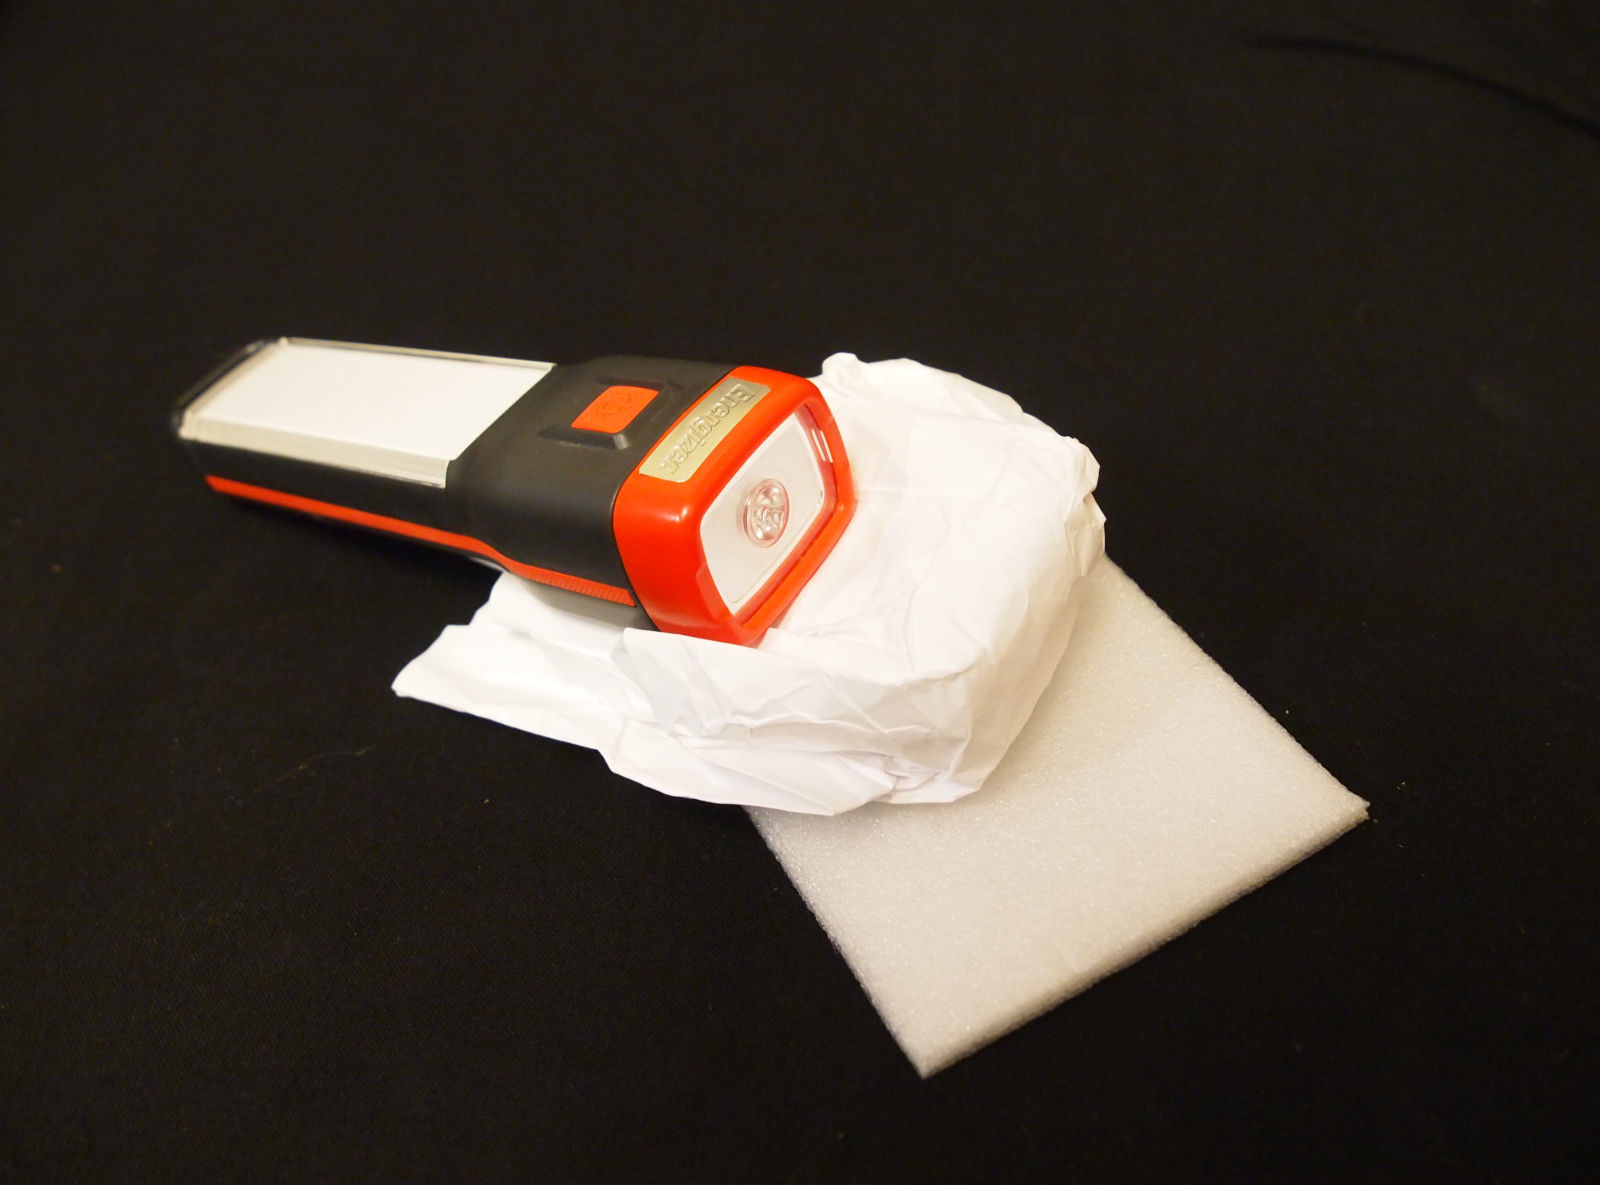
My set-up (my sheet is usually a bit better laid out than this, also this is a 1:18 for scale):
Using a diorama (from Jobjoris, because look at it!):
Light. Natural light is usually best, but try to get lighting that has a color as close as possible to natural light. If you only have incandescents be prepared to adjust your camera or adjust in post-processing as this will make the light a bit yellow. Fluorescents usually have a greenish tinge. Main point: have a good amount of light to showcase your diecast. Better to have too much than not enough (unless you’re getting artsy of course). A lot of times I’m working with incandescent or an LED flashlight (LED can tend to be a bit blue). With our setup you can also have some good diffusion and light reflection which will help in lighting up your subject. Having a white poster board reflecting light down and on the sides of your subject can be a big bonus.
Camera. Nowadays this can be the easiest part. Even phones have better cameras today than the DSLR I bought over ten years ago. Biggest thing is just knowing your device, both its capabilities and its limitations. Capabilities can be what kind of light it works best in, or what components of your camera you can adjust. The better you know your camera, the better your shots will come out. Practice makes perfect ;)
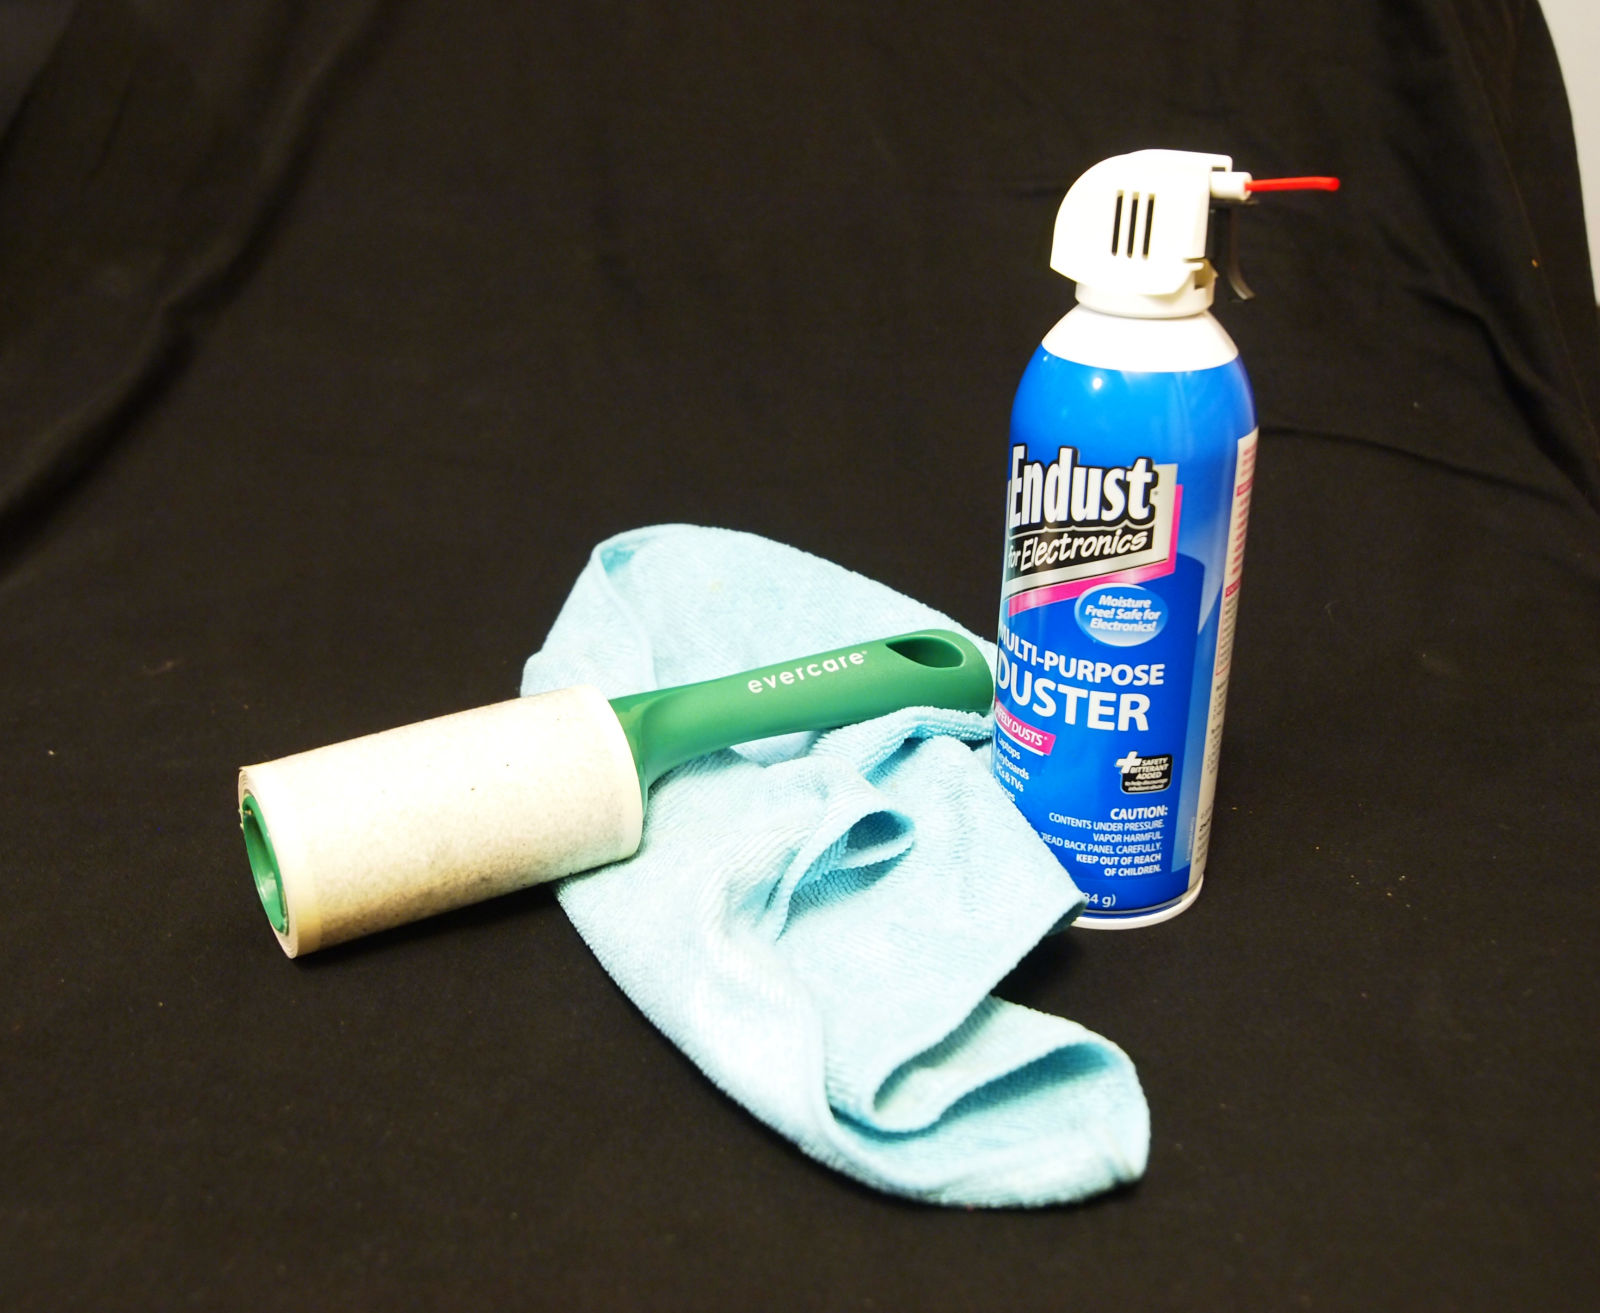
Cleanliness. With 1:64 especially it can be really hard to see that spec of dust hanging out on the glass. Sometimes we don’t notice a smudge on our lens. If you have pets like me, dog hair loves to come into your shot at the worst moment. There are 3 things I keep around to help keep my stuff clean. A microfiber towel for wiping down my diecast and it’s even ok on lenses (as long as it’s clean), electronic dust spray for keyboards and such - helps for getting rid of dust on and inside your diecast, and a lint roller since I use a drop-cloth for my backdrop. I know a bunch of people have something similar, I’m sure a lint roller would work for just about any sort of backdrop.
Tripod. Trust me on this one, get a tripod. If you’re using a phone, try to come up with something to keep your phone steady. Try to use some sort of timer as well so that the act of you pushing the button to take a picture doesn’t move your camera.
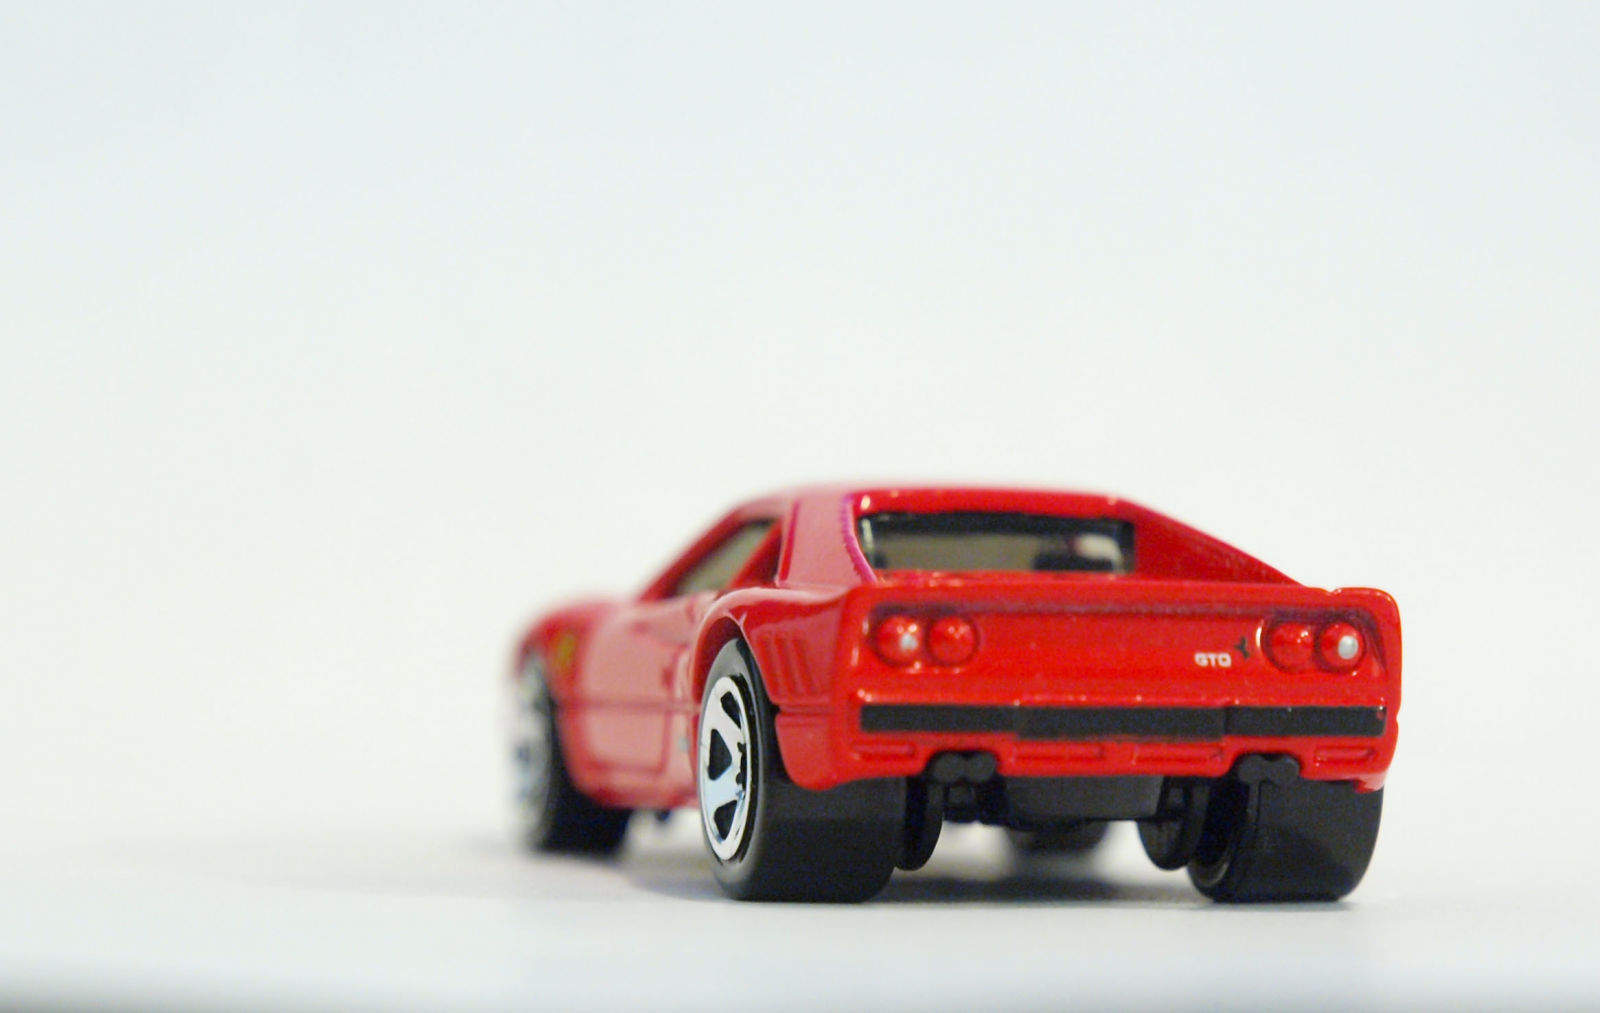
Positioning. Where you line up your diecast in the shot will have an effect on the end result. Now in photography, the rule of thirds usually leads to more interesting photos, but for us, I feel that only really applies with interesting backdrops. If you have nothing behindyour shot, I find it’s ok to center your subject. Outdoors shooting? Try to go for the rule of thirds. The rule is thus: make your main focal point one third to the left of your right edge or one third of the image size to the right of your left edge. Also one third up from the bottom or one third down from the top. I hope this is as clear as mud.
Example: the actual diecast is one-third up and one third from the right side. Rule of thirds!
With all of that you should be good to go practicing your shots! Try all sorts of angles on your diecast to find the kinds of shots you like.
Now, let’s get into some more advanced stuff.
Advanced
Light. Taking pictures is ALL about light. I mean, the photons hitting your camera image sensor is exactly what makes the picture, right? So it’s time to understand how your camera manipulates how it sees the light.
We shall dive into some terms you’ve probably heard, but not totally understood what they mean (took me a book and reading it over a few times to get this...).
White Balance. This describes the light you’re using. You want to adjust your white balance to try and get your image to look natural. Flourescent gives off a green tinge, LED usually blue, and Incandescent a yellow tinge whereas the sun is essentially perfect since our eyeballs evolved to look at things in sunlight. Also note shooting in shadows can give you a blue tinge.
ISO. ISO basically tells you how sensitive you’ve set your image sensor to the light coming in. Low ISO means it’s not very sensitive, high ISO means it’s very sensitive. What this means is if your ISO is set quite low then you need to have a longer amount of time for you shutter to be open to get the correct amount of light for your picture. Higher ISO means a shorter amount of time for your shutter to be open. There are caveats to this though: yes a really quick shutter speed is handy (like taking shots of something moving), but the higher ISO can make your pictures grainy with added noise due to the extra sensitivity but some shots require higher ISO (like taking shots of stars). Fun-fact: Back in the day before digital cameras, ISO was controlled by the specific camera film you used.
Shutter speed: This is the amount of time the shutter is open, letting the light hit the image sensor. Too long and you will get your picture over-exposed and it could be too bright. Too short and your image will be dark, or under-exposed. I’ll also refer to this as exposure time.
Aperture. So aperture, or f-stop is how open the hole that leads to your image sensor is. As you may guess, this affects how much light hits your image sensor over a period of time (which is controlled by shutter speed, yay!). Now your aperture also controls something else. Your focal length. Focal length is basically the depth of focus. We’ve all seen pictures where the entire diecast is in focus, or where just a little bit is in focus and the rest is faded. This is all controlled by your aperture. The lower your aperture, the narrower your focus, making very little of your image in focus, BUT the shorter your shutter speed to get the correct amount of light in. Yes, for f-stop (aperture) the lower the number the more open your aperture is. It’s a bit backwards in thinking (just remember it’s related to focal length. - smaller means shorter distance in focus and vice versa). The higher your aperture setting, the more you can have in focus, but the longer your shutter speed needs to be. With something in 1:64 this can be a bonus because the cars are very small already, so you can get away with a smaller aperture and still keep everything in focus. Note: F-stop will vary based on your digital fixed lens (think phone or point-and-shoot) or your DSLR lens, not on the image sensor or your camera if you have a camera with interchangeable lenses.
Now let’s explore what this looks like with some shots.
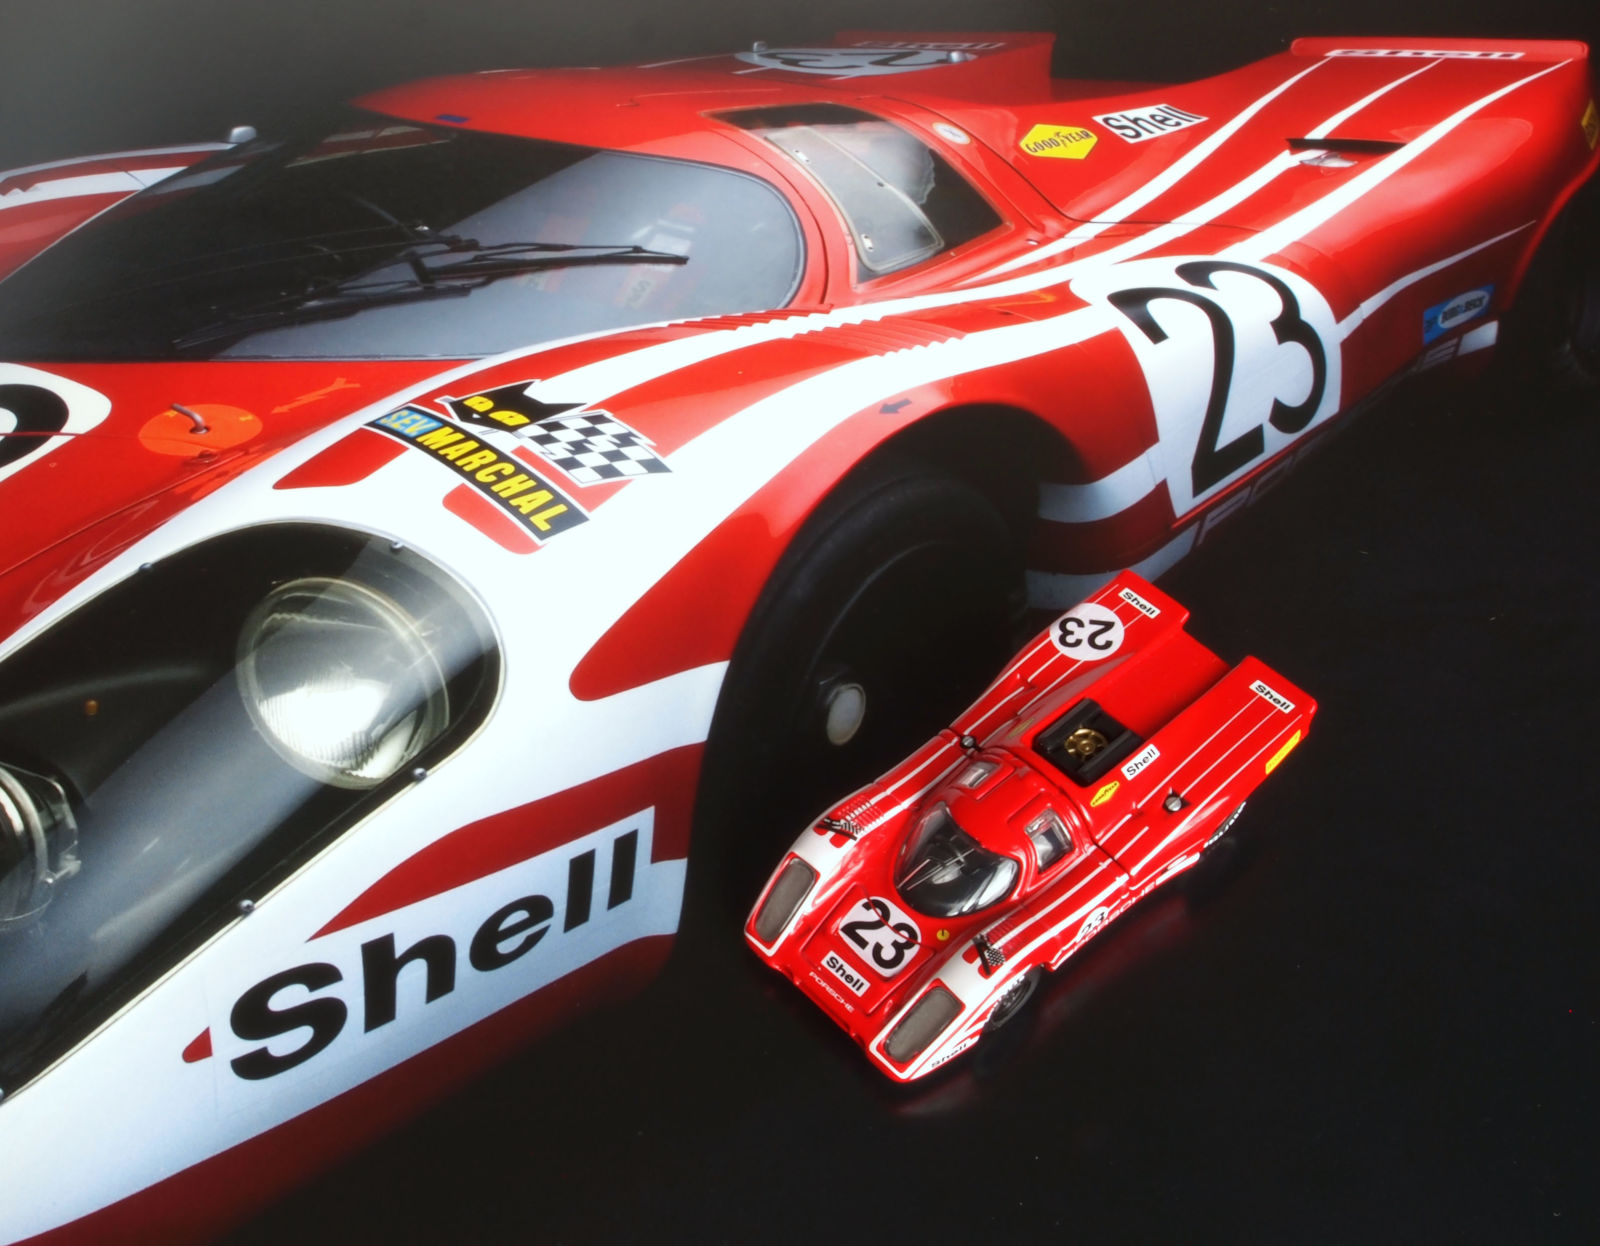
Settings: f-stop: 3.6, .0667 sec exposure, ISO-320
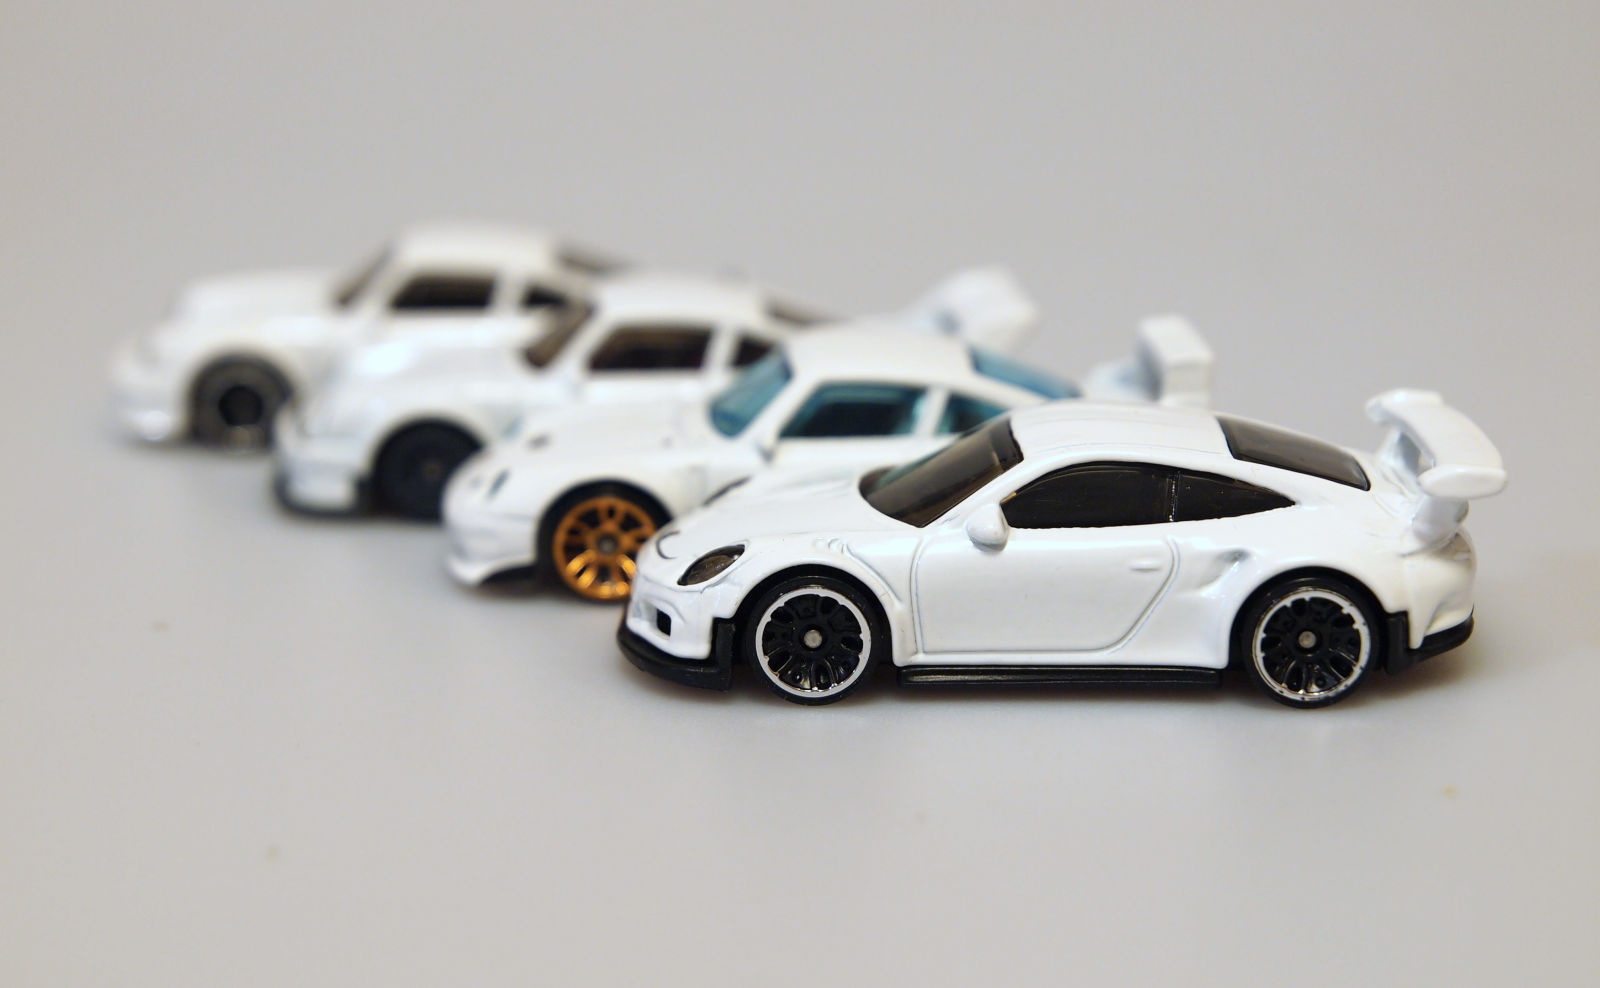
f-stop 7.1, 0.2 sec exposure, ISO-320
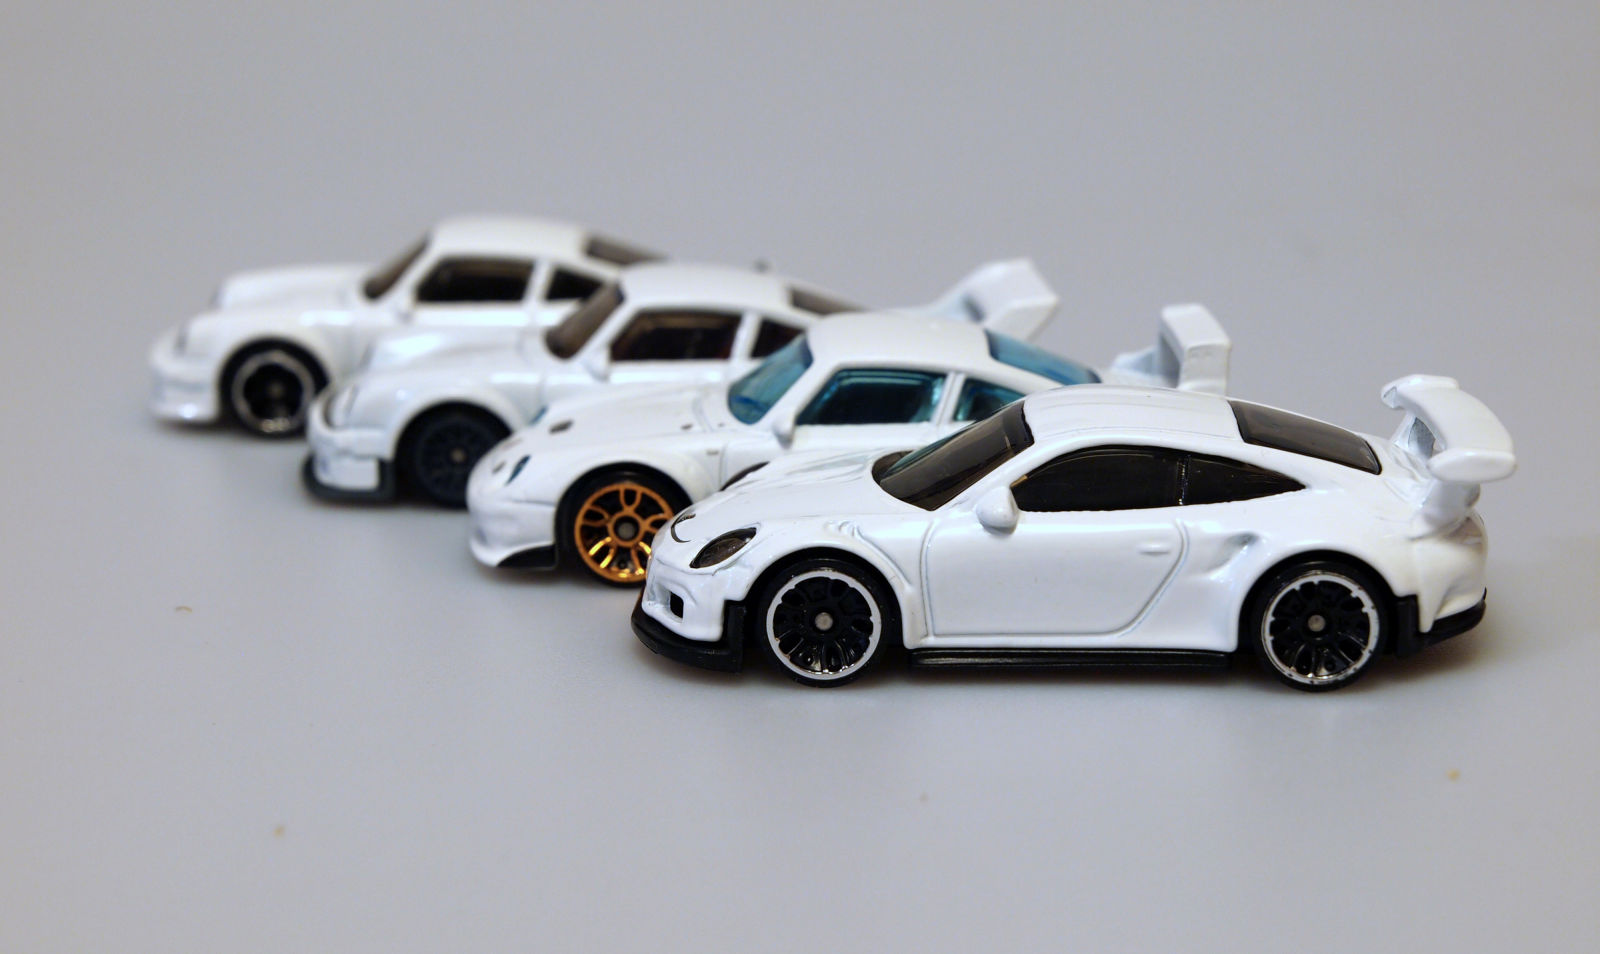
f-stop 13, 0.77 sec exposure, ISO-320
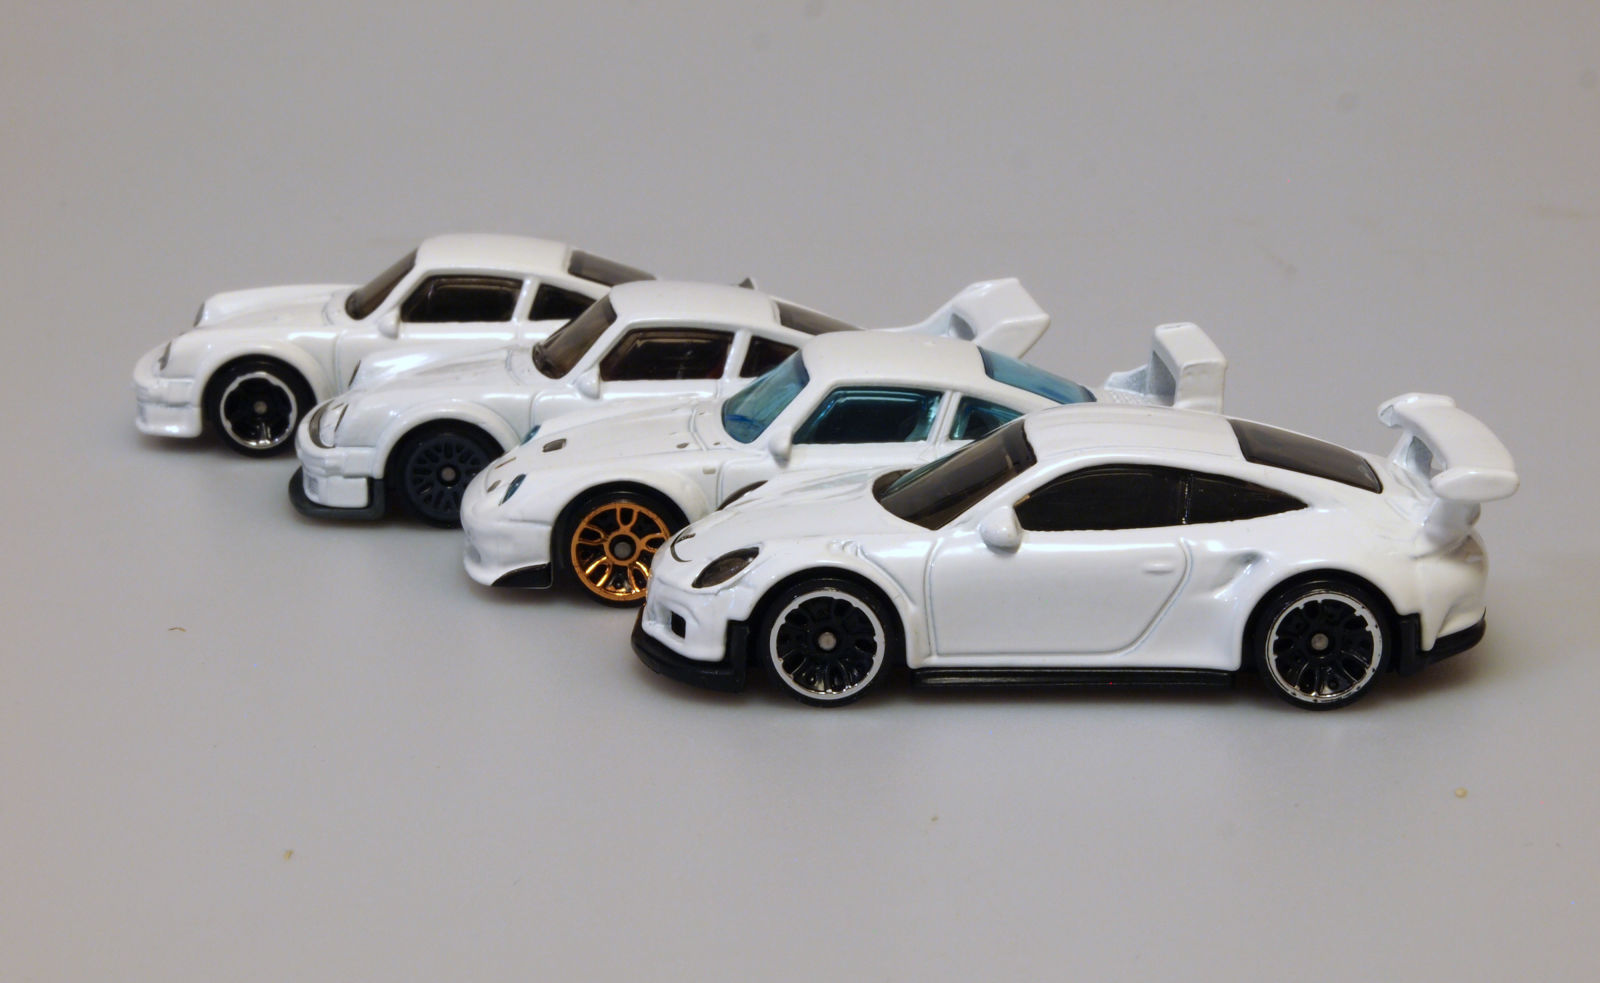
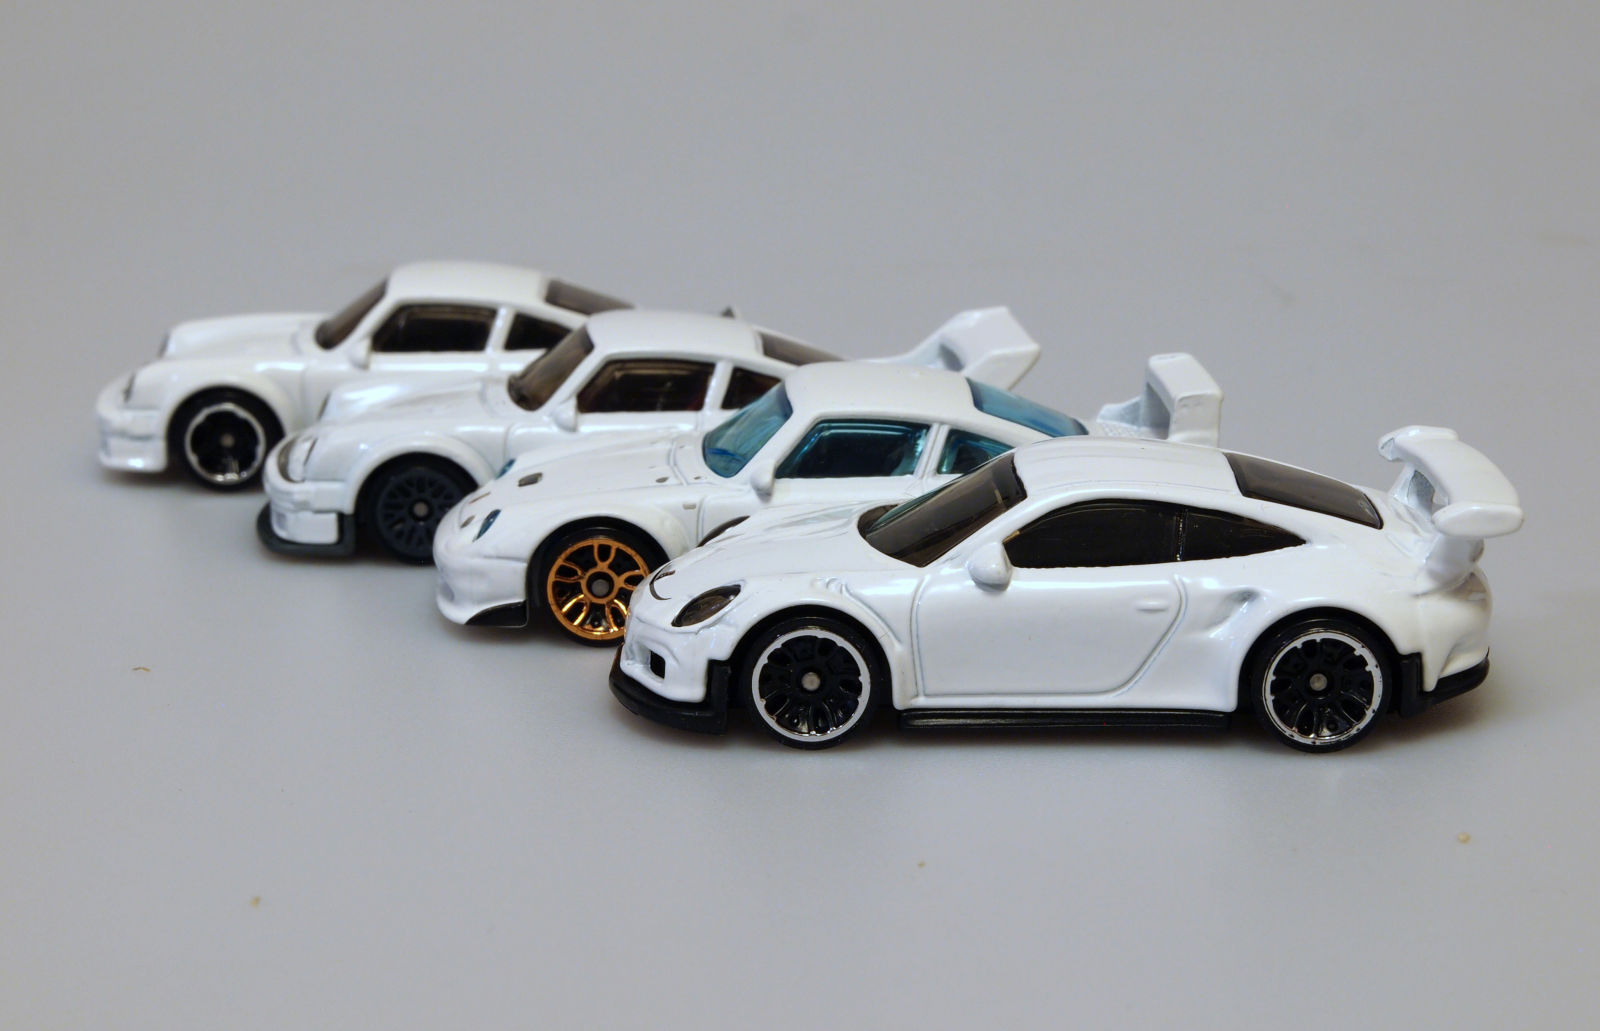
f-stop 22, 2 second exposure, ISO-320
In the images you can see how the focal length changes based on the change in f-stop. Now since I’m shooting some hot wheels, the difference between f-13 and f-22 really isn’t that much. The Porsche 934 at the end of the row is just a touch out of focus in the f-13 picture. Note how my exposure time (shutter speed) changed with each picture. Also note how I have a steady ISO of 320 on these. Honestly it’s just a leftover from when I was doing really dark shots where I was worried about noise, I could have easily raised my ISO, which would have then made it so I could have a quicker shutter speed.
Now although my light sensor said that I was slightly overexposed on these pictures, we can see they’re all a bit dark. If you’re using a camera that doesn’t let you control much, like a phone or something, it will usually try to just get the perfect exposure, which could leave your shots a bit dark. Now I know these new-fangled phones have some pretty amazing cameras, so you never know you could actually control these properties. I know I’ve seen that you can adjust your exposure settings to plus/minus (a zero is ‘perfect’ exposure, + is over exposed which means your picture will be brighter).
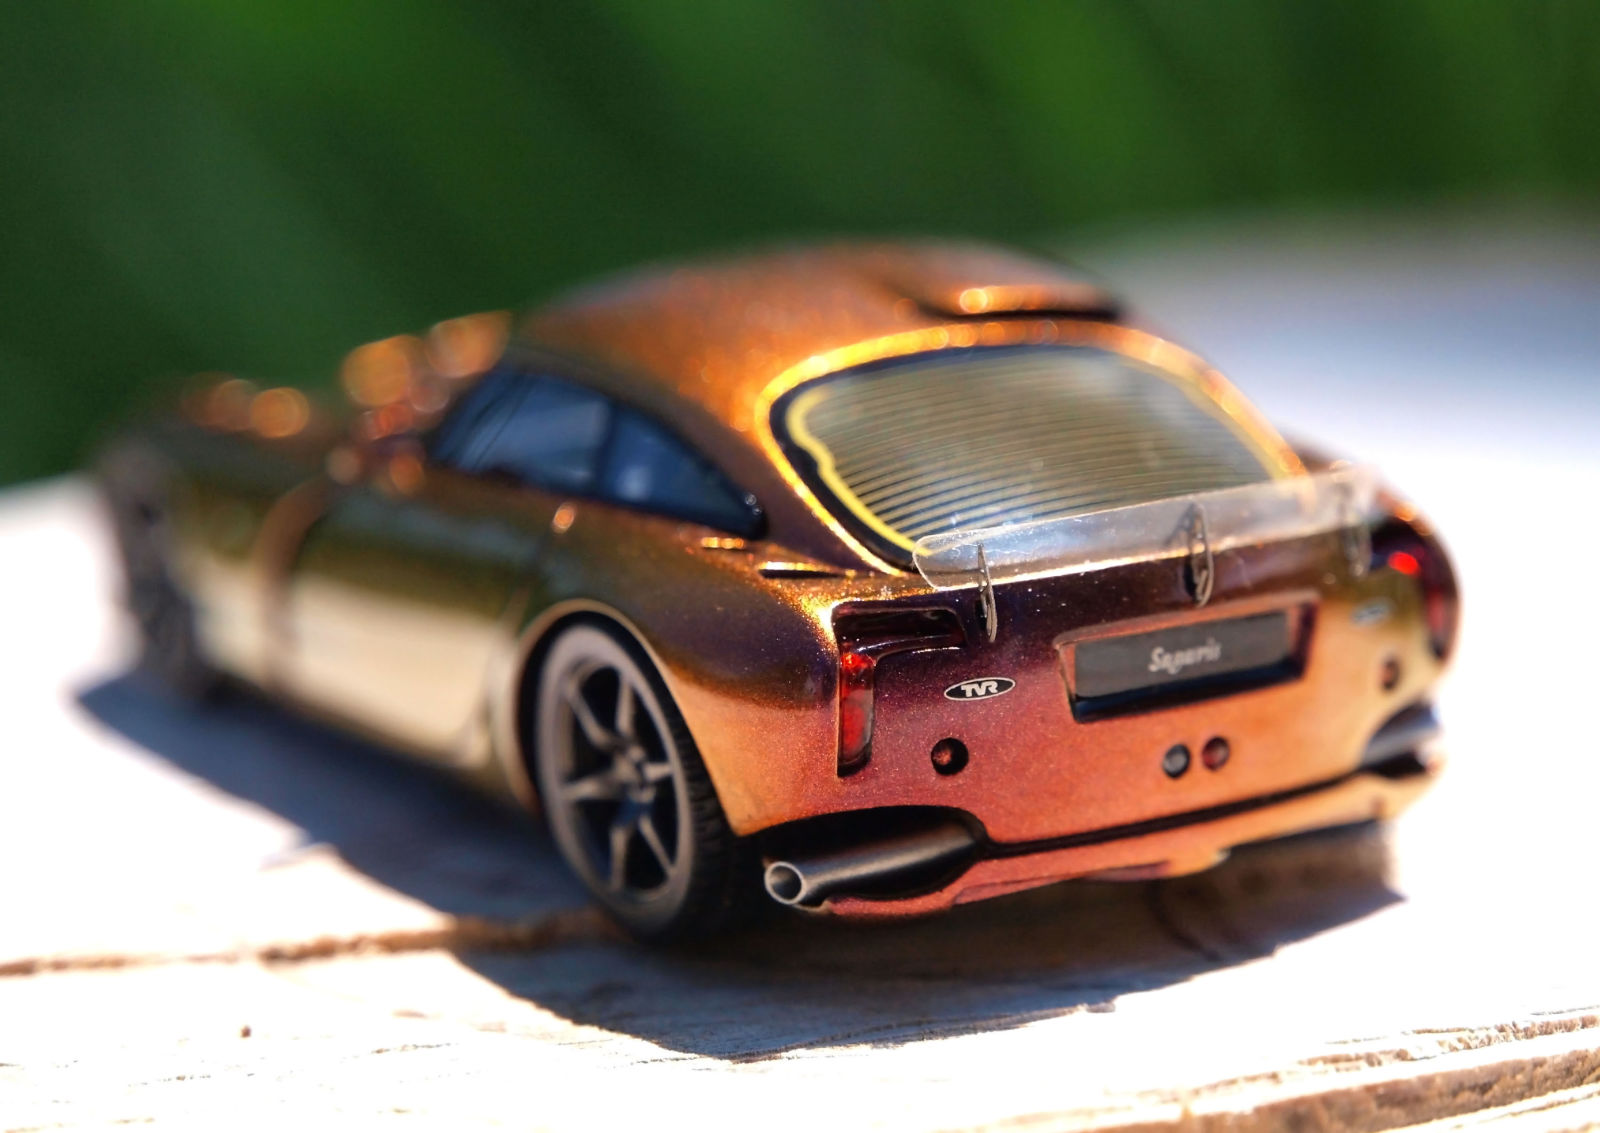
Post-processing. Ah post-processing. Giving you the tools to fix the worst of shots. But let’s be real, the closer you can get to nailing the perfect shot on the first try, the more you don’t have to do in post.
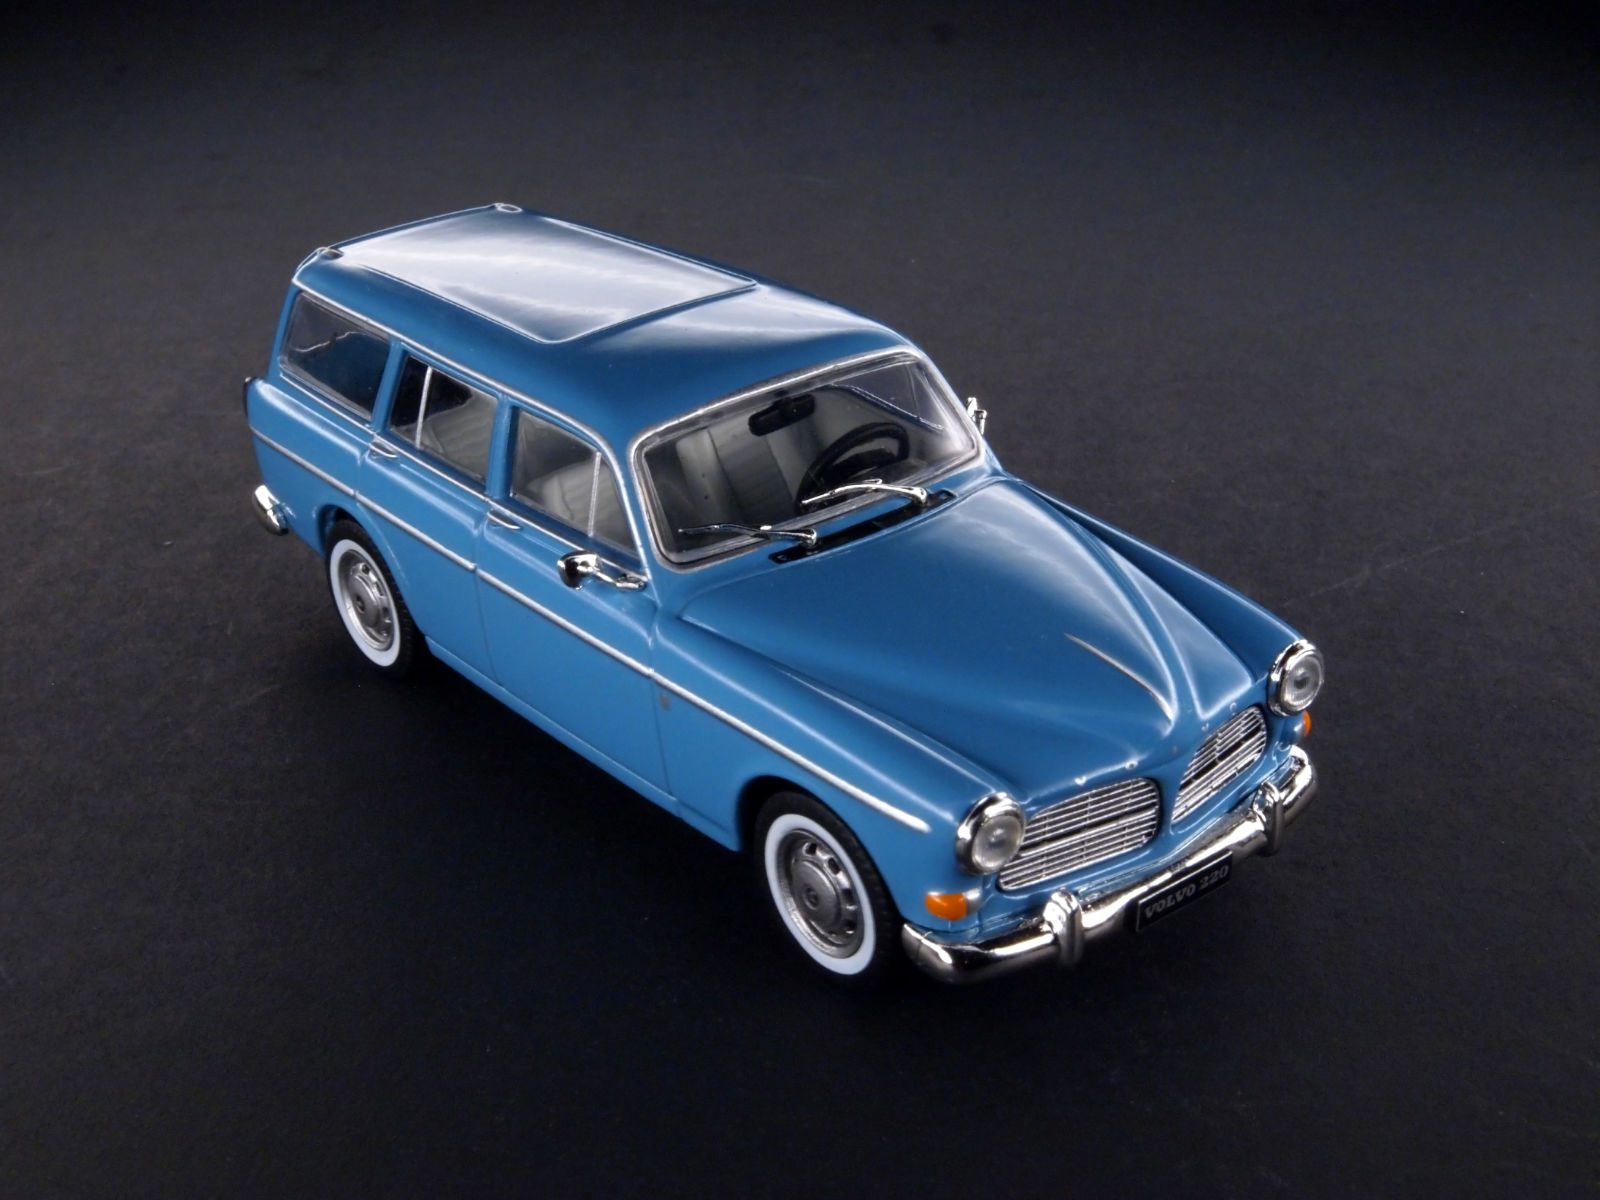
I didn’t have to do any post-processing for this guy besides some cropping. Using sunlight and knowing a perfect exposure would give me the right light seriously helped. Also you can guess that I was using a very low aperture to get that faded look.
Now some standard things you can do is adjust your contrast and saturation. I generally adjust these slightly to adjust the image to what my eye was actually seeing. Of course you can take this further to get some neat effects on your photo. HDR is a good example where it takes the extremes of over and underexposed images to make a combo of the best of the darks and lights to make a highly contrasted and dynamic image.
Another thing I will adjust especially when working with yellow-hued lights is that photoshop and other programs have a nice button that allows you to color-correct for the light used.
Now when you’re doing post-processing make sure you have a screen that is calibrated right. If your image looks good on your screen, but it’s poorly calibrated, then everywhere else it will look off.
RAW. If you have a fancy camera, shooting in RAW will give you the most control in post-processing. It’s amazing how much easier it is to get your picture looking amazing if you edit in RAW. This does require a program that can read RAW files and a camera that can shoot in RAW. Note that your file sizes in RAW will be much larger. Also note that you have to save them as something else for the web as kinja certainly won’t let you display an image in a RAW file format.
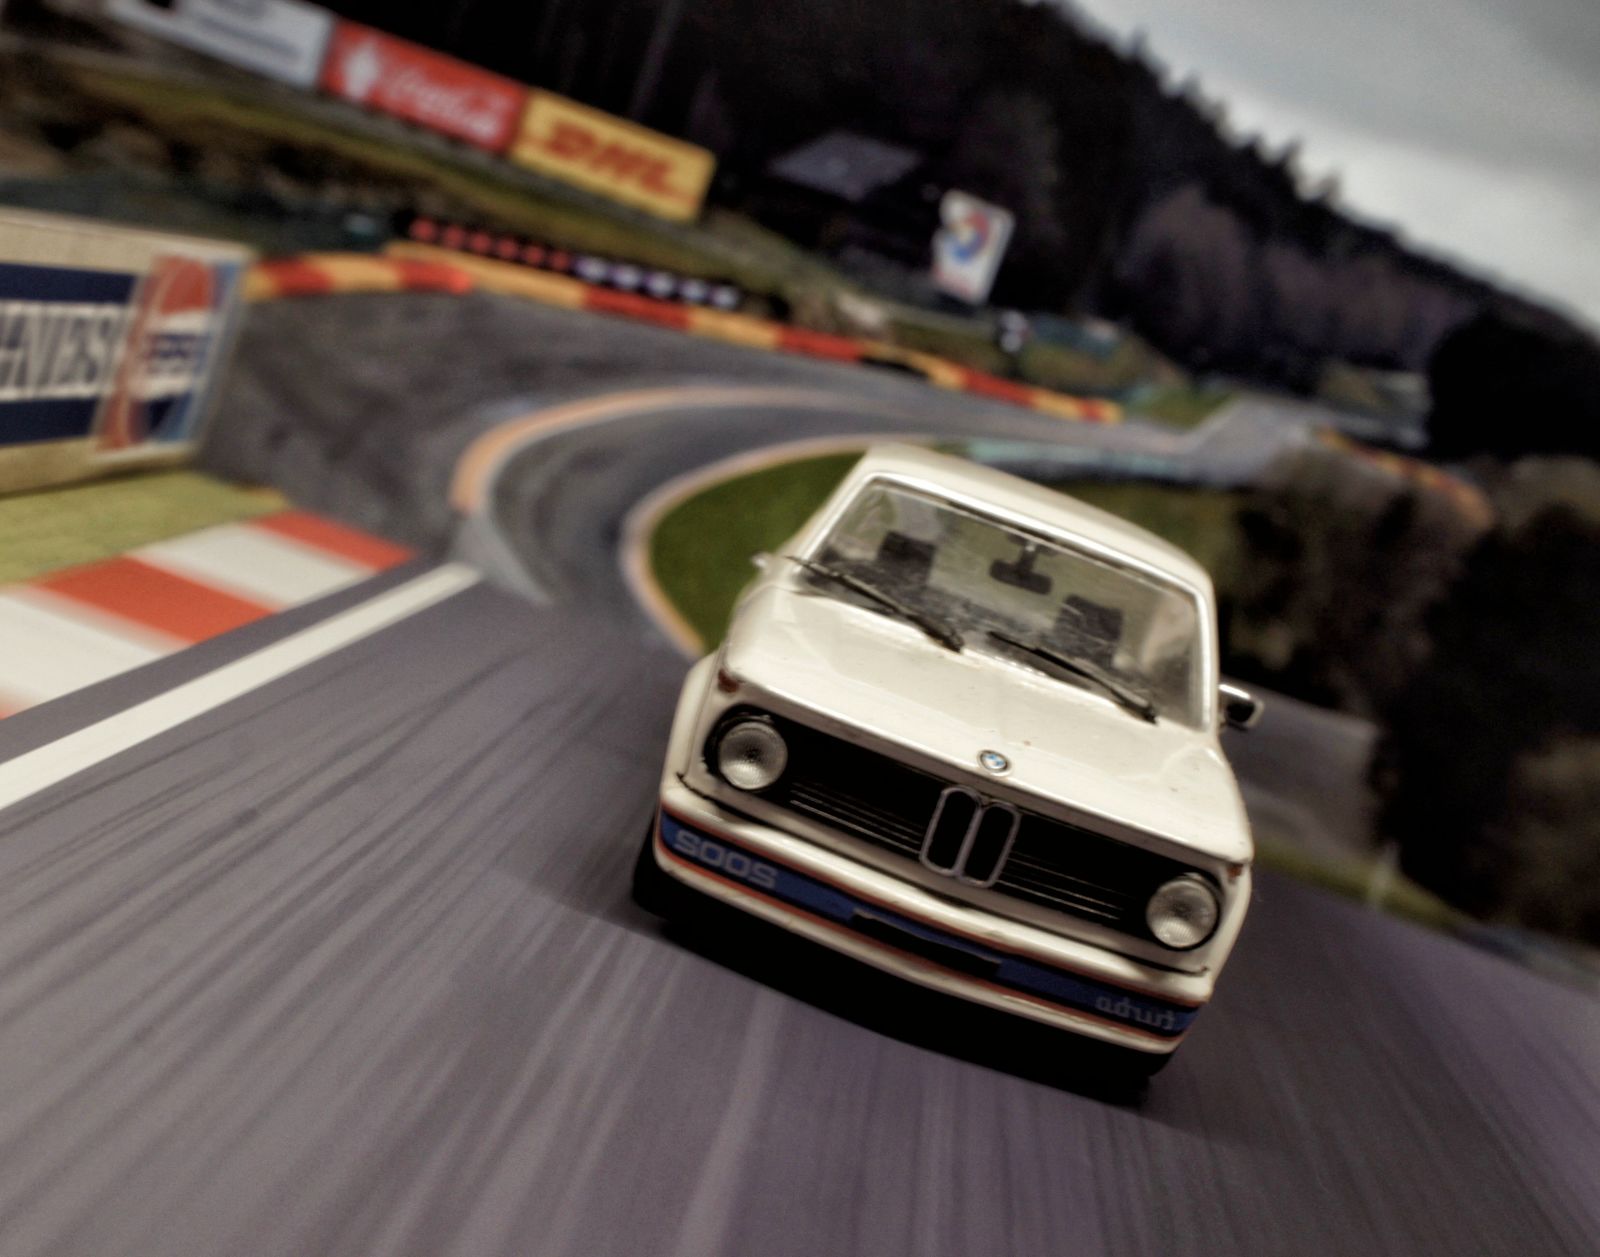
Foreshortening. This is going to be a quick thing about shots. The premise on this is getting your diecast as close to the lens as you can to create an exaggerated perspective. Basically what’s closer to you is very big and tapers quickly backward vs positioning your car away so it has a nice shallow perspective. You can also get foreshortening using a wide angle or fisheye lens.
Foreshortened:
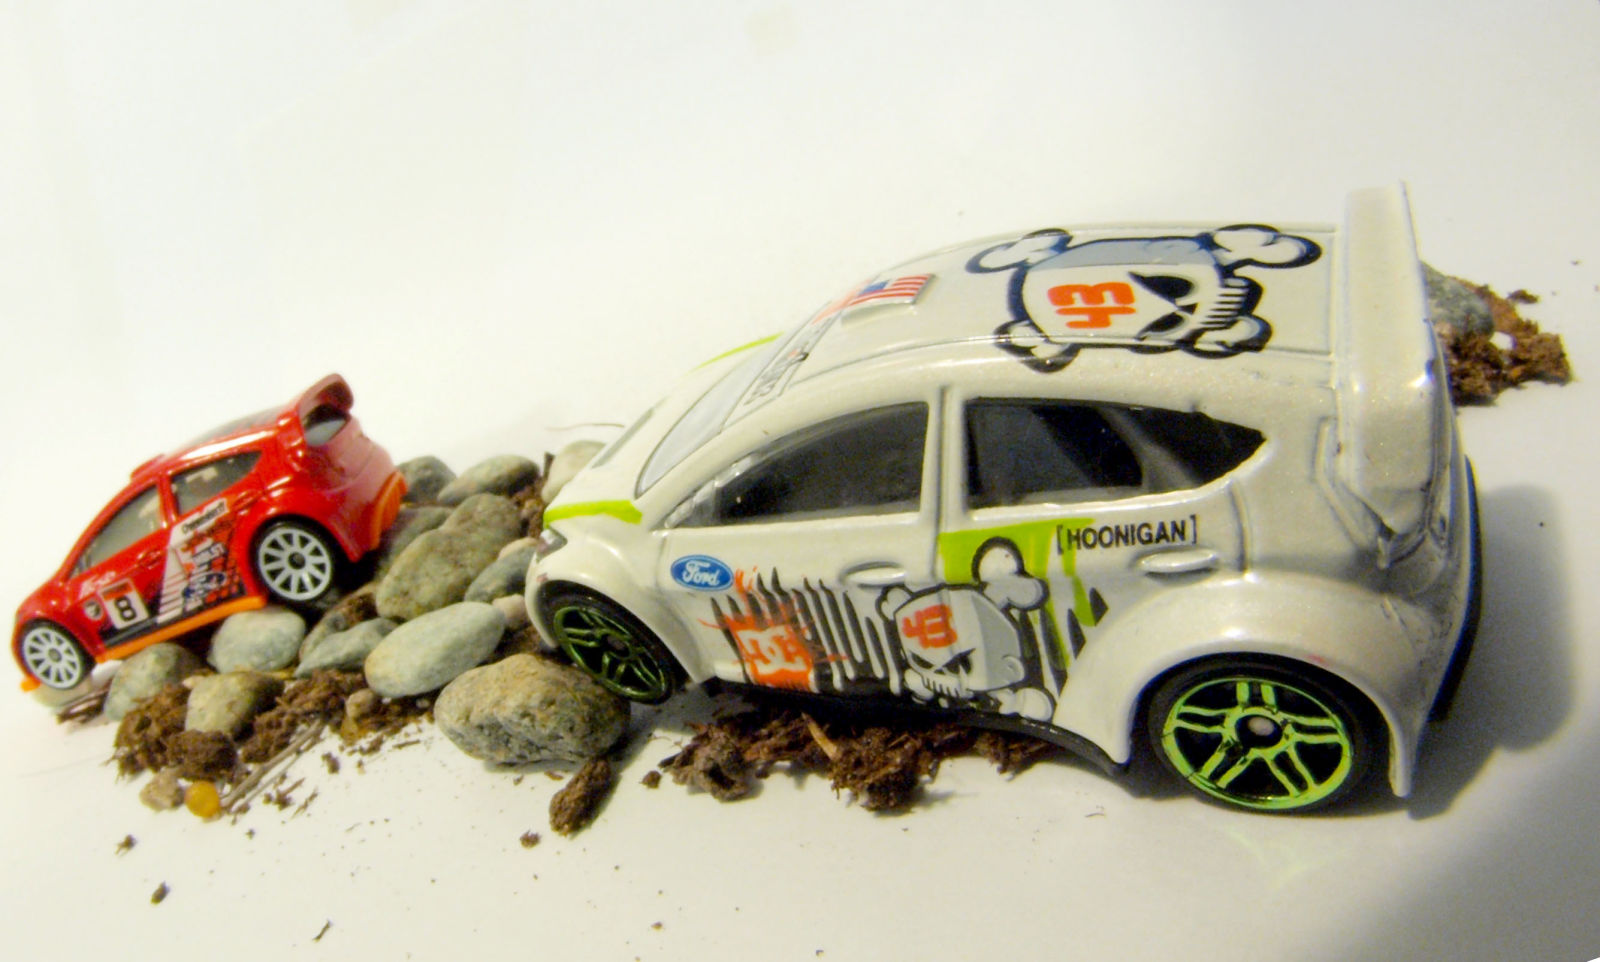
Standard:
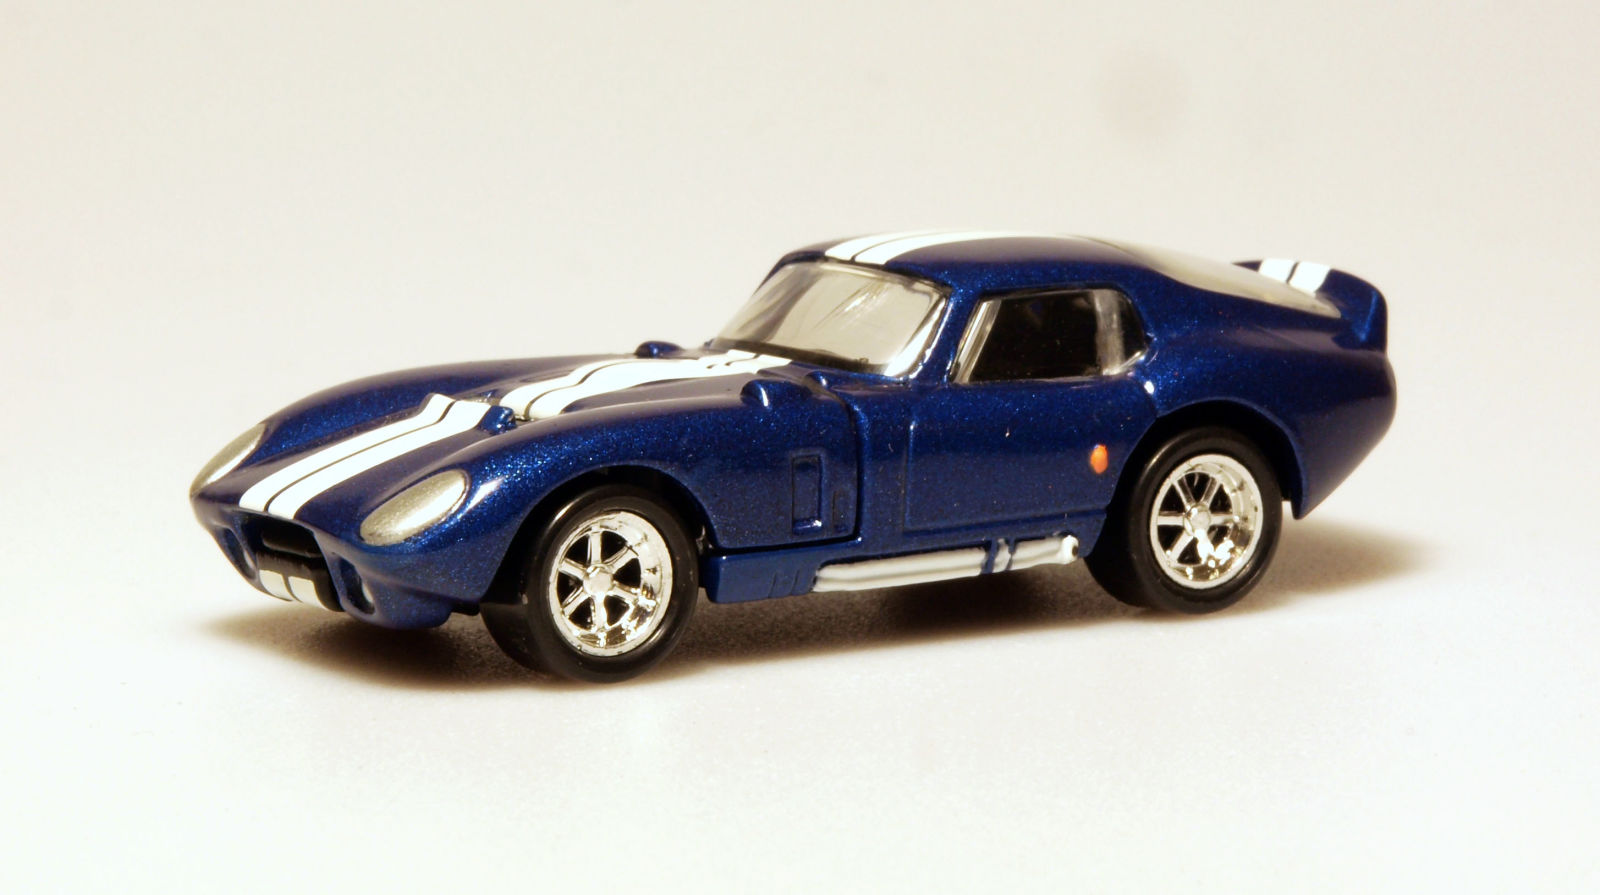
Playing in the Dark. Now through my own playing around I’ve found a neat way to give a realistic shot. I’ve alluded to how controlling light is important, and that’s everything with these kinds of shots. I start out with being in the dark. I mean total darkness. Night time and everything - not even the hallway light on. Now since I’m using a black dropcloth, I can focus the light totally on my diecast. To do this I use an LED flashlight. Now since it’s a flashlight, the beam is very focused and quite bright, so I use some things to diffuse the light, otherwise it will be like shining a carzy spotlight on the diecast. I am currently using a few sheets of white paper to take back some of the light and some of that white packing foam to help diffuse the light - I figured out by messing around with items to get the result I wanted.
Now the point of all of this is to reduce the ‘spot’ effect when shooting diecast. You know when you get a spot of light on a nice body line, but you know it should follow it all the way down? This process I’m describing will paint light on those body lines. We also like how cars look glossy, time to get uber glossy.
SO. The set-up on the camera is thus: High f-stop (large focal length to keep the car fully in focus, and increases my exposure time to help me do some light-painting; my lens goes up to f/22), and low ISO (like 200 or 320) so that I remove noise from my image (also increases exposure time). Finally the shutter speed gets us to the correct exposure. Many times I’ll shoot at 20 to 30 seconds at a time. This method can take a long time for a photoshoot. Most times I’ll set it up close to what I think it should be and take some test shots. Based on those I’ll adjust my shutter speed to increase or reduce my exposure (brightness) of my photo.
When I take these shots I’ll go in a circular pattern around the car pointing the light right at it. I’ll also adjust the height of where I hold the flashlight to have it reflect in a certain way. Remember that this takes 20-30 seconds... don’t bump the camera... I’ve wasted so much time by accidentally bumping the camera.
Results:
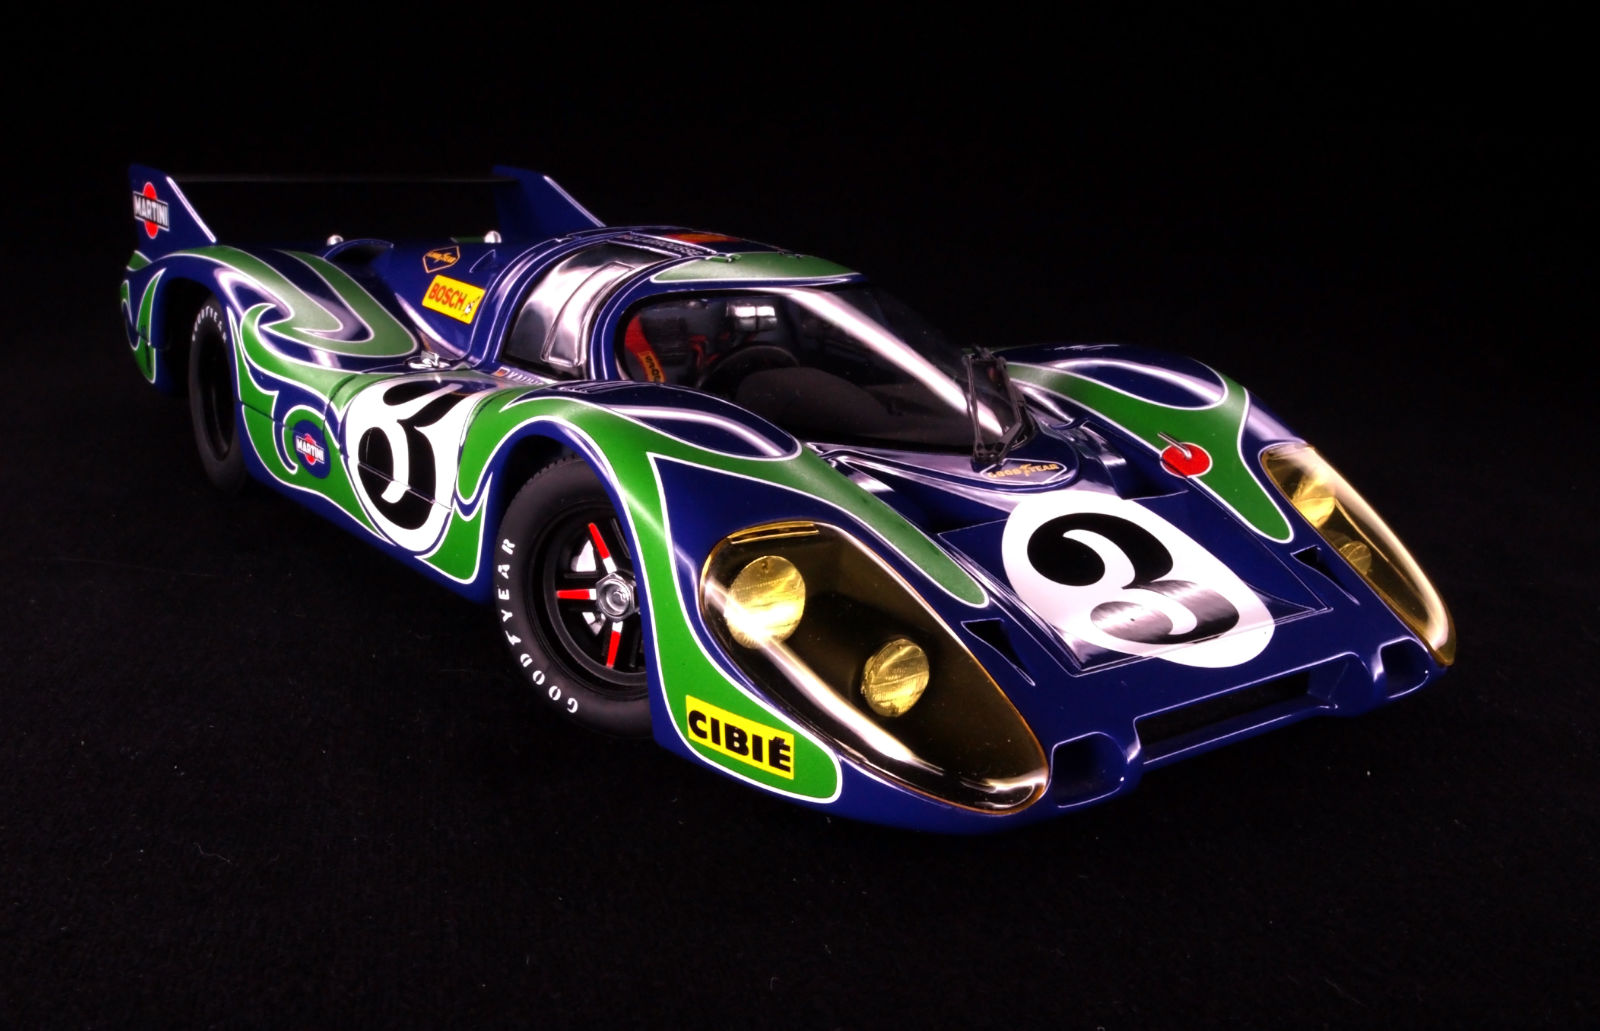
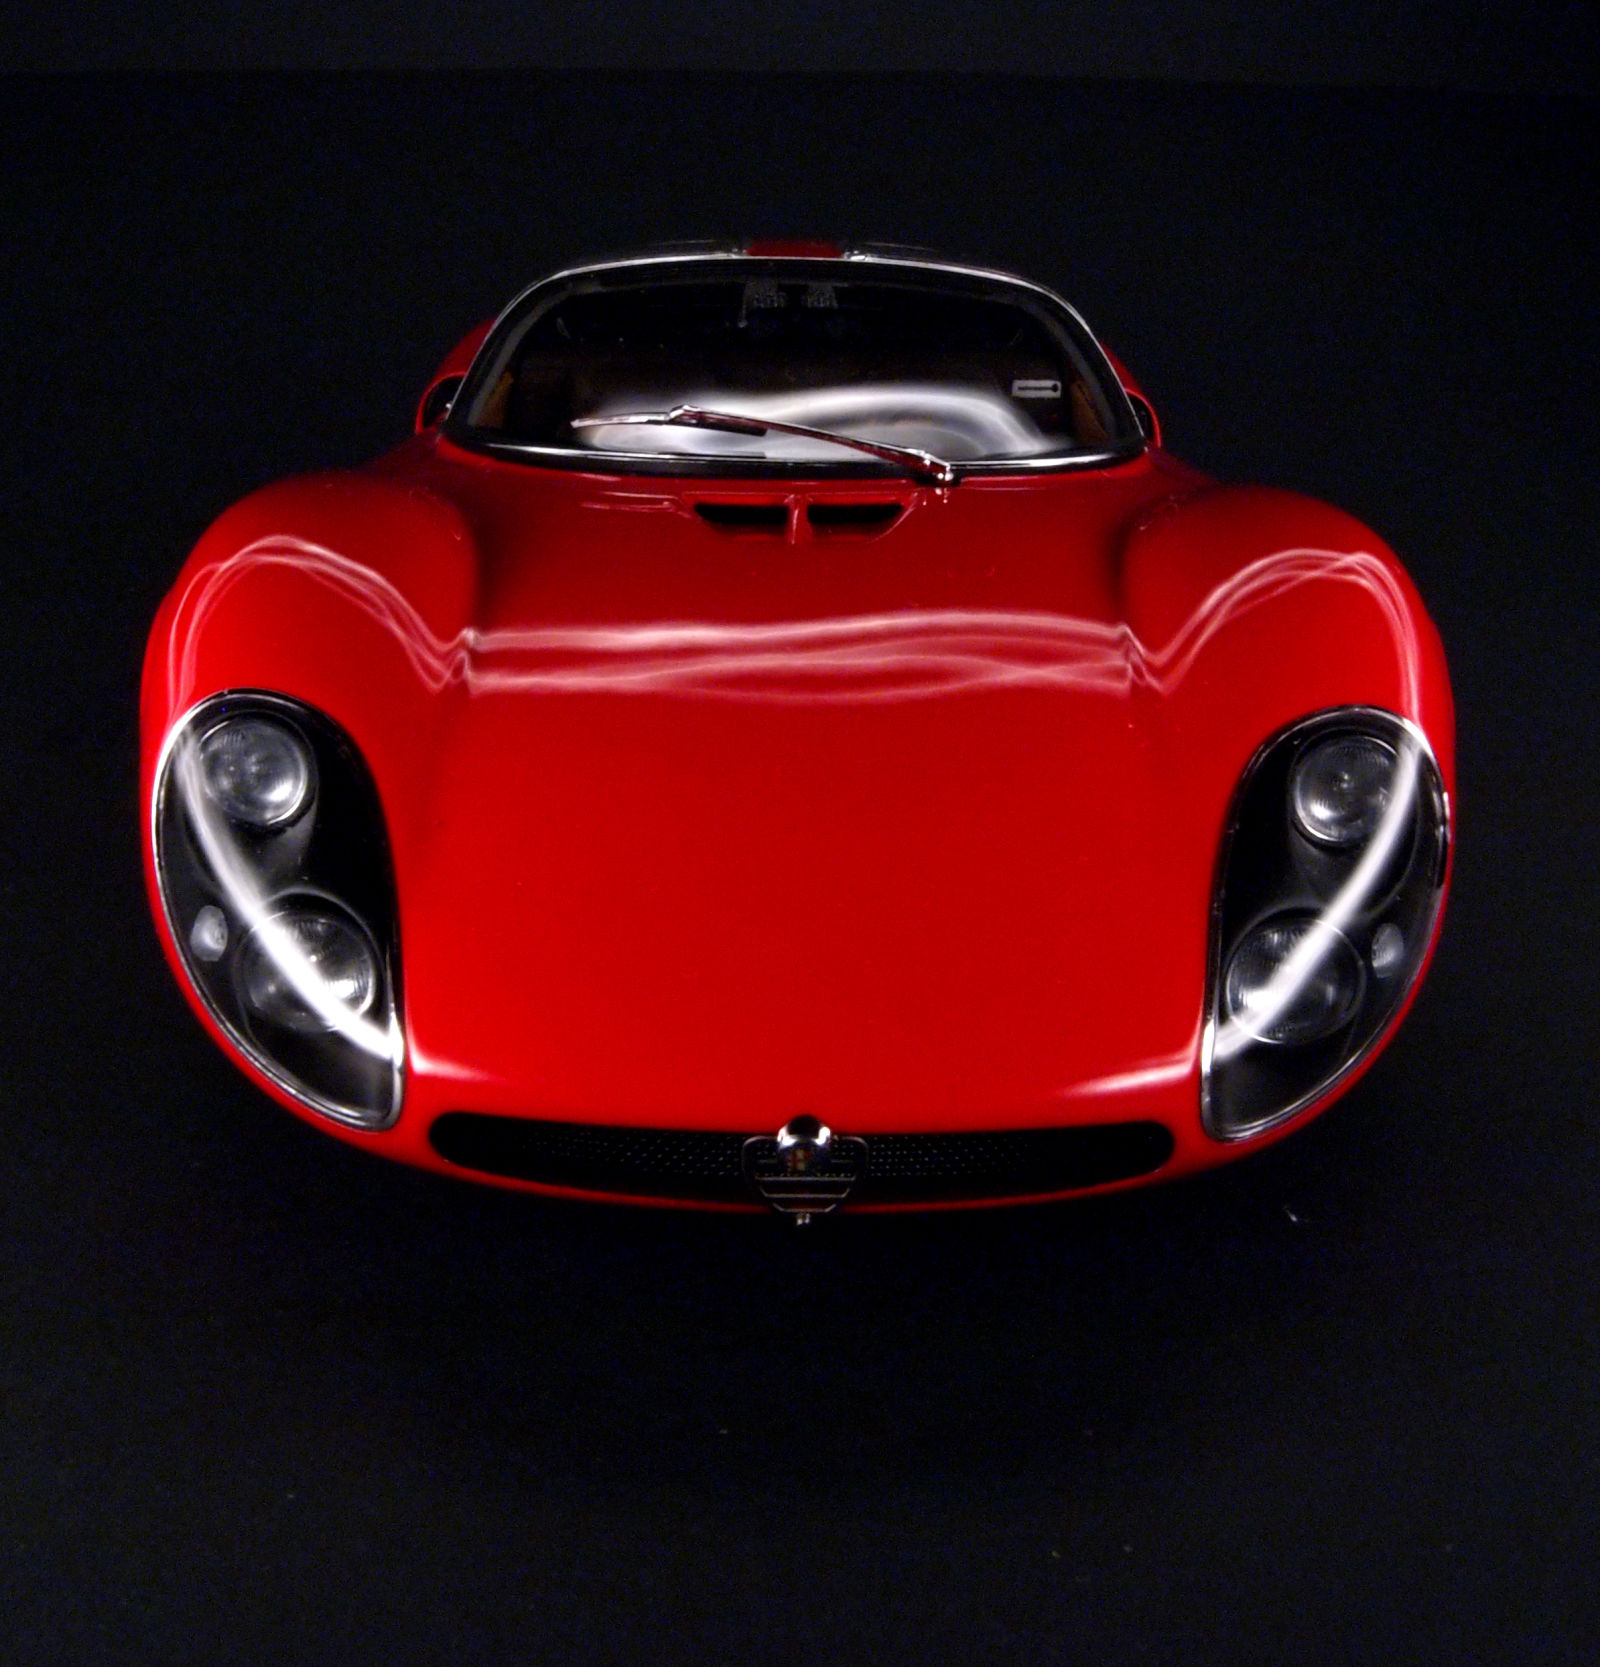
Now realize these last shots are a culmination of everything I discussed beforehand. Understanding the basics and other advanced things and then applying them to something I only really had a hunch about.
So take your skills and go explore! See how changing things up changes up your photos. Try new things and see what cool shots you can come up with! This is all about enjoying the hobby, so make sure that comes first as you play around with your diecast-photography skills.