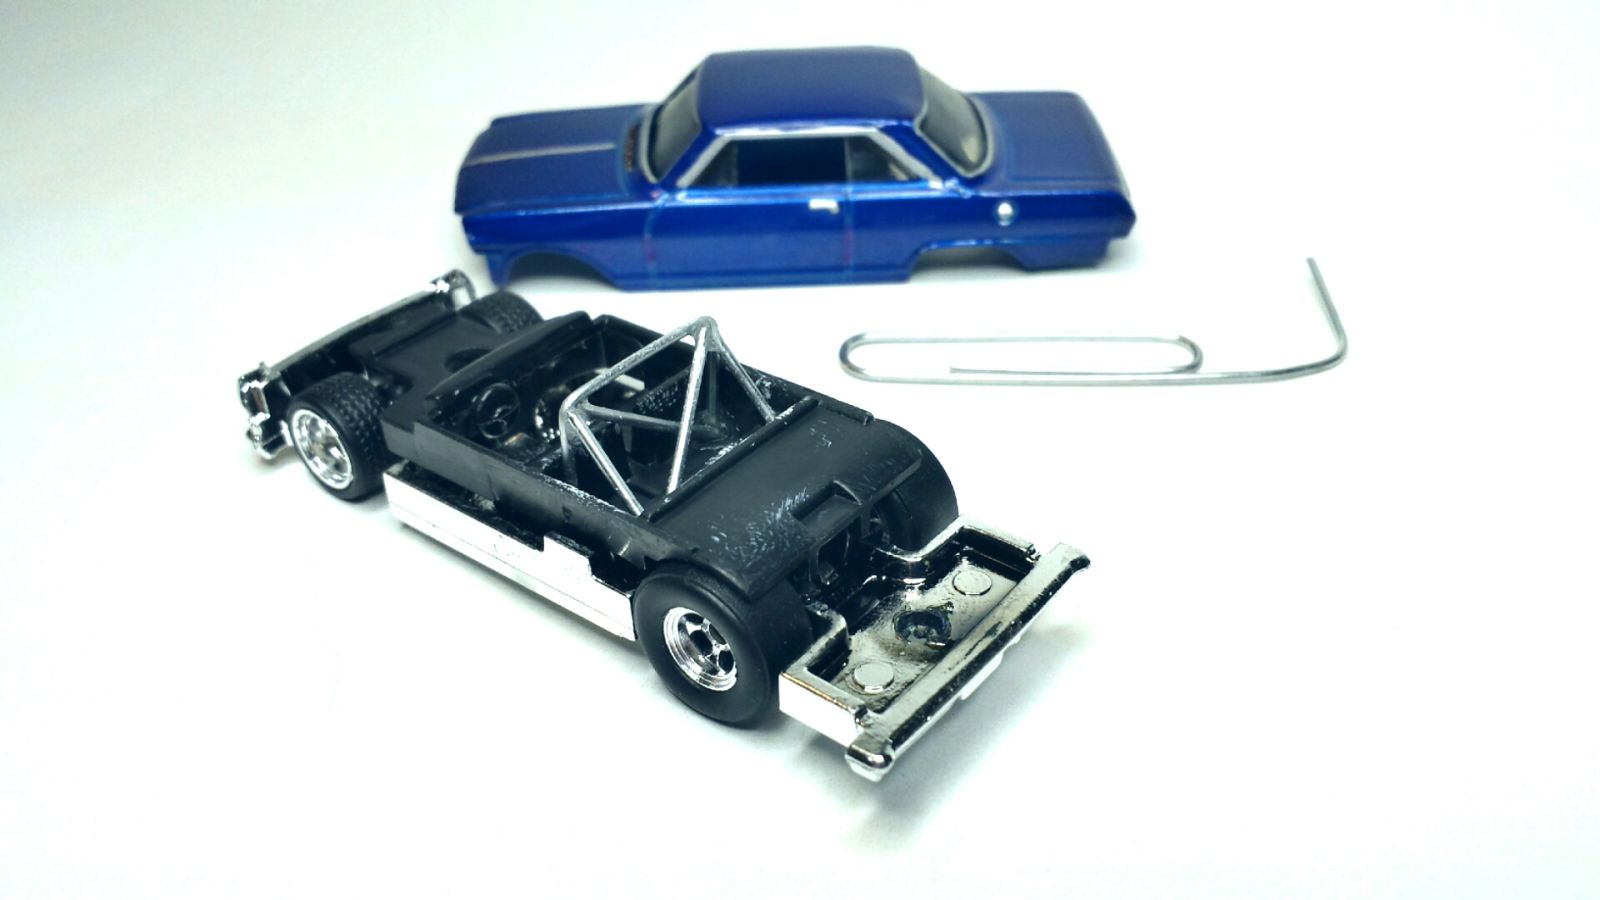
With my latest two customs I’ve began to add my signature half cage to the interior of the cars. I probably got the idea from the fact that my own daily driver has some scaffolding installed, and since I like doing track day themed customs its a nice detail touch.
A few of you ask how I do it. Well it’s rather simple and adds maybe 15 minutes to a custom interior, depending on how elaborate you want to get. Materials are easily accessible and cheap. I simply use jumbo smooth paperclips. They are so great to use because they bend and cut easily and if you make a mistake you're out probably $.02 if that. Tool of choice is some small needle nose pliers (or tweezer) and a small pair of snips if you pliers don’t have a cutter provision. I use very small dabs of super glue to keep everything in place.
The basic half cage usually comprises of a main hoop and two rear legs. I form any bends over the end of the needle nose pliers. You can add crossbars, forward door bars, and a forward hoop if you like, it just takes more time. The key here is to measure twice and cut once. The issue I most commonly run into is roof clearance with the main hoop. Once you get that dialed in everything else usually fits within the shell. On occasion you may have to take a very small drill bit and countersink the interior to make for a lower attachment point but the super glue usually is all you will need to hold it in place.
The rest is up to you, if you want to paint it or leave it raw, etc. Now that I’ve shared my trade secrets I want to see you guys giving it a shot, it’s really very easy. Cage up those diecasts!
