
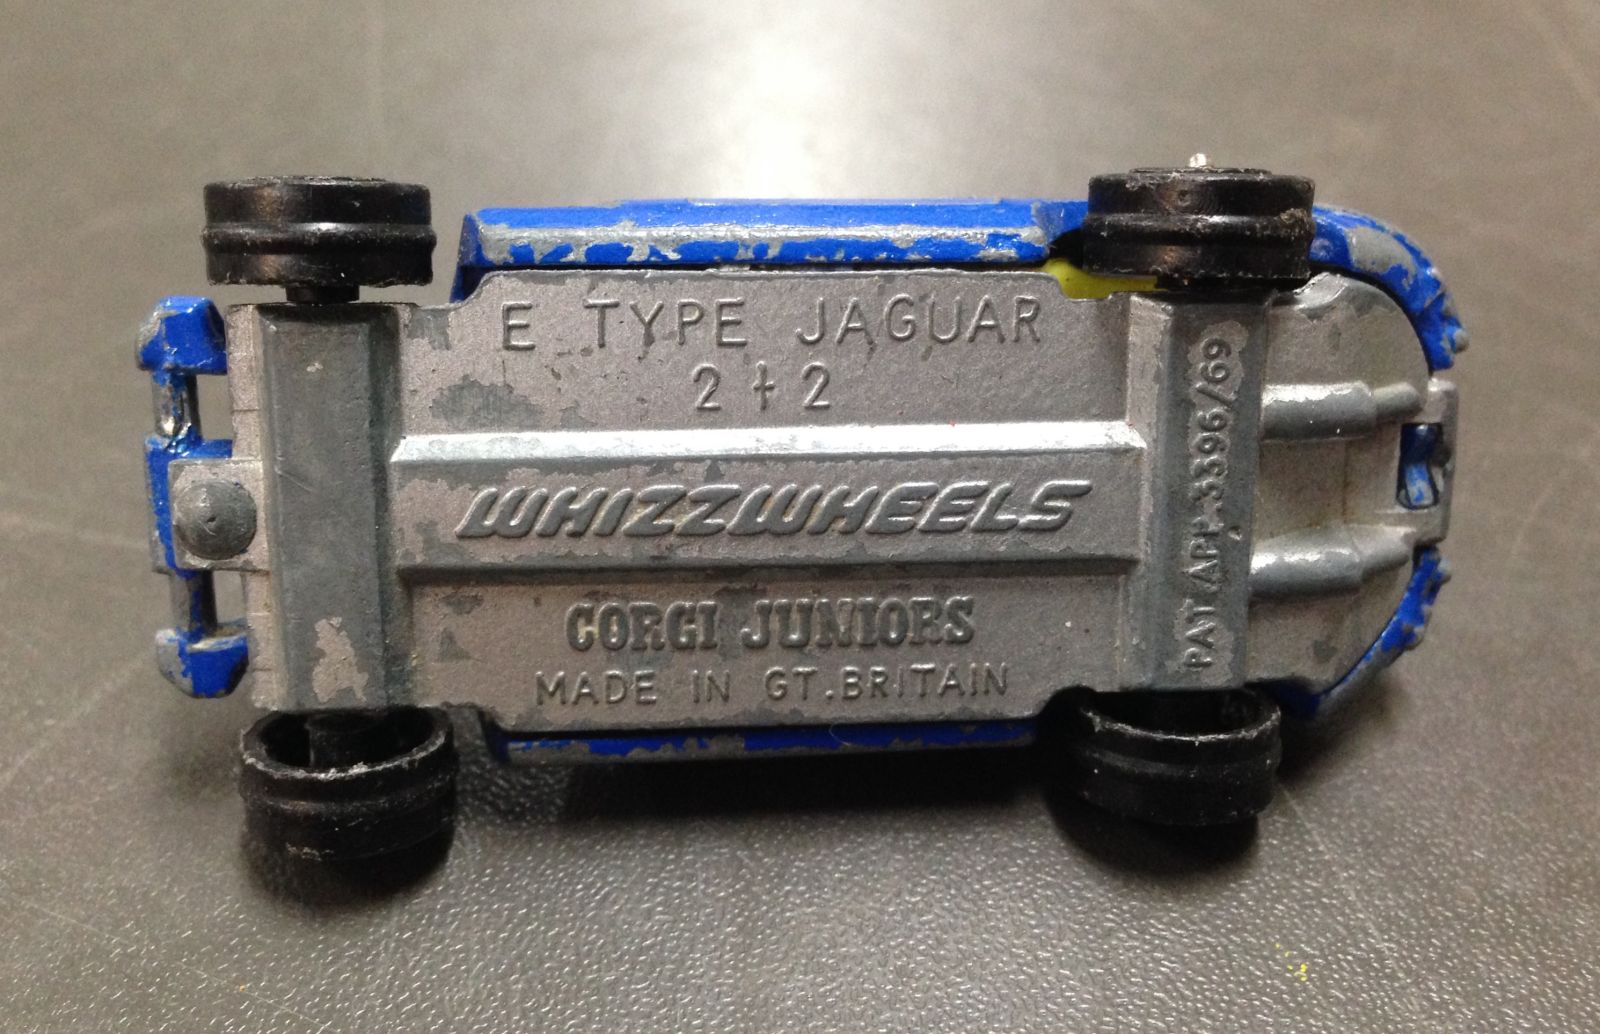
So by now most here would be familiar with my E type and the fact that it is going through some changes lately. For around 45 years this little 1:64 cast has exsisted and after what looks to be years of vigorous play it somehow ended up hanging in a zip lock bag in an antique shop. That was until Friday last week when I walked in and started rifling through the stock. I found quite a few of these older casts and put the ones I liked in a pile. When I’d exhausted the prospects I then went through the pile and culled the selection until it fit in my budget. I now want to go back and grab the ones I left, you can’t take your cash with you when you die right?
Anyway on with the program. I took photos of the various stages of the disassembling process. Captions below each picture.
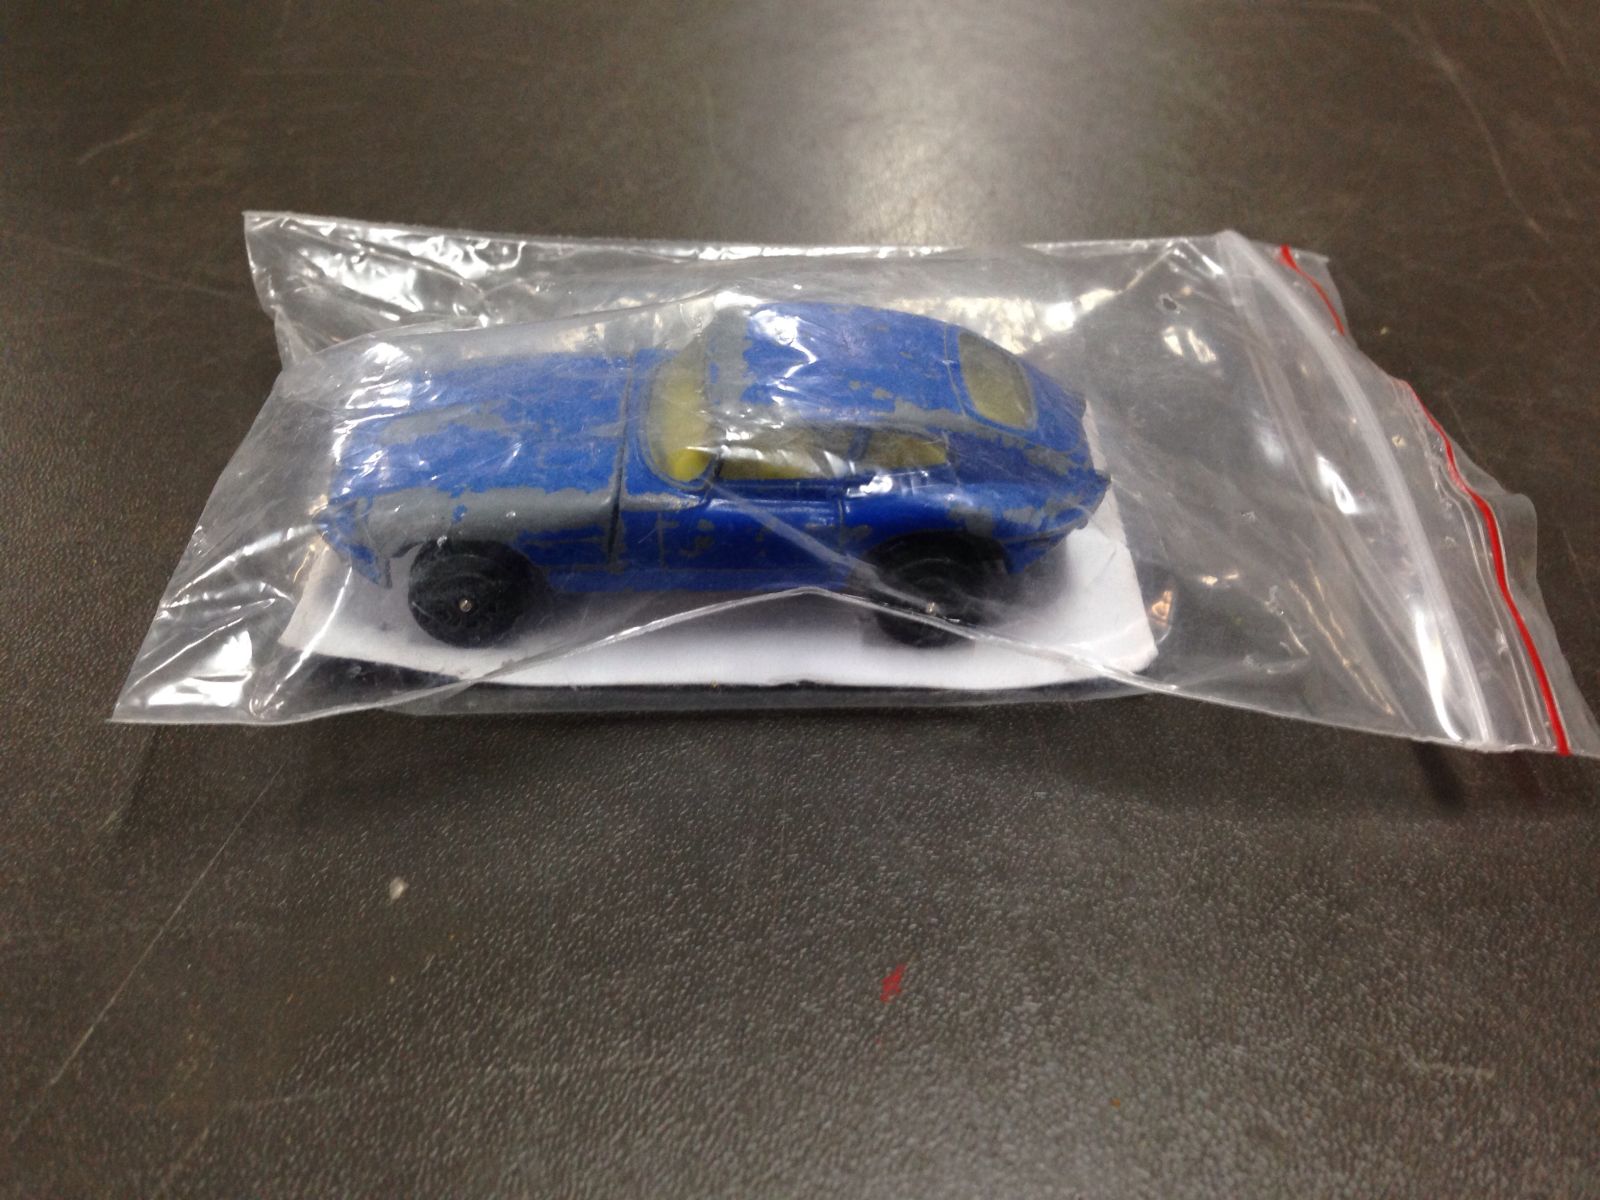
45 year old freshness...
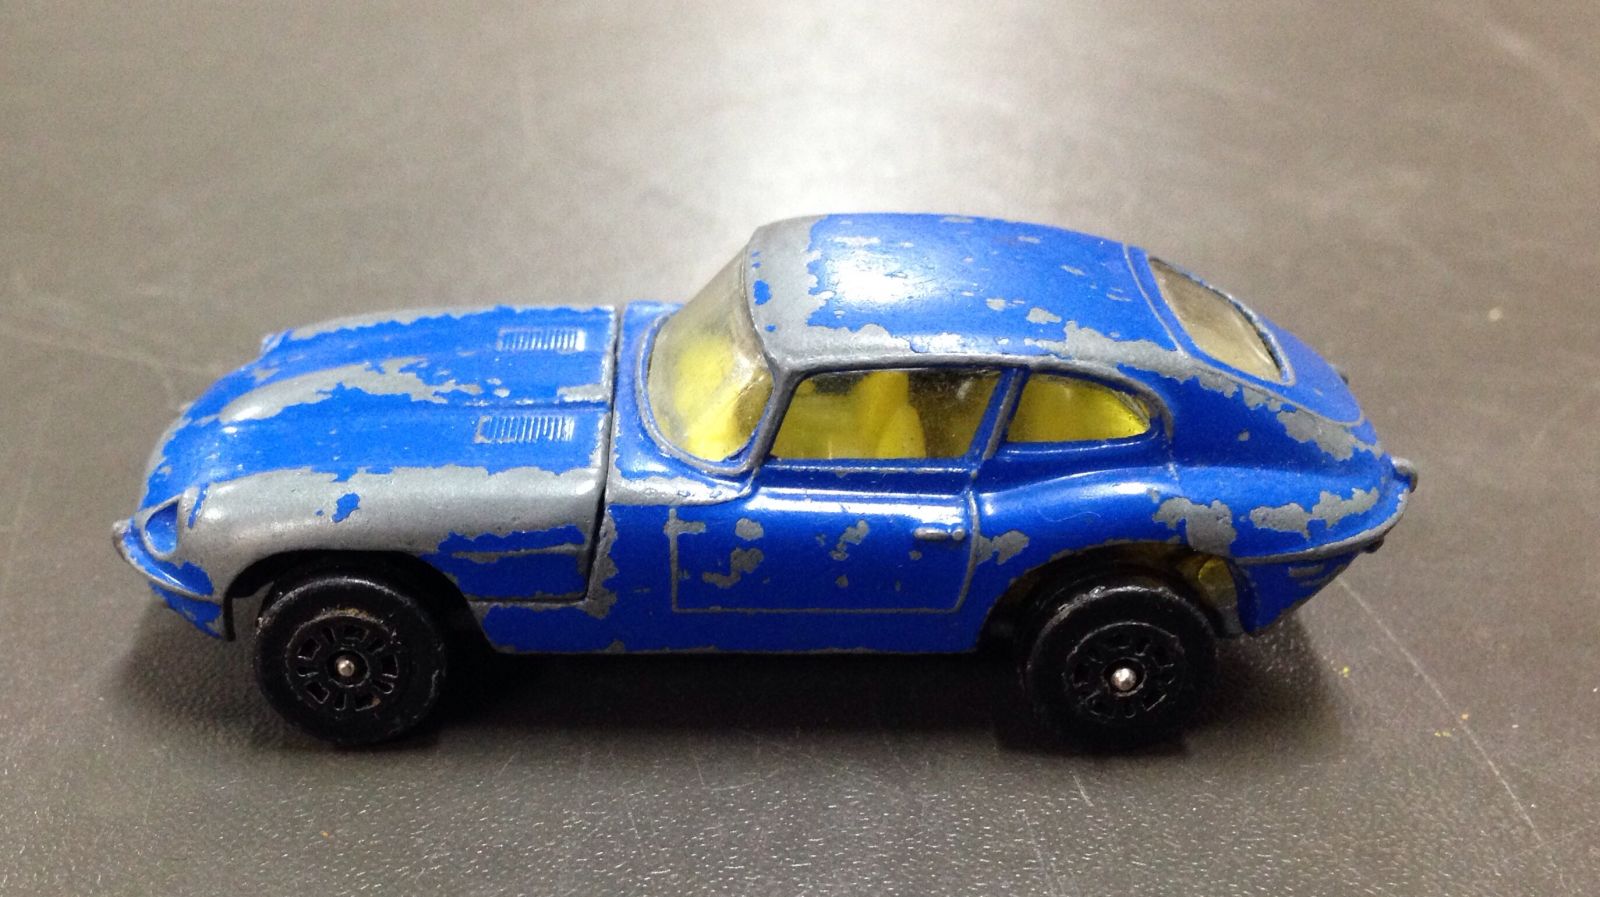
I didn’t take it out of the bag in the store so it wasn’t until I got home and DLM’d it that I first witnessed its full beauty, except for the wheels.
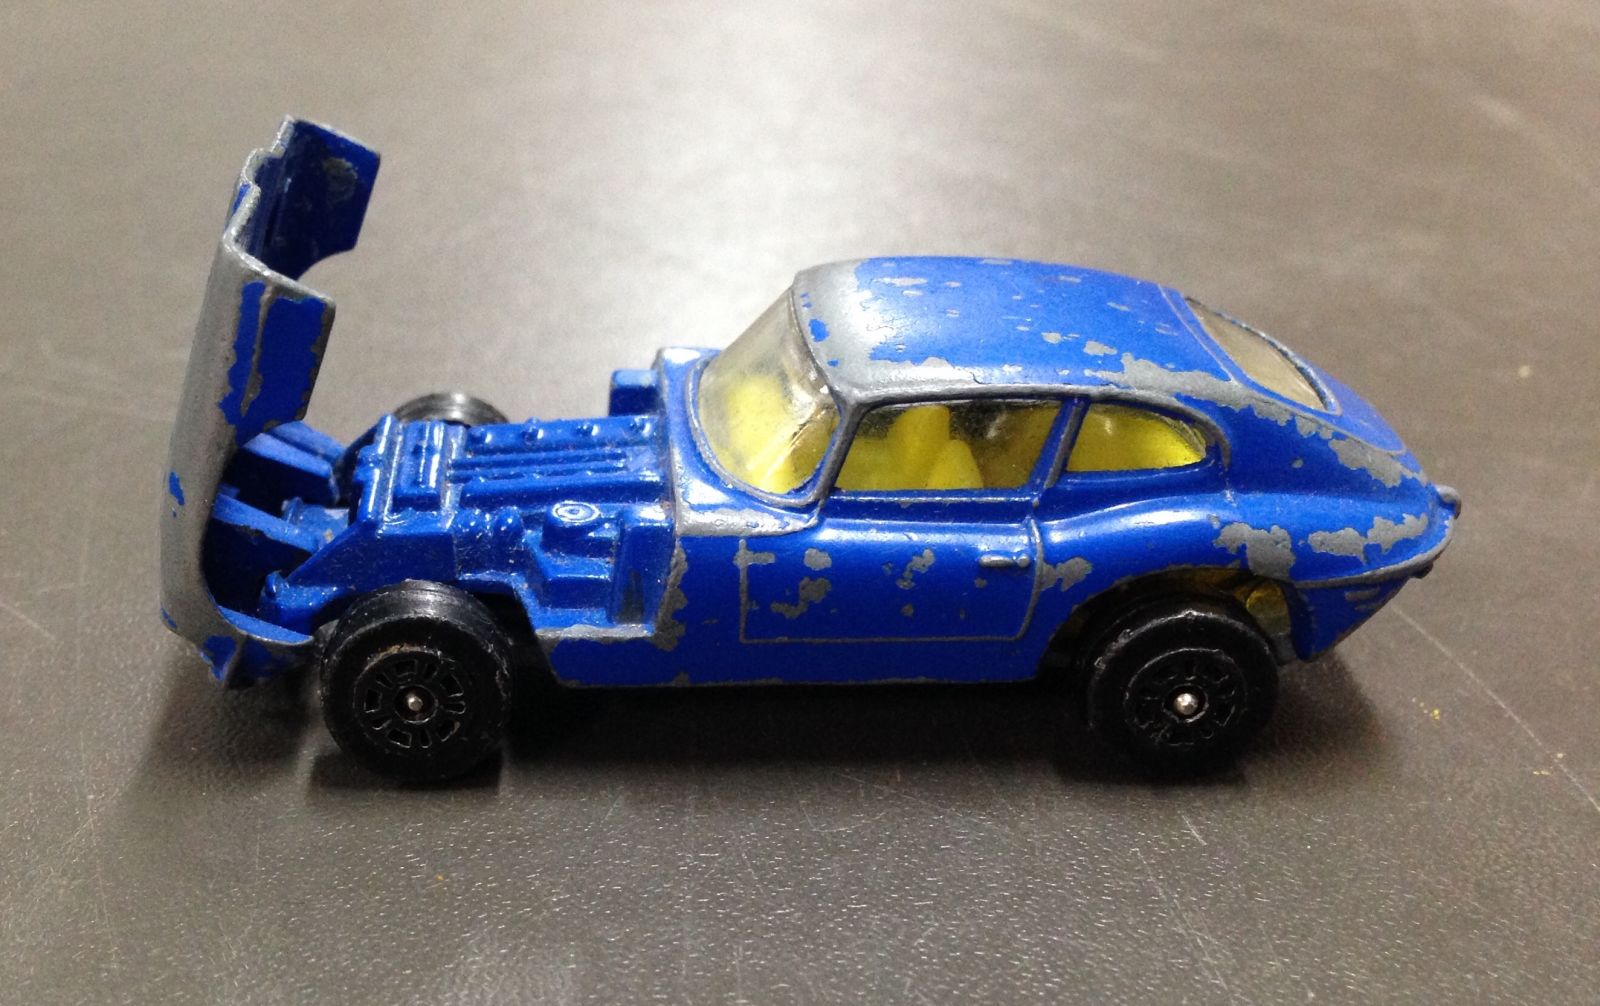
I could see that the hood opened while it was in the bag and to be honest that was what made me buy this cast.
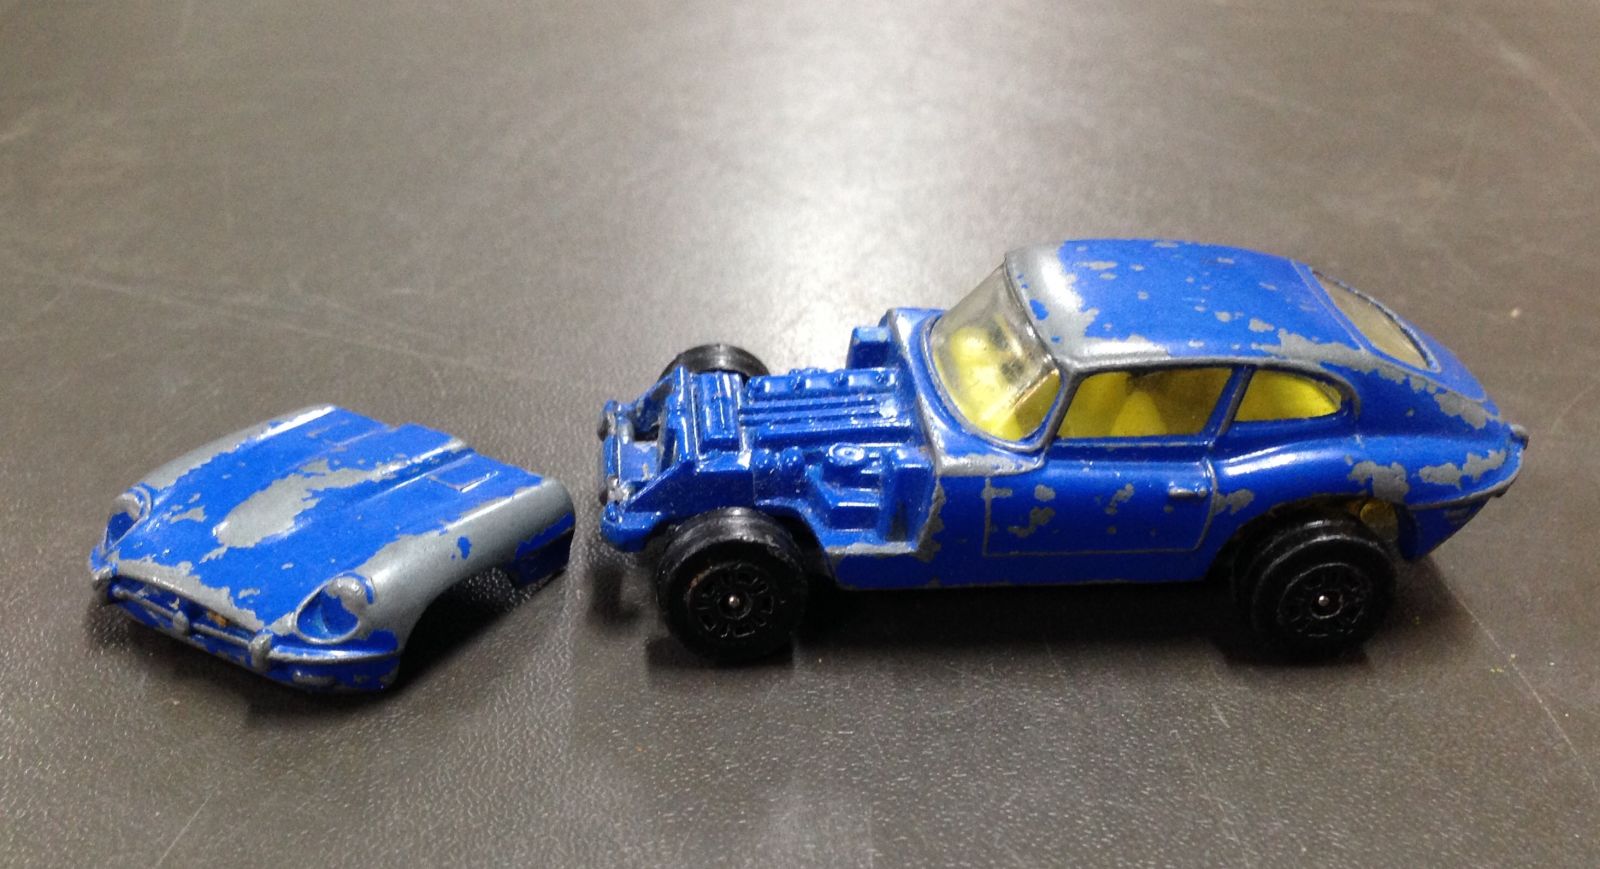
One pivot clip on the hood was already worn enough that it was possible to tweek it sideways at a certain point when it opened. This allowed me the confidence to use a small flat blade screwdriver to bend the other clip enough to remove the hood completely. Hood removal made the later body seperation stages possible without causing any damage to the hood and body casting.
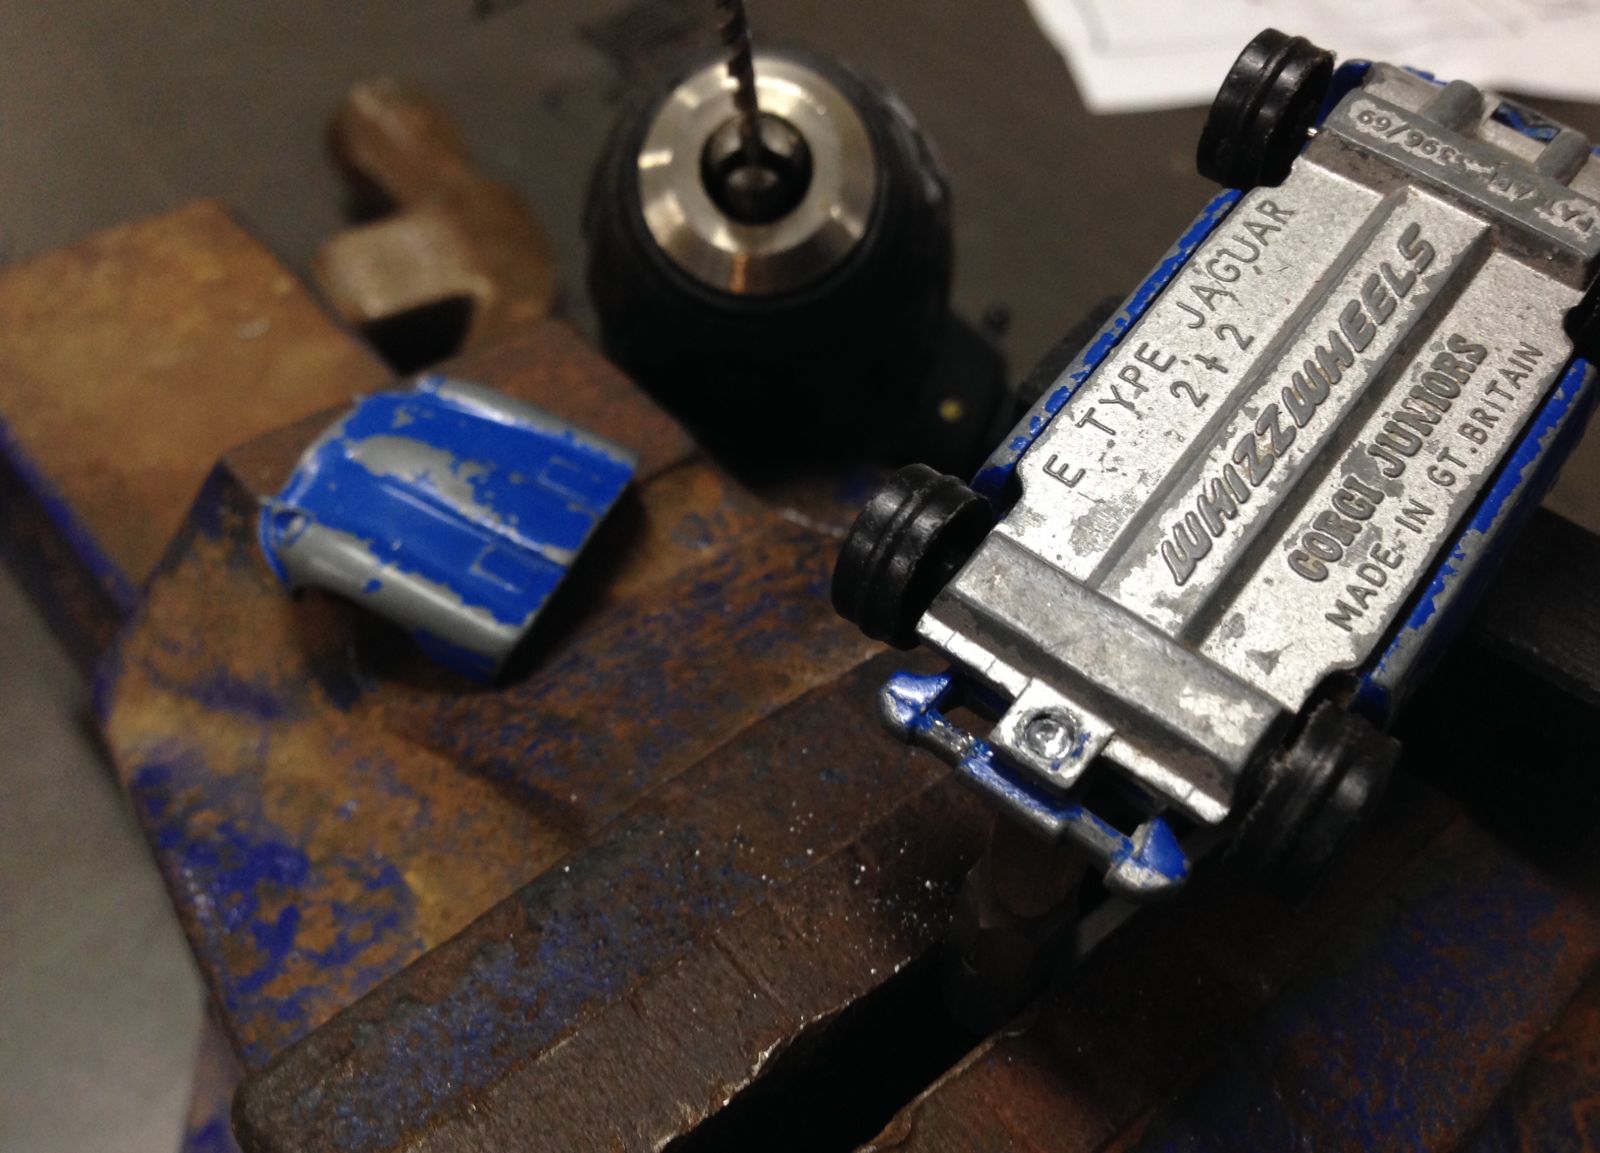
I was nervous at the thought of drilling this rivet as I’d only drilled out HW so far and the design of those makes it easy to center the drill bit. The Corgi rivet is a smooth dome so it needed a center punch mark to help start the drill. Luckily there is a tiny dent in the right place, I couldn’t see it until I’d taken the photo and zoomed in on it, then I saw it wouldn’t be so hard to line up the punch, just had to sharpen the punch to a very fine point. There is just the one rivet up front with the rear having a tab that pokes through the cast a little and splits like a snakes tongue holding the two parts together, for nearly half a century! (I’m starting to feel bad about this!)
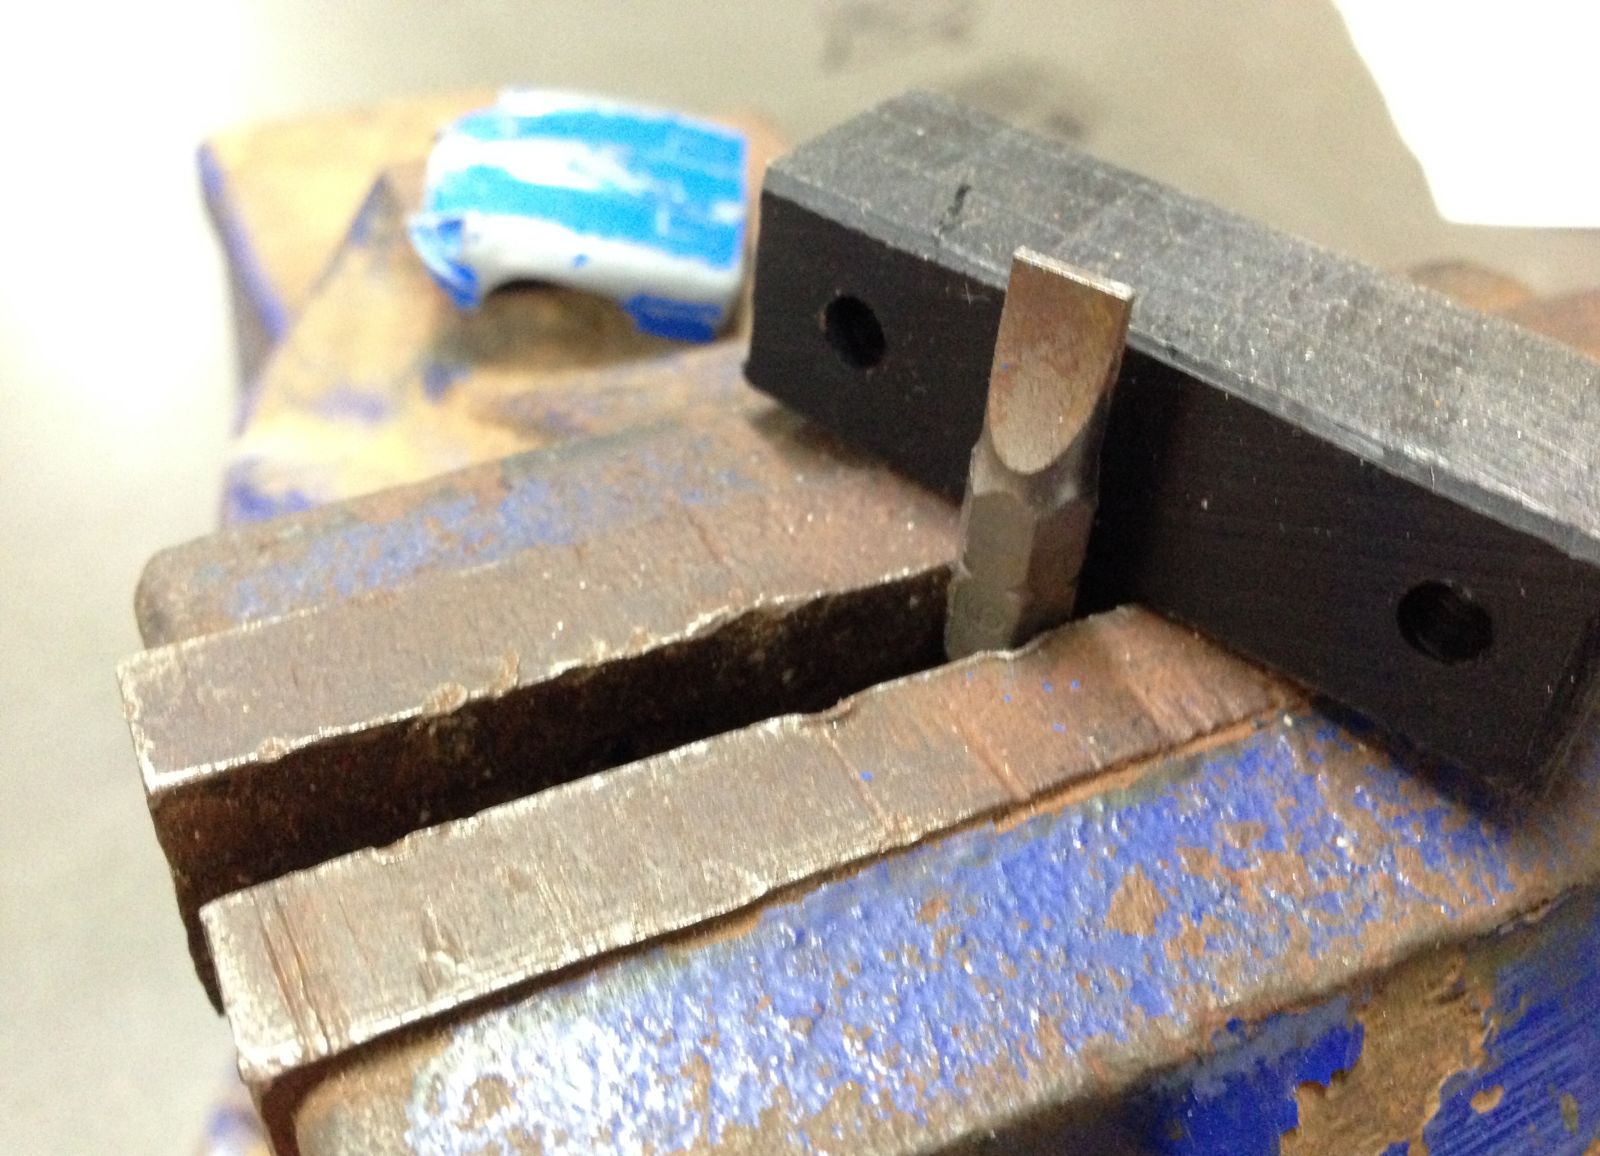
I needed a make shift ‘anvil’ to support the cast during the center punch stage. As there is a small lip at the very front of the car it wasn't possible to rest it on the edge of the vice, I had to support the underside of the rivet while I hammered the center punch. The small tool piece in the vice jaws is what the underside of the rivet area will rest on and the black plastic block supports the cast with the engine resting on it. Doing it this way meant that all the force was directed through the rivet and to the tool piece in the vice jaws and no damage to the cast can occur. Without something like this obviously the roof would get flattened at the first hammer strike!
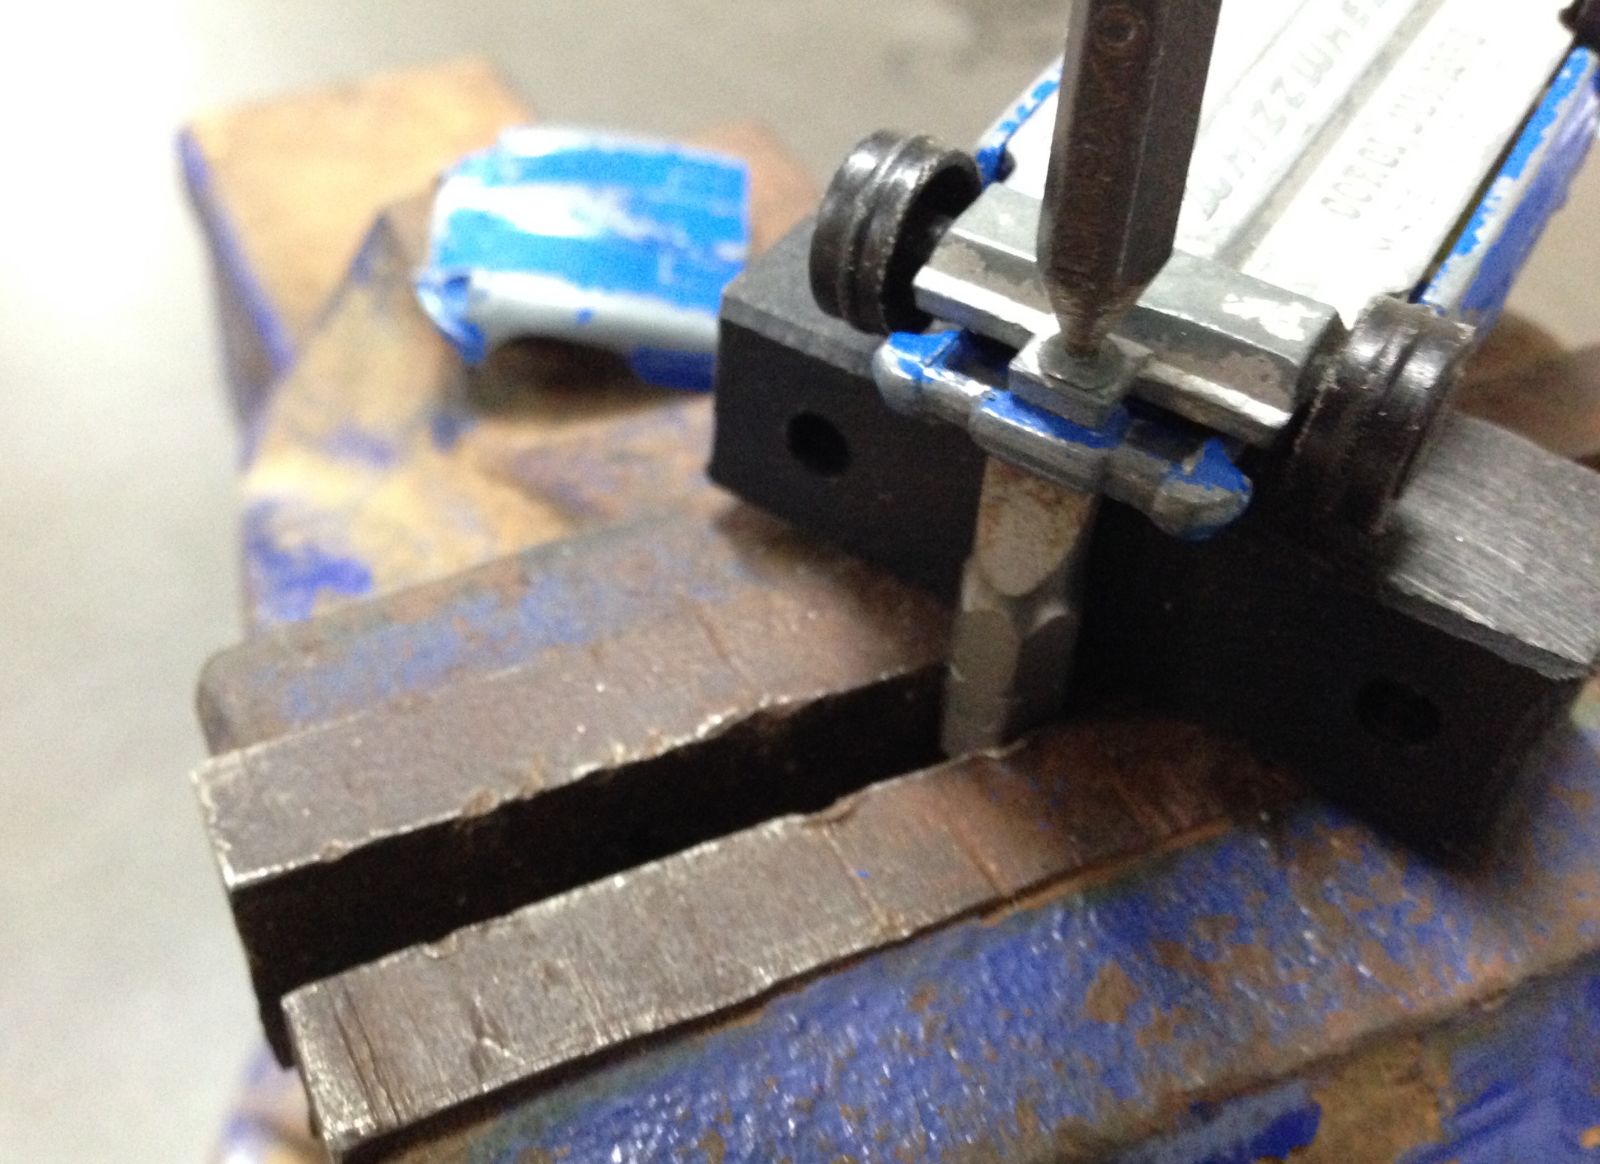
Center punch stage is extremely important as the rivet is so small (apx 3 mm dia) that the slightest bit off and a clean rivet removal will be difficult.
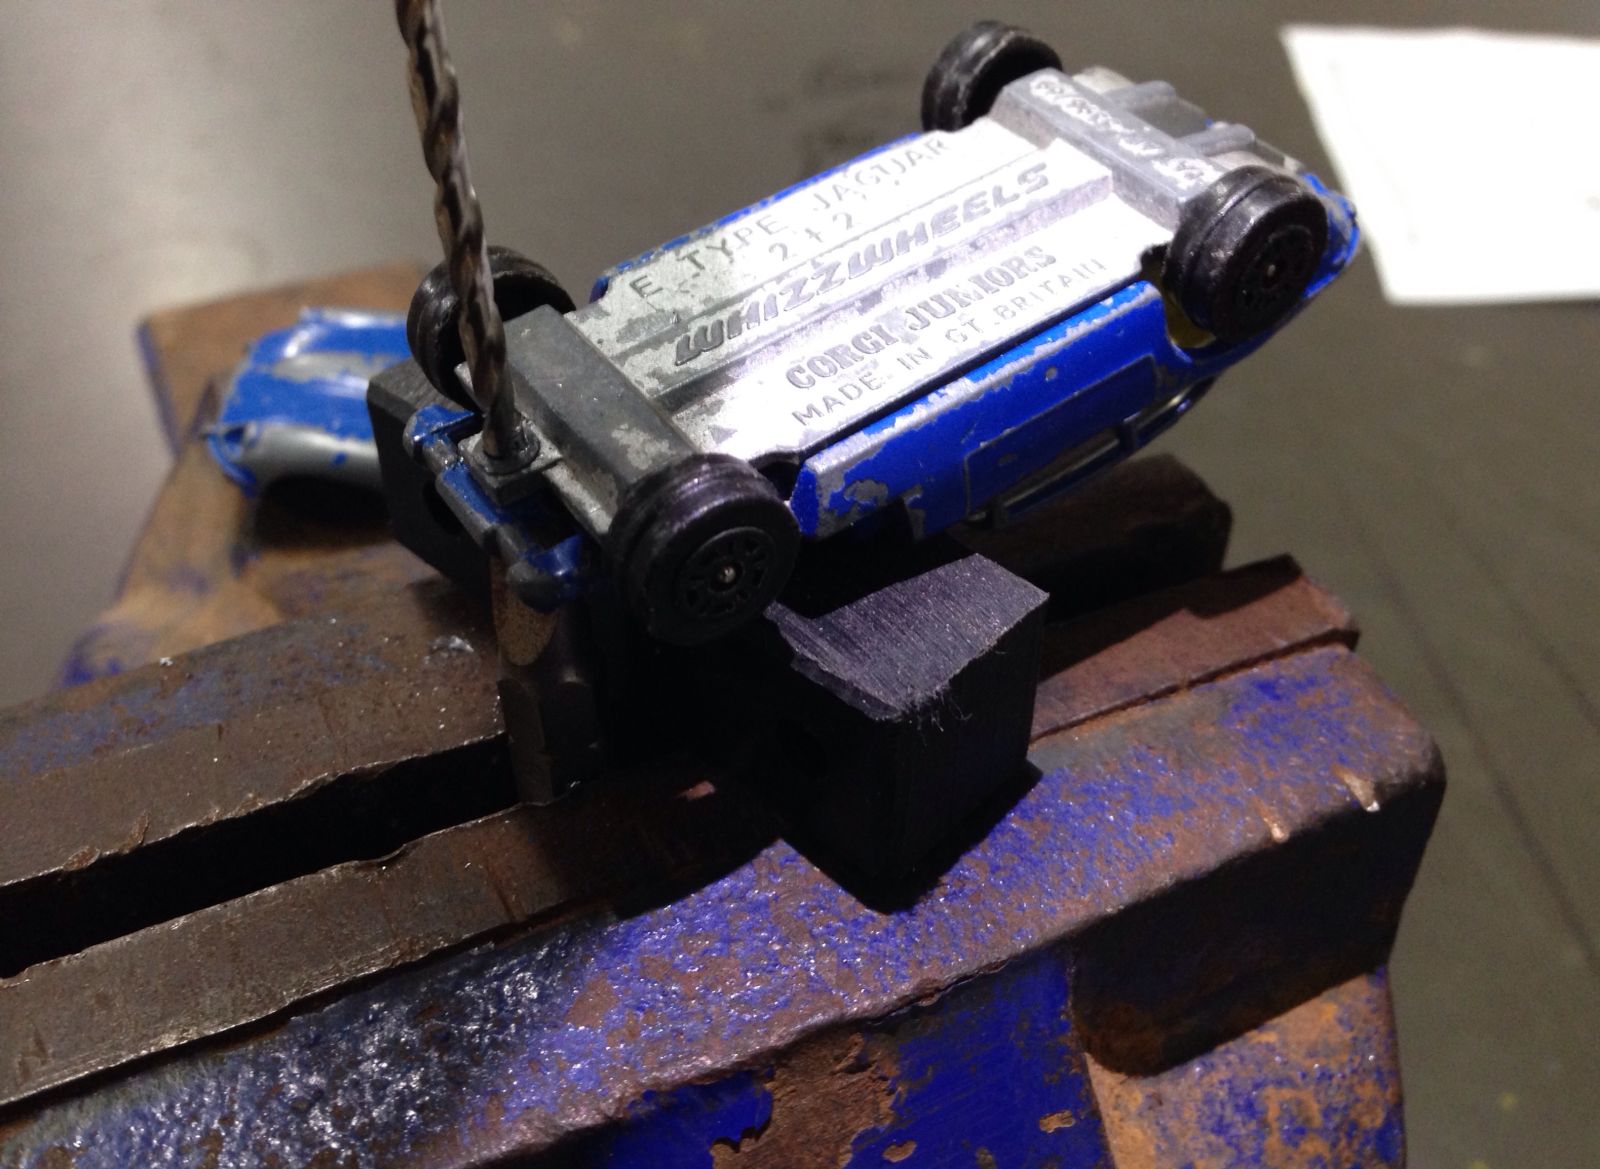
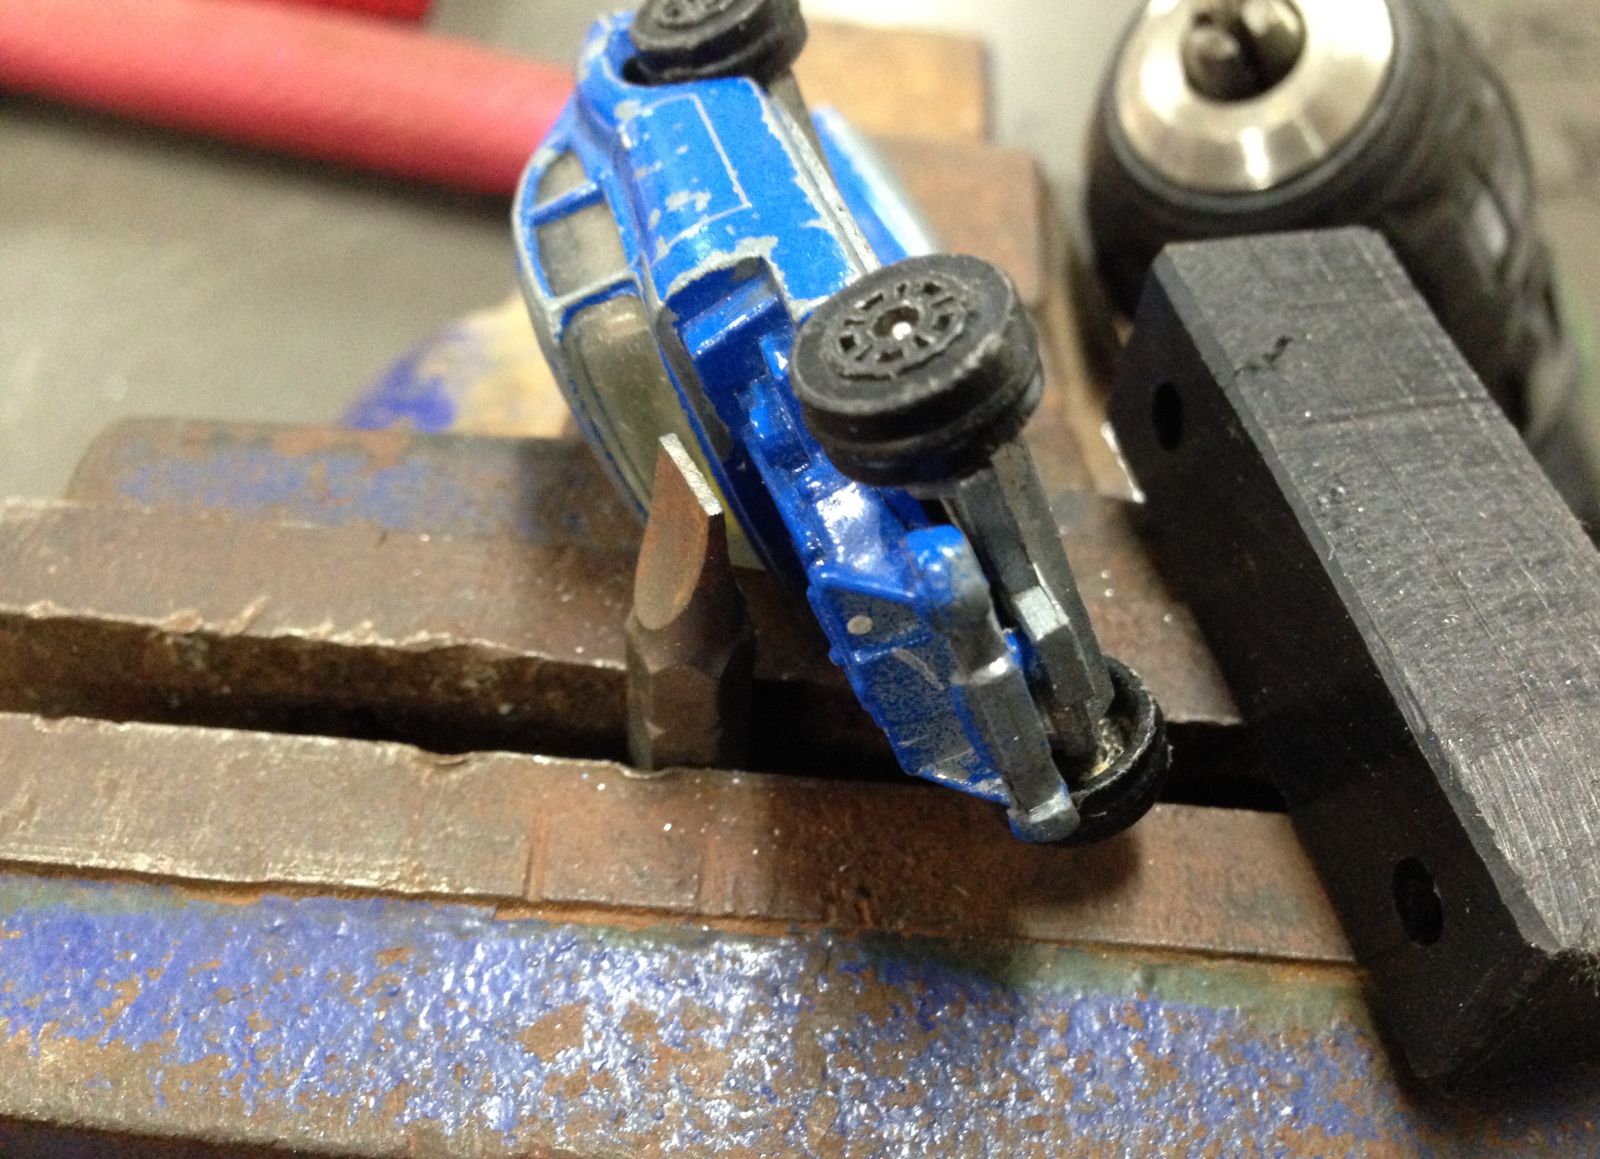
I was doing this single handed so my hand that would be holding the cast is holding the camera, drill isn’t spinning for the photo.
Drilled it! Slight clean up and it’s all systems go!
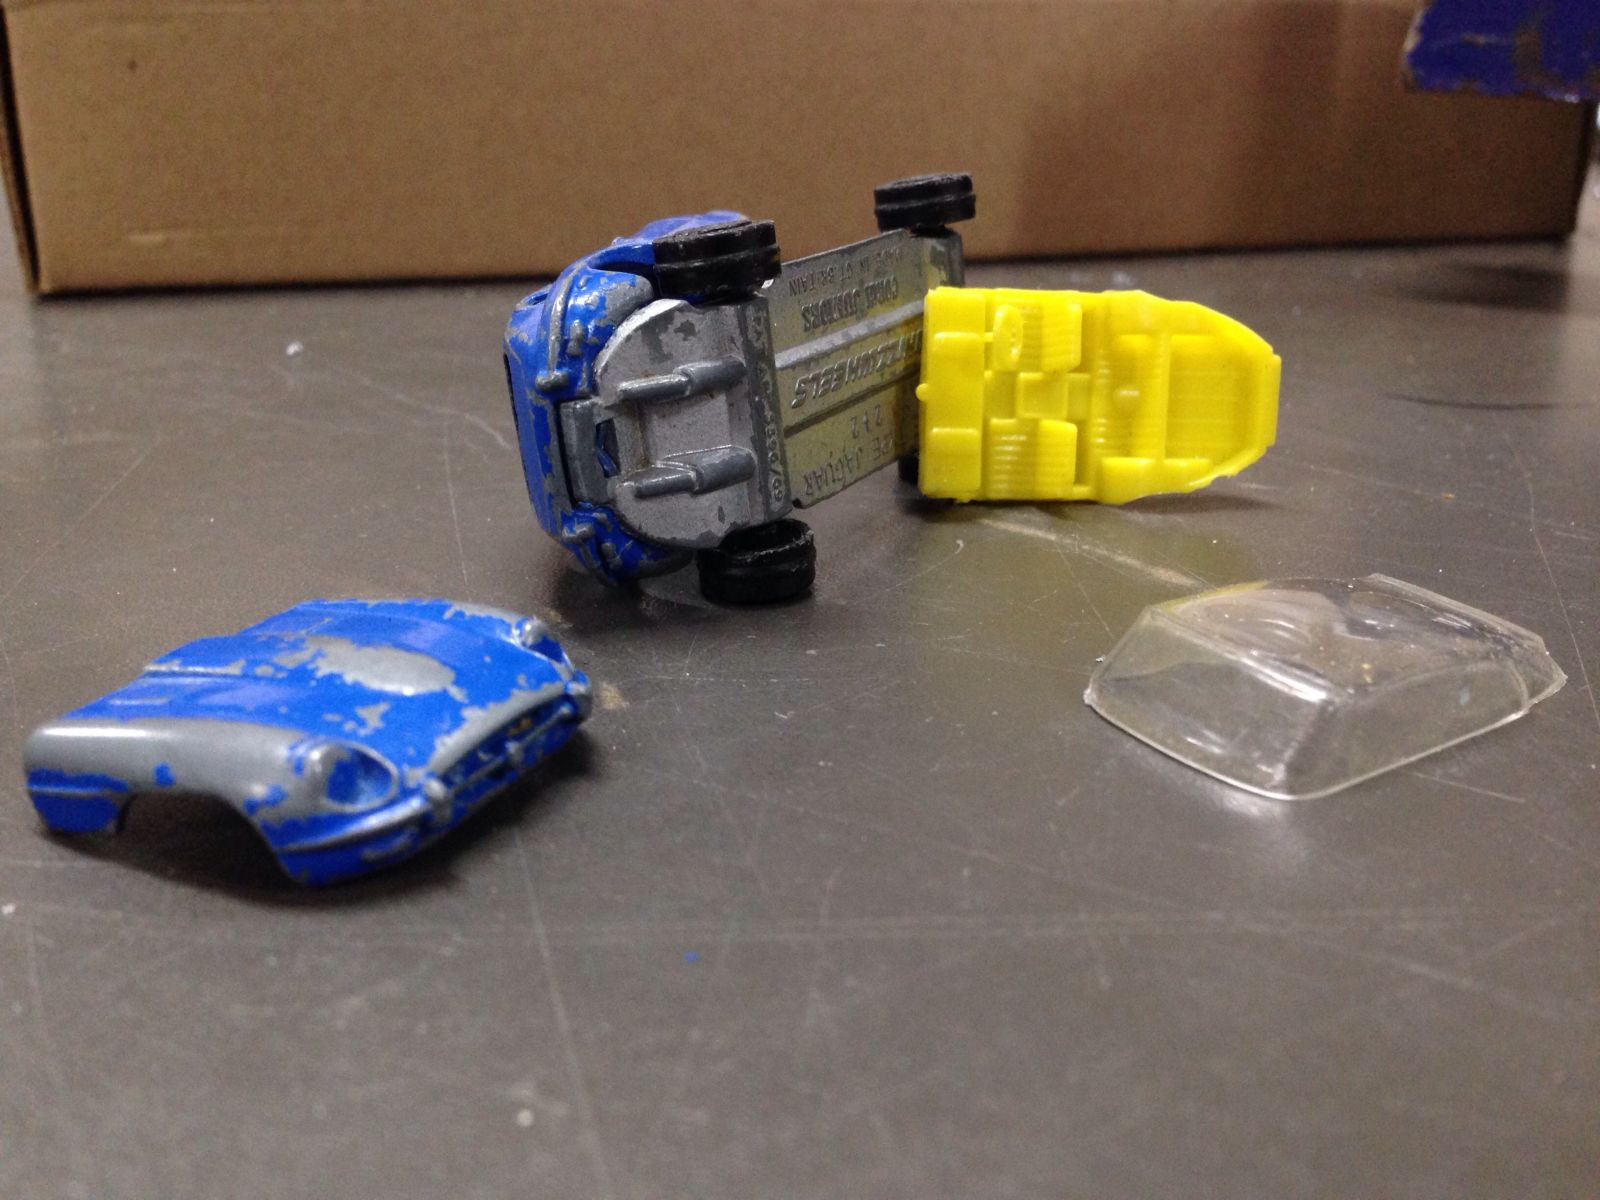
It has begun...base is just coming apart at the front. Yay!

I took it slowly and just gently moved the base and body in separate directions and could feel the rear tab starting to let go of its grasp!
Getting closer.
Inside out. (Note the vice also comes from England, is blue and shows similar patina. Destiny)
That is the tab in question at the rear of the cast.
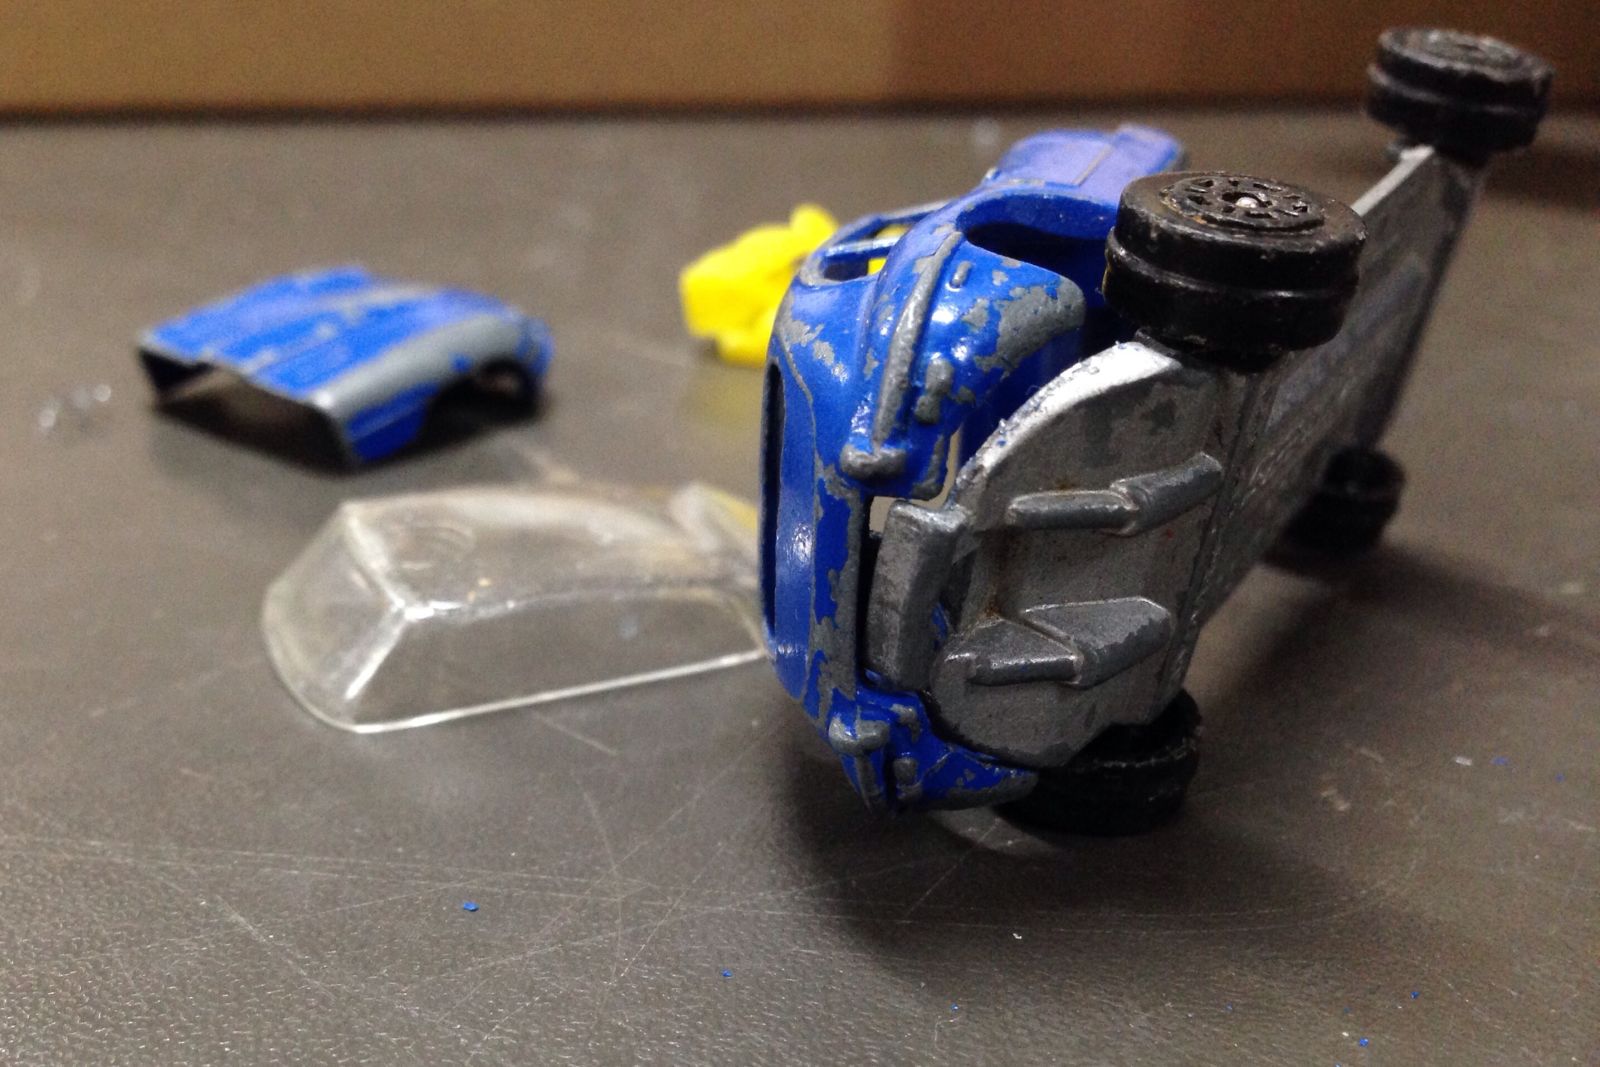
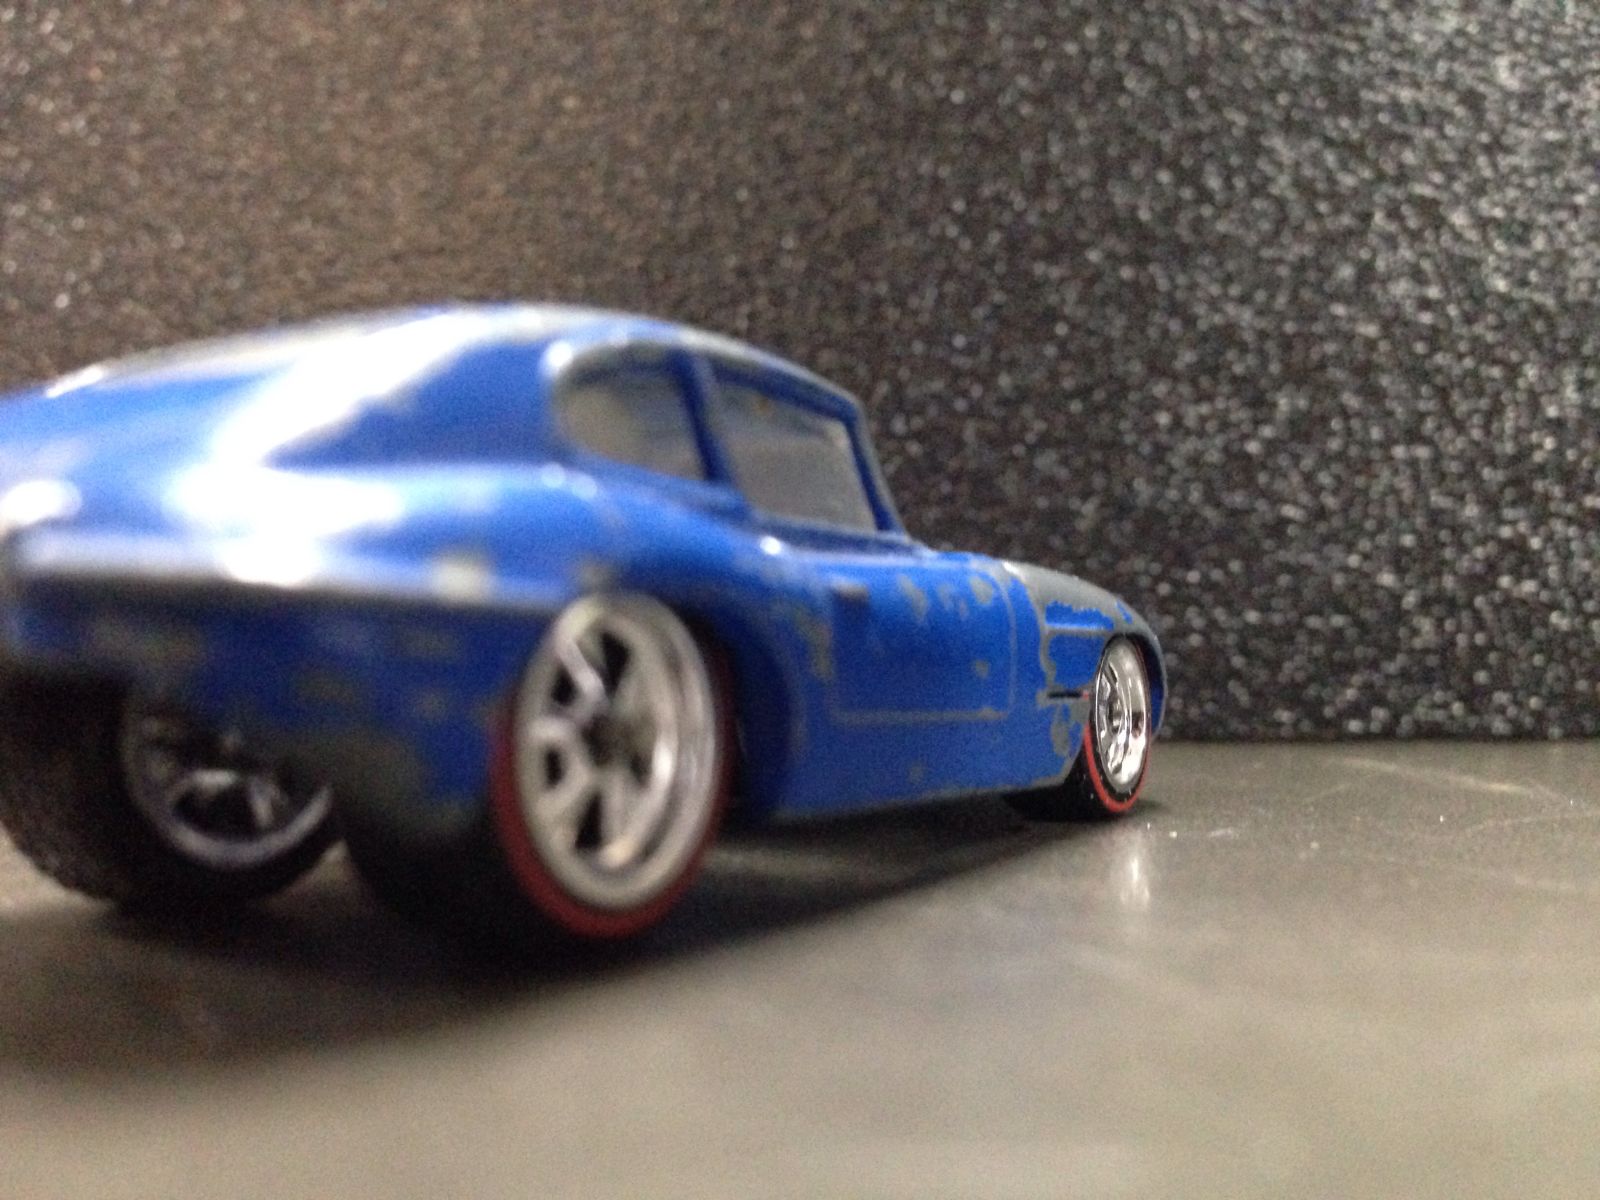
Check out the dual exhaust system and taillight and side marker features! Nice details
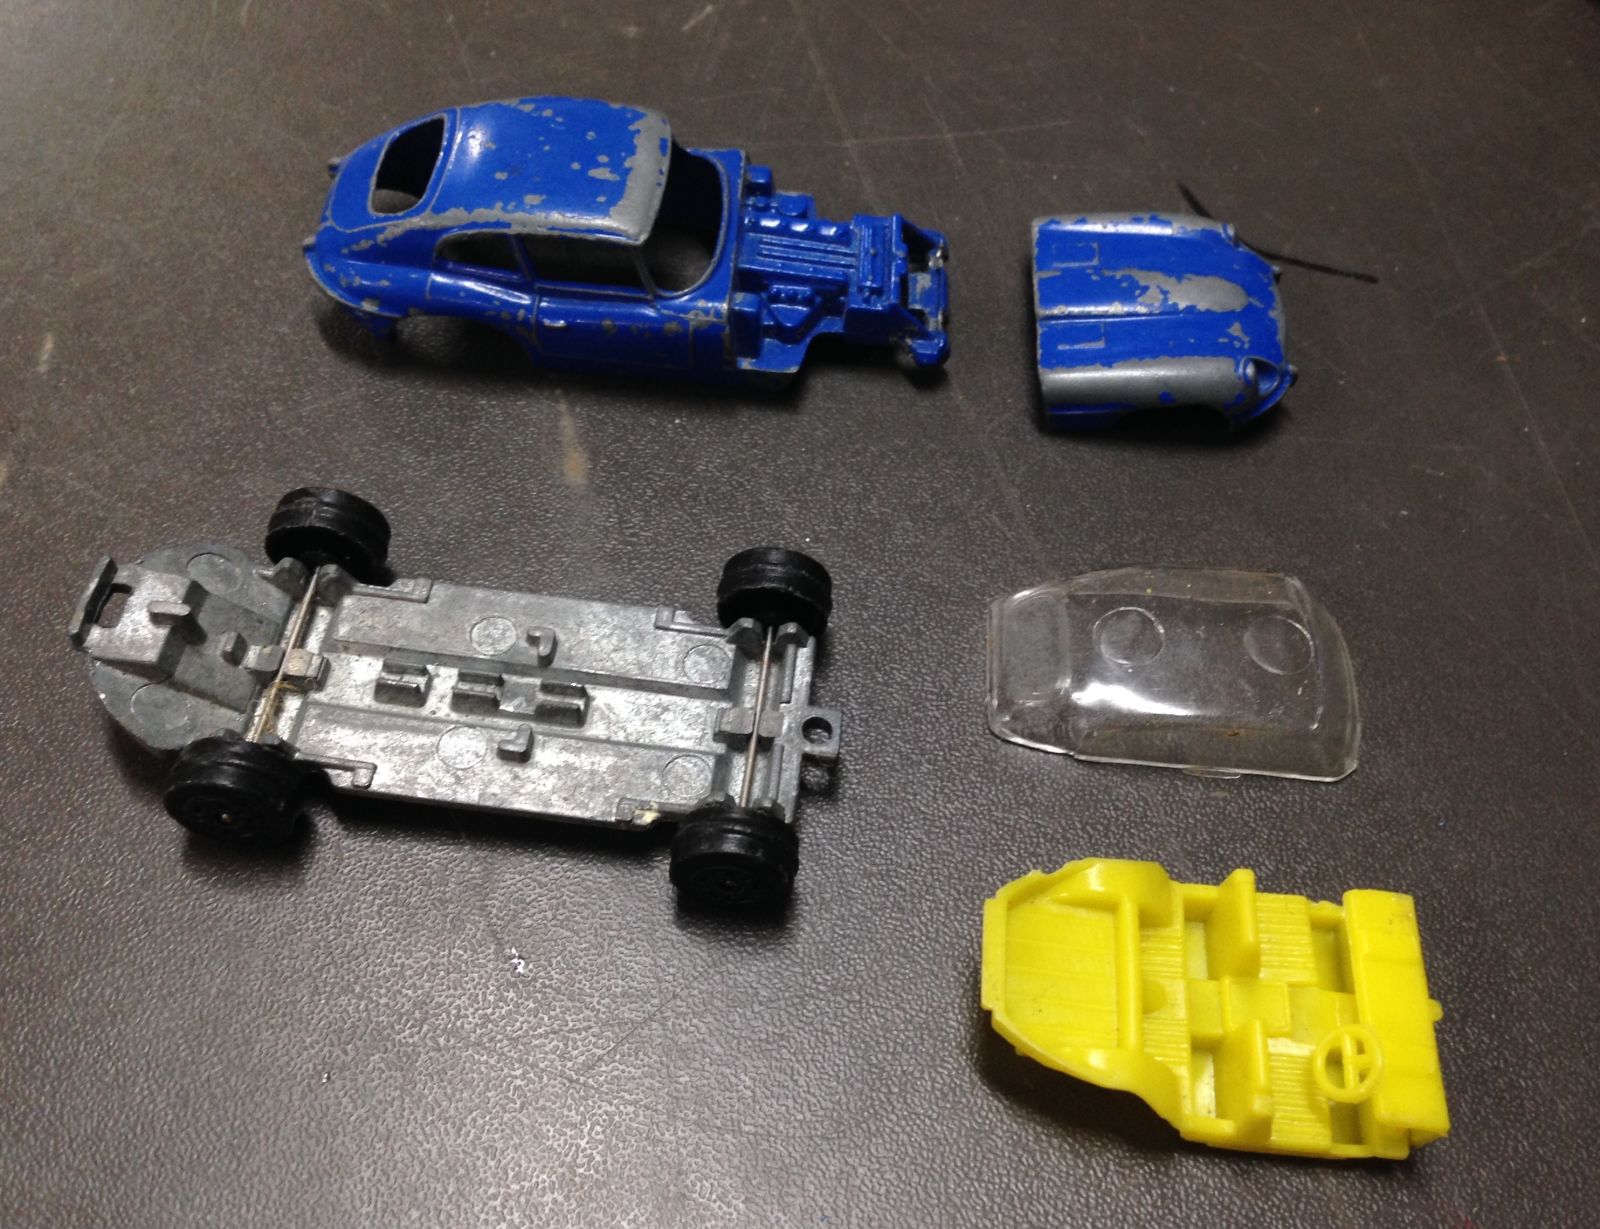
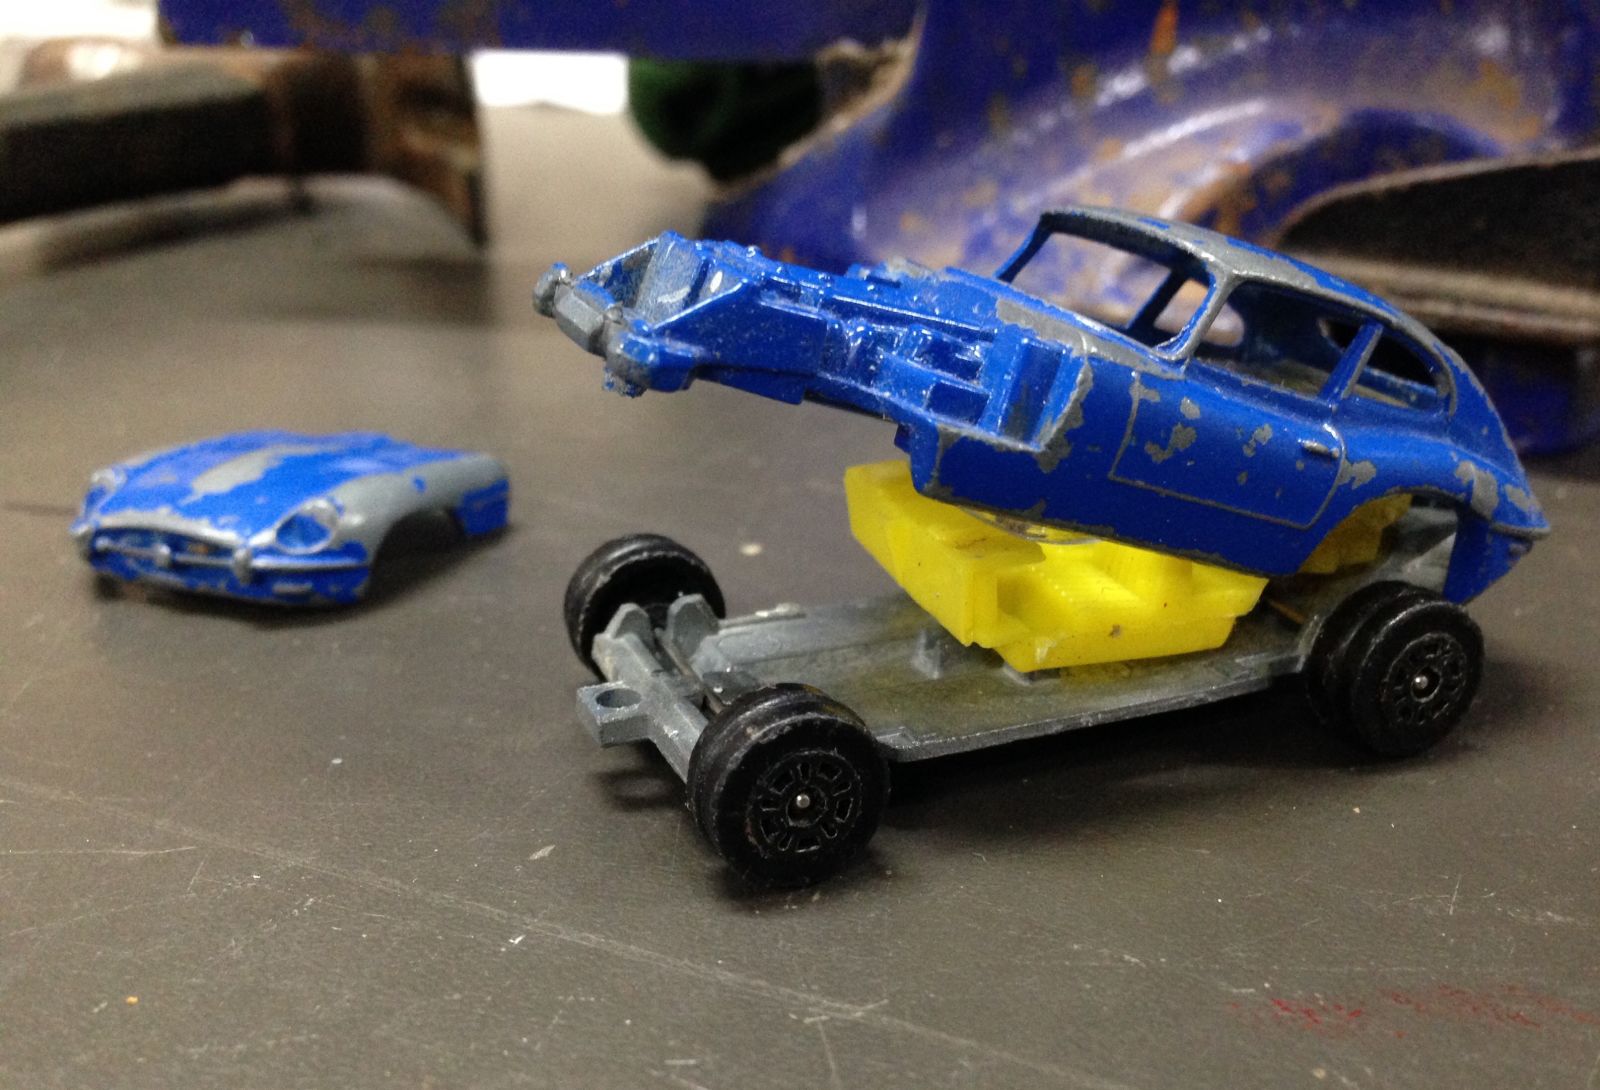
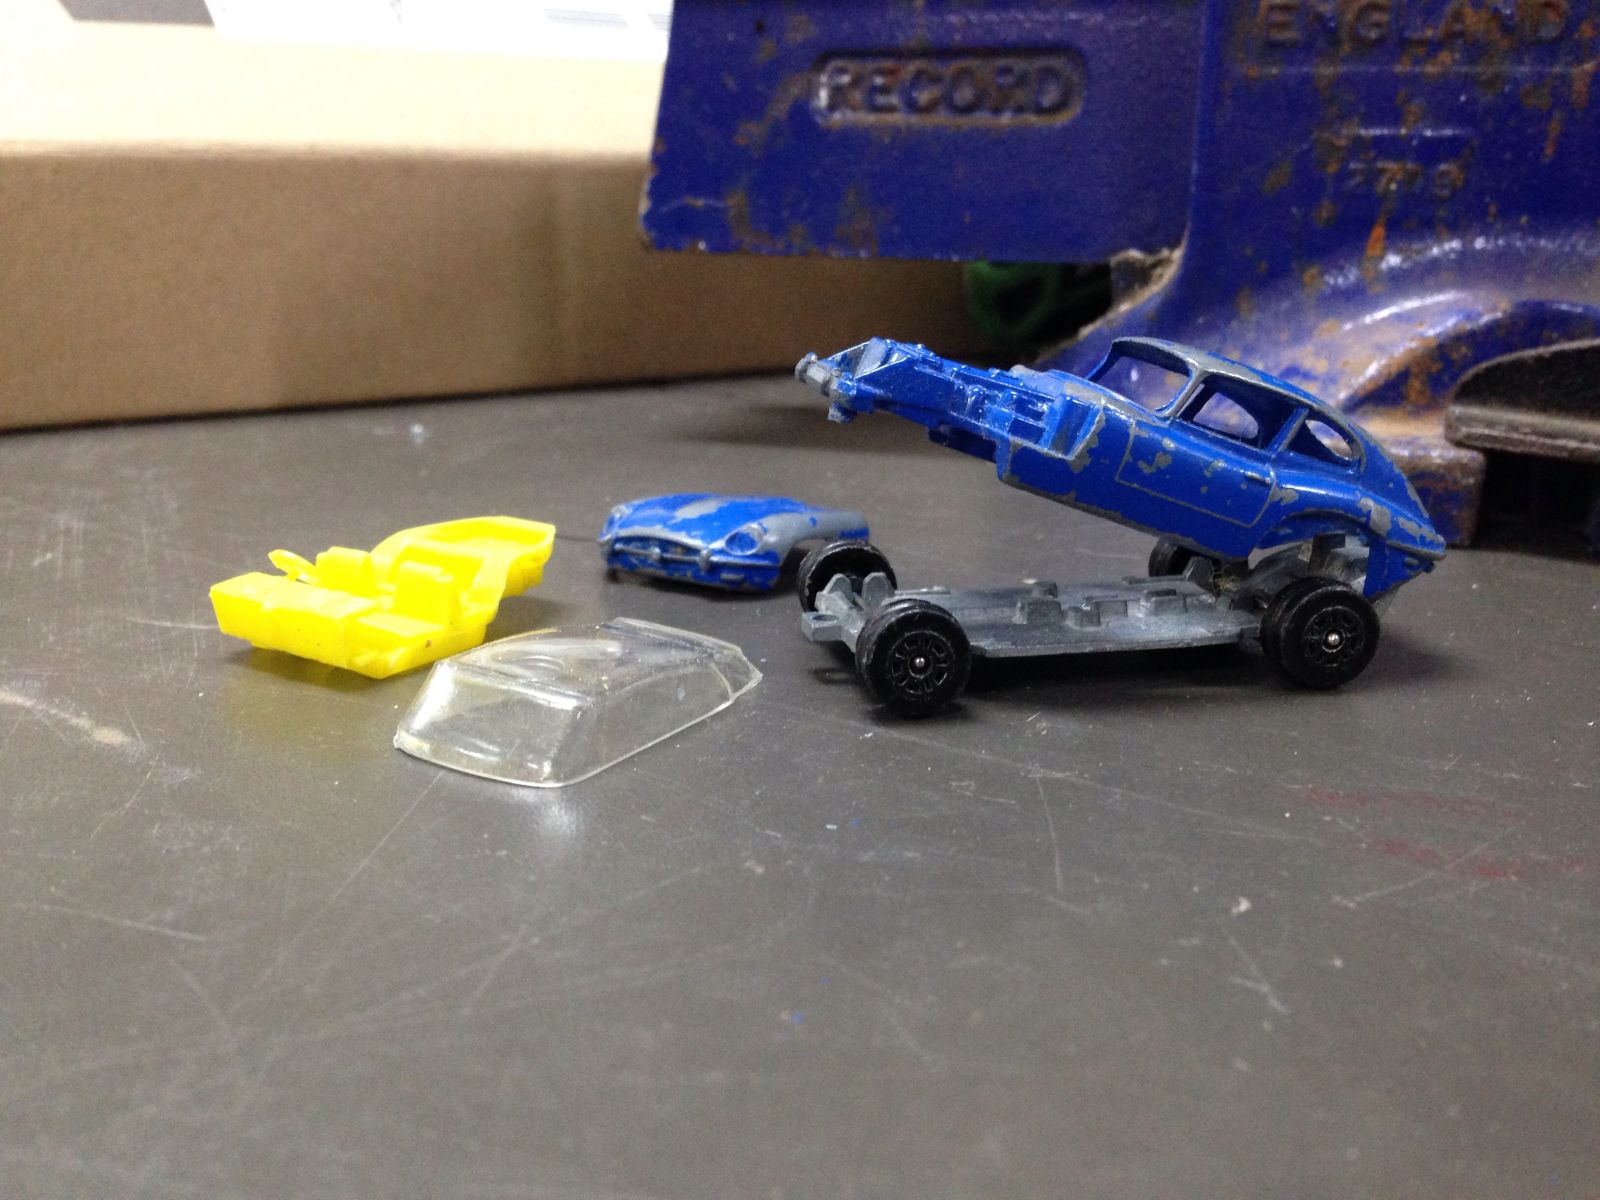
Exploded view...SUCCESS!!
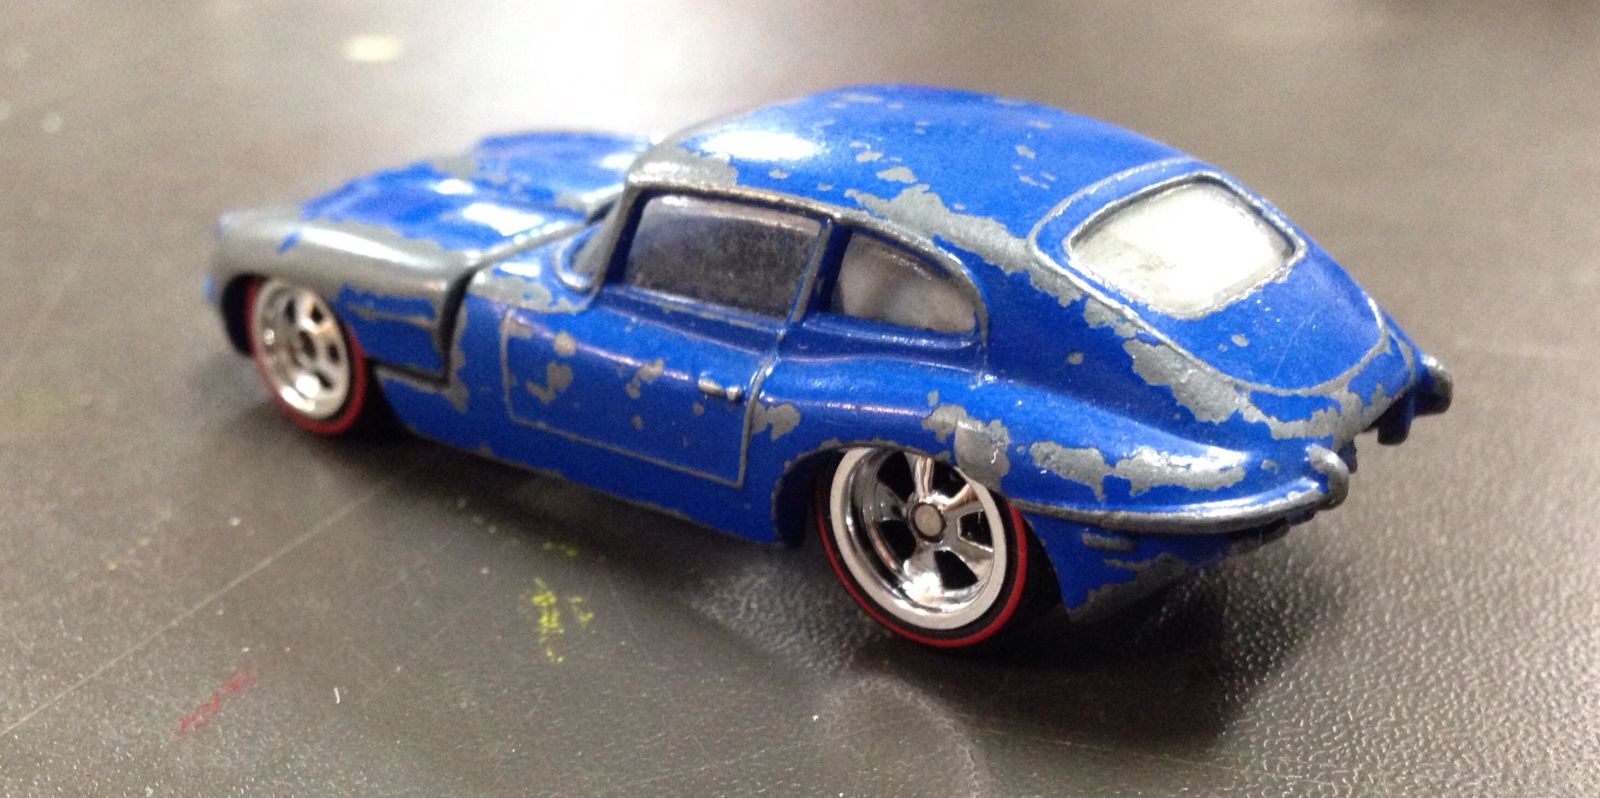
And some mock up shots. The cast is simply resting on the wheels and has no base plate fitted. I’m using BluTac to keep the wheels in position, you can see the big blob through the windows. Man that stuff is useful! I’m leaving the original base intact and making a new one from scratch as it’s impossible to get any wheels to fit under the body without major surgery which would probably destroy it anyway.
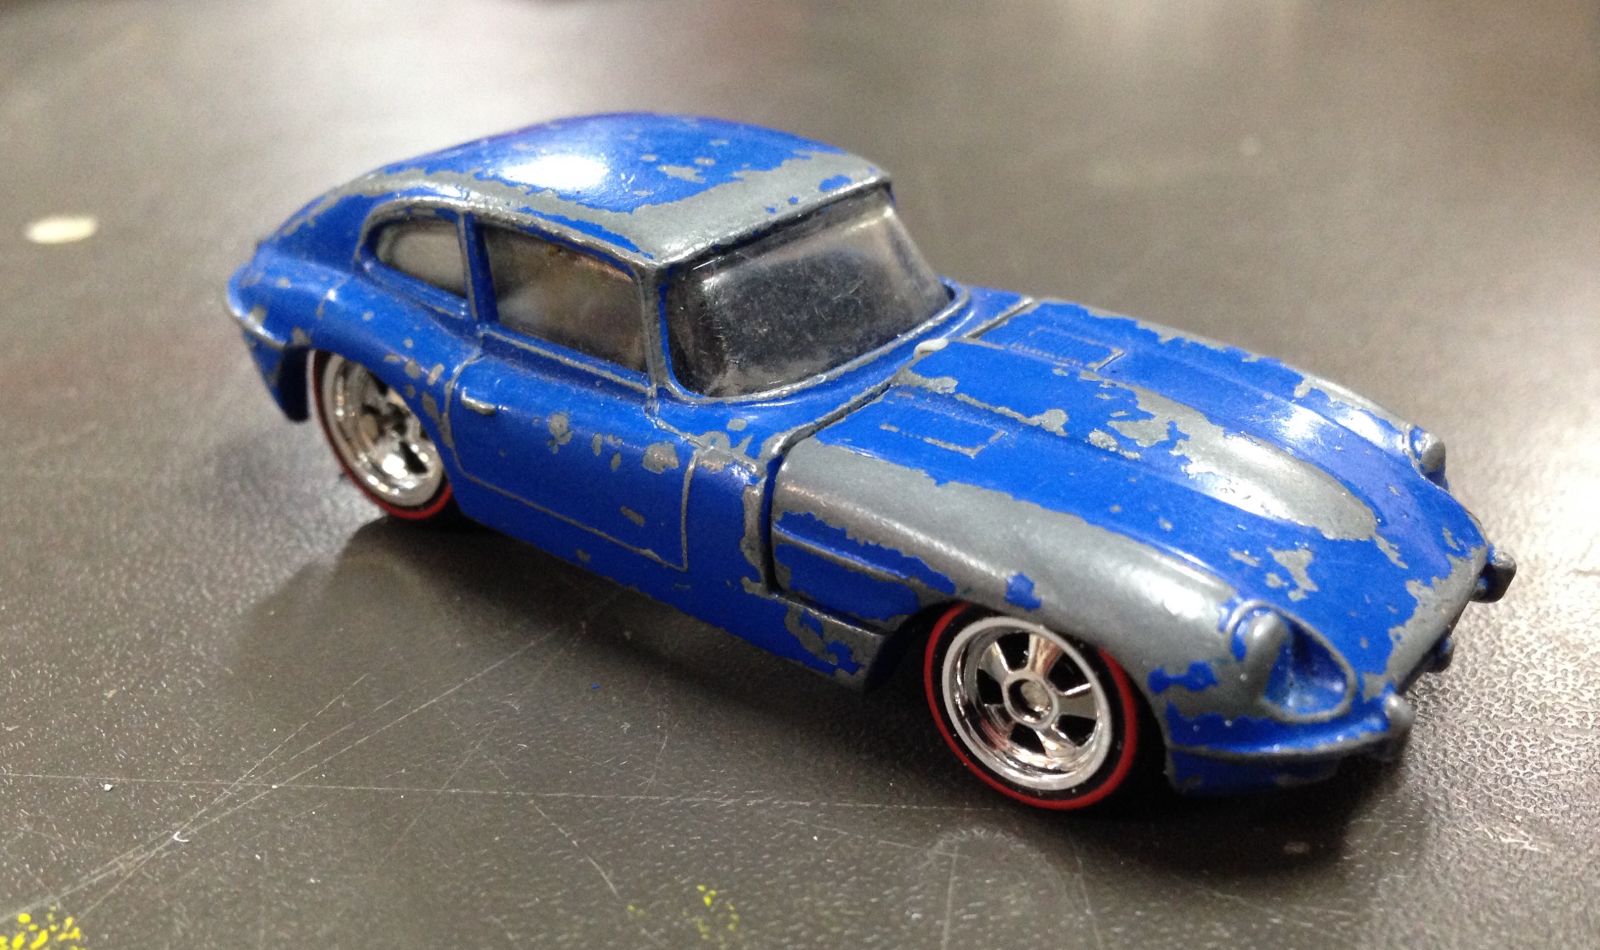
Wheel choice is limited right now and this is the best I can do until I locate something else. I don’t mind the wheels really but as someone rightly pointed out in the mock up post comments the Red Lines don’t really work on it. I would probably turn them around so the line is on the inside unless I can get some white walls for it.
Thanks for checking it out. Not sure when part 2 will happen but it will happen....