
Ok well they’re not quite finished, but I am impressed at how quickly they went from junkyard steelies to OK looking wheels. This weekend I popped over to the local pick-a-part and grabbed some steel wheels for the wagovan in hopes of converting it from 13” to 15” wheels.
I’m going to start by saying I did not do my Oppo duty. I completely forgot to take “before” pictures, plus I forgot to take pictures at the junk yard. I am a bad Oppo and I will pay for my misdeeds with pictures of the Doggos.
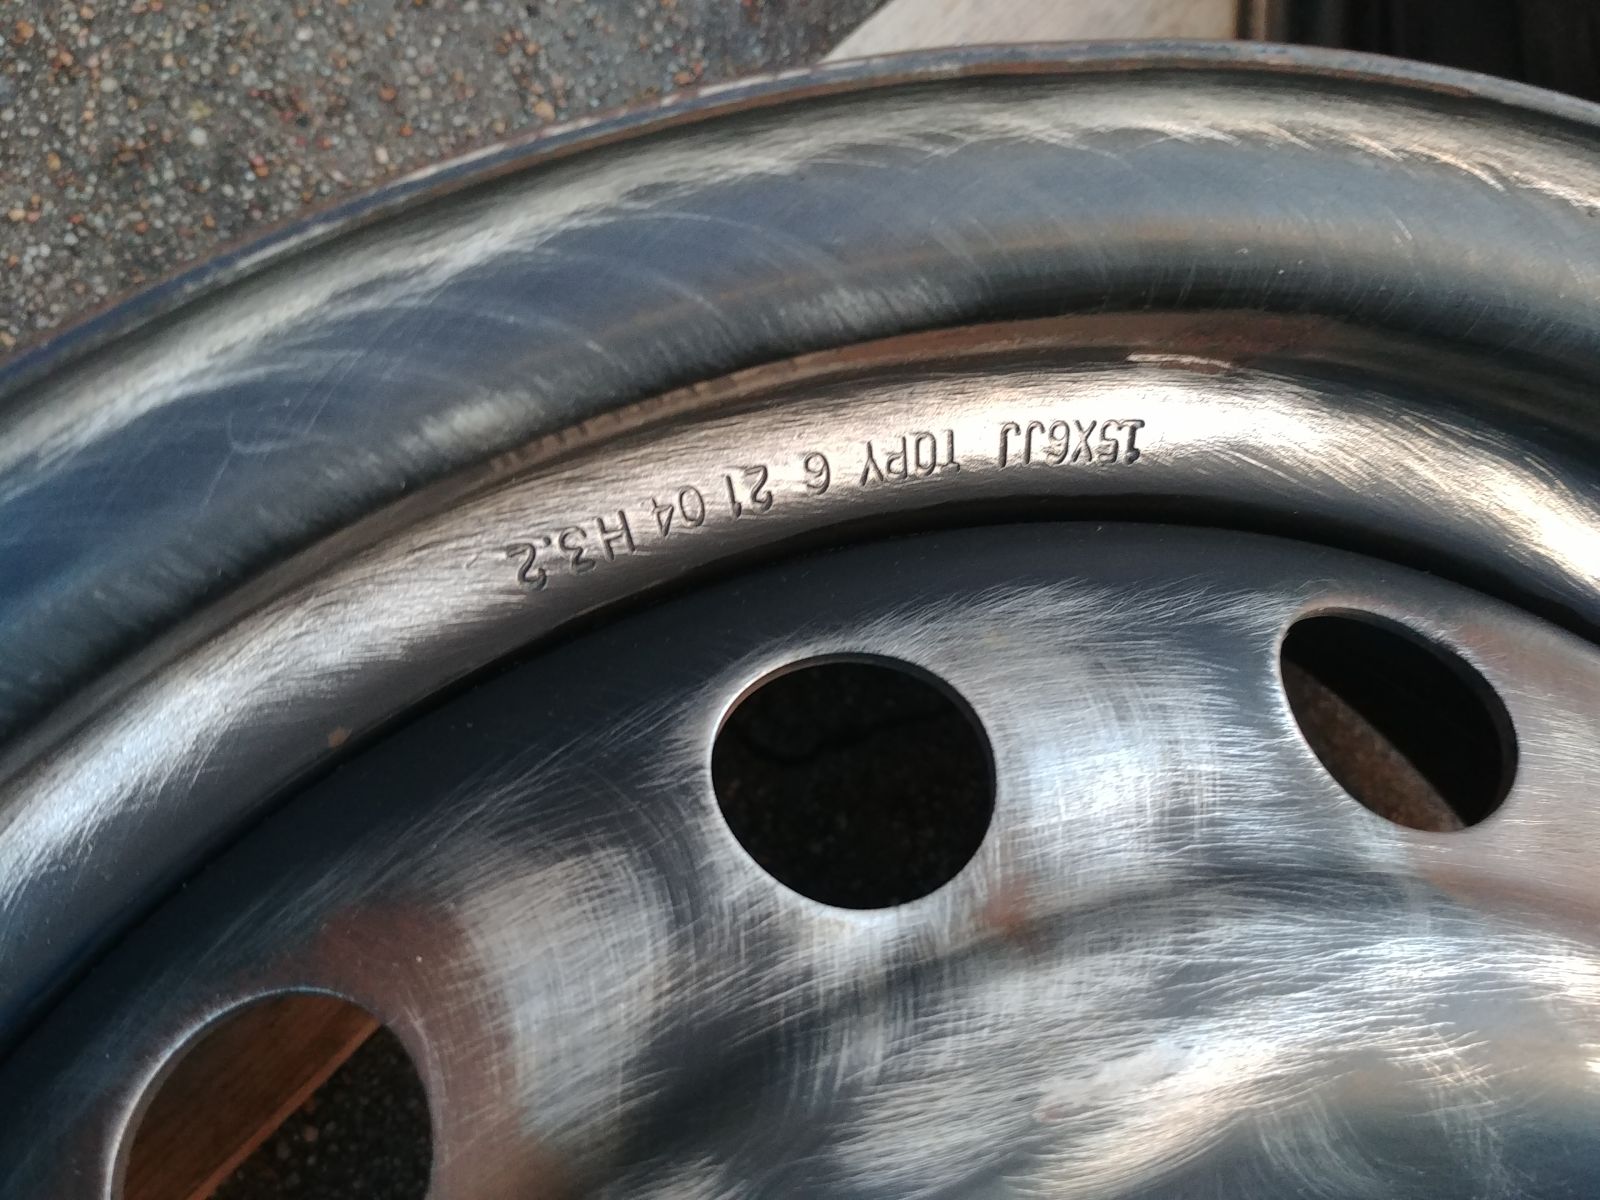
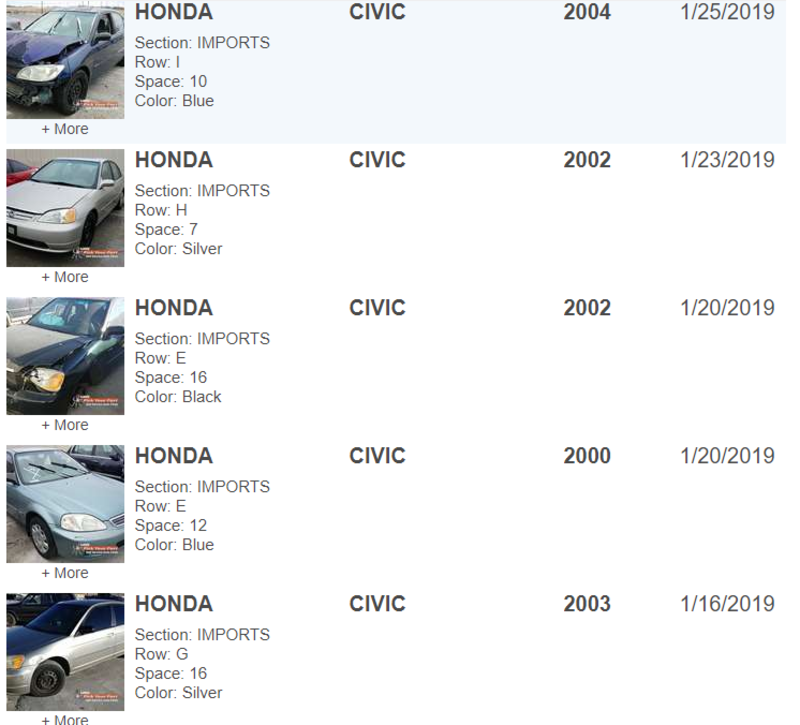
Right so… the quest was fairly simple. I’d decided I needed 15” steel wheels in 4-100mm. This narrowed me down to 7th gen (2001 - 2005) Civics, which were the first to commonly have 15” wheels but before Honda switched the bolt pattern.
Luckily the local LKQ had a ton of these and several looked like they still had their wheels. LKQ’s parts price list shows the wheels will cost $10.85 each, plus a $3.50 core charge, which puts me at about $65 total for four. Not bad when you consider new steel wheels run upwards of $250 for a set.
Two friends of mine joined (Brady of the Sidekick and his girlfriend Kate of the Jeep Cherokee) and we loaded up the Land Rover and headed out. After paying the entry fee we went out in search of Civic. Unfortunately… this ended up being more of a pain that we’d thought. The first couple we saw either didn’t have wheels, had 14” wheels, or the wheels were damaged from the vehicles’ life ending crash. Eventually we found a Civic with good looking 15” wheels… but it only had three!
:sigh:
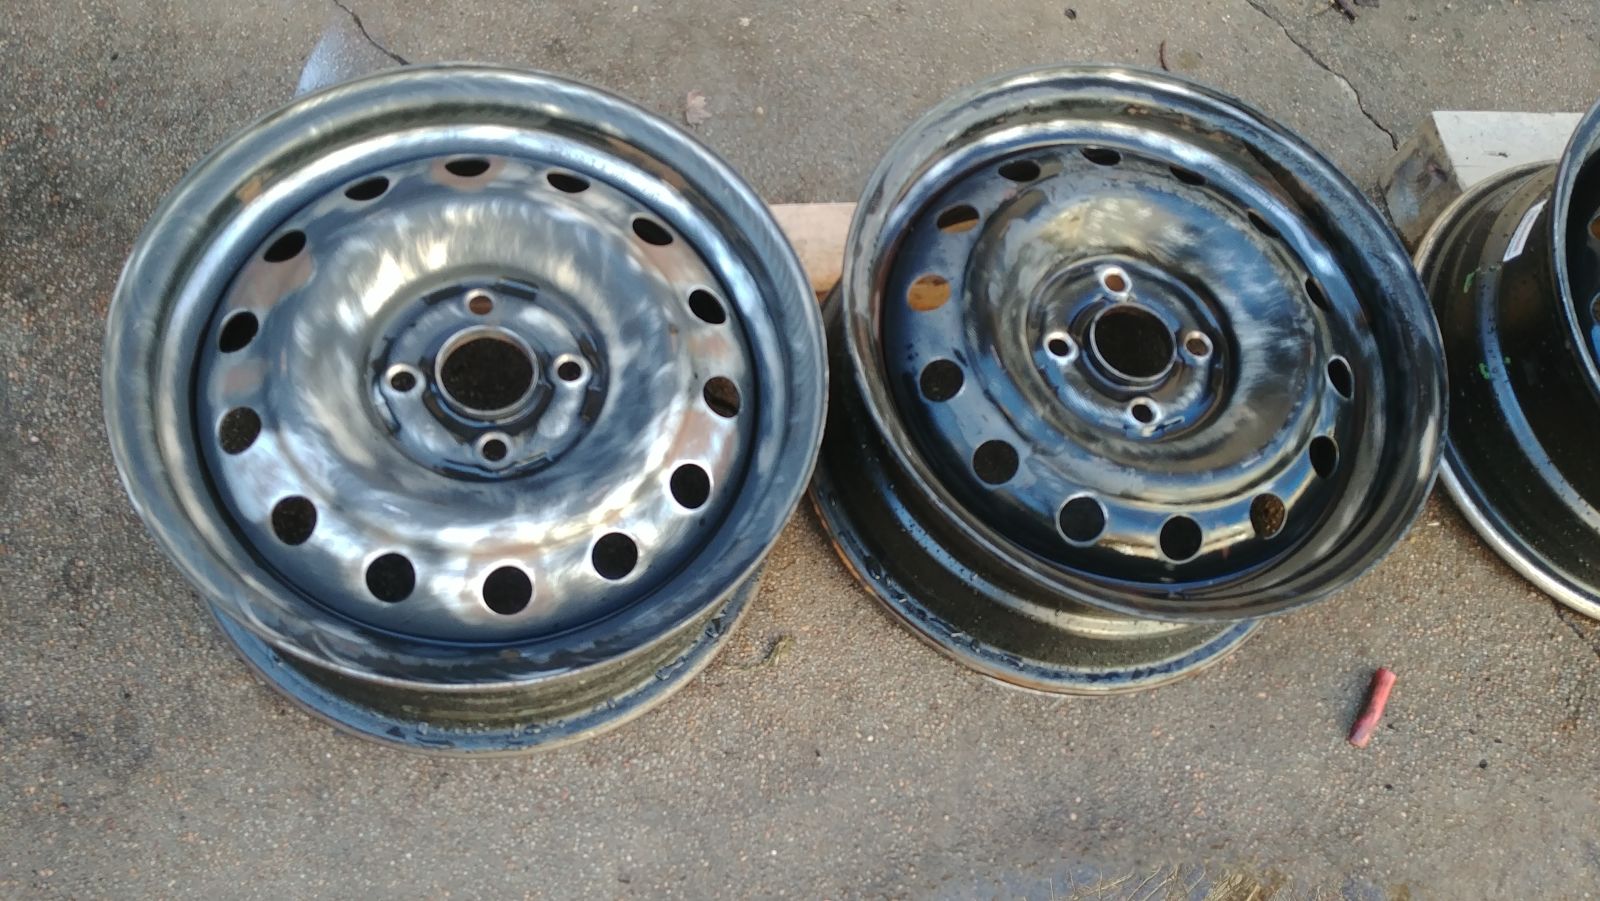
Ok well three is better than none, I guess. Two of the wheels, thankfully, were already off the car. After measuring the bolt pattern to confirm they were actually from the civic they were sitting next too. (They were.) We scrounged up some scrap metal to wedge in the brake to remove the third, and suddenly I was 75% of the way to my goal!
With a partial load, we revisited the cars we’d passed over before, and eventually found two additional OK looking wheels and loaded them up.
That done, we had the staff remove the tires from the wheels. Luckily, unlike my only other attempt at buying wheels from LKQ, they managed to not ruin the wheels in the process. They even took special care to make sure the valve stems cores were put back in…. which I felt bad about because I 100% cut those off later. They also discovered one of the wheels was holding air, but badly dented. I opted to pass, and kept it to just having a set of four. We’d deal with the spare later.

Checkout time revealed a total of $80, which is pretty typical for LKQ. One never knows what random charges they’re going to throw on. In this case it was a $3.25 per tire labor charge and a per tire disposal fee… which feels like double dipping to me but… here we are.
Now to the meat of this write up!
I didn’t expect to finish rehabbing the wheels quickly, but I ended up doing just that. I got them home, hosed them off, hit them with wheel cleaner, and then hit them with a wire brush. Then and only then did I remember to start taking pictures.
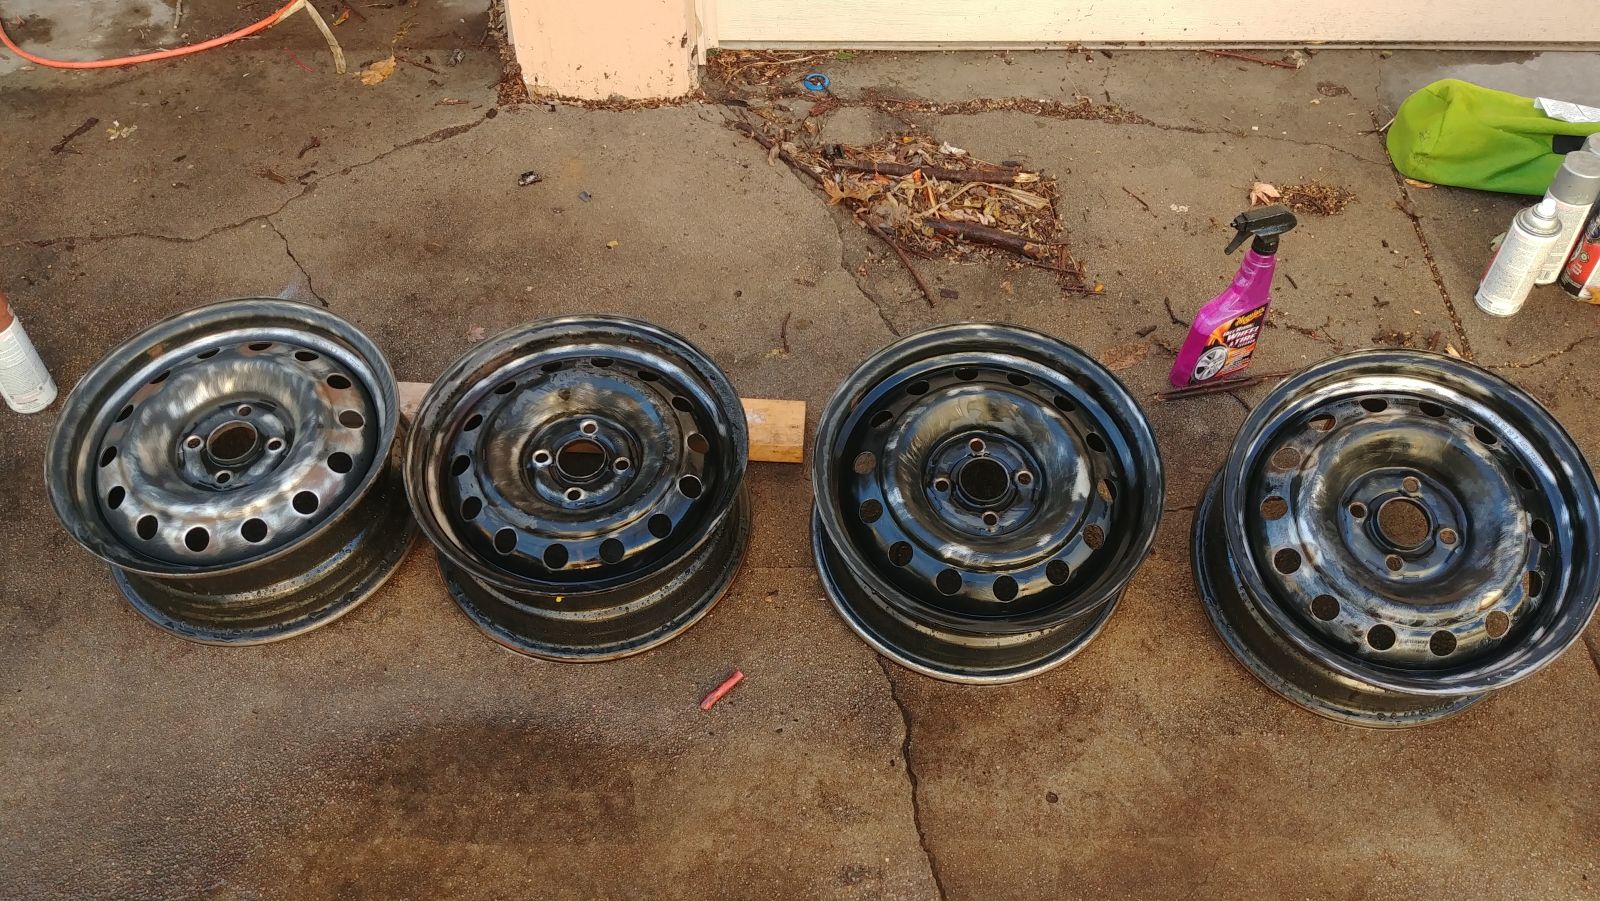
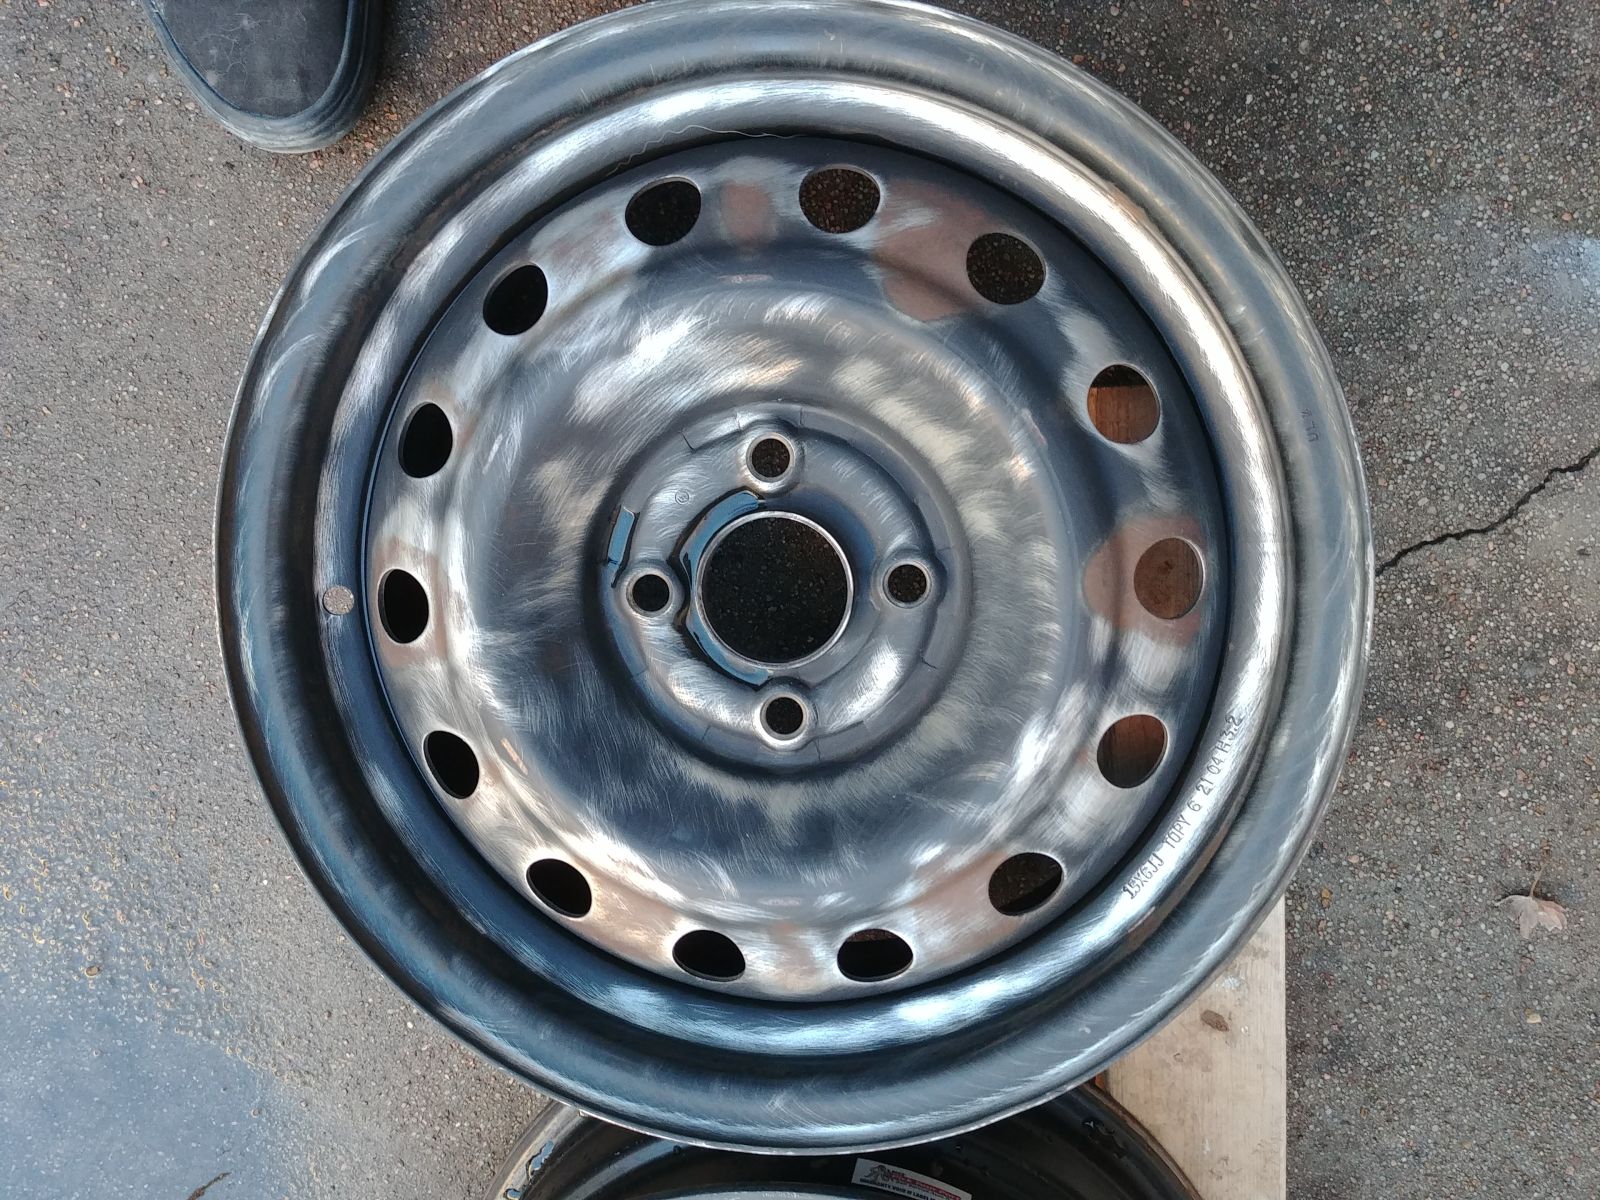
Ok… I was tempted to leave them like this. I’m kinda digging the Mad Max rust and metal look the wire brush left on the junk yard patina, but I just don’t think this car is nice enough to pull off that look without just looking… poorly kept.
Anyway, after another clean and a dry with compressed air, they were ready for primer. I used self-etching primer for… no real reason. It sounded cool.
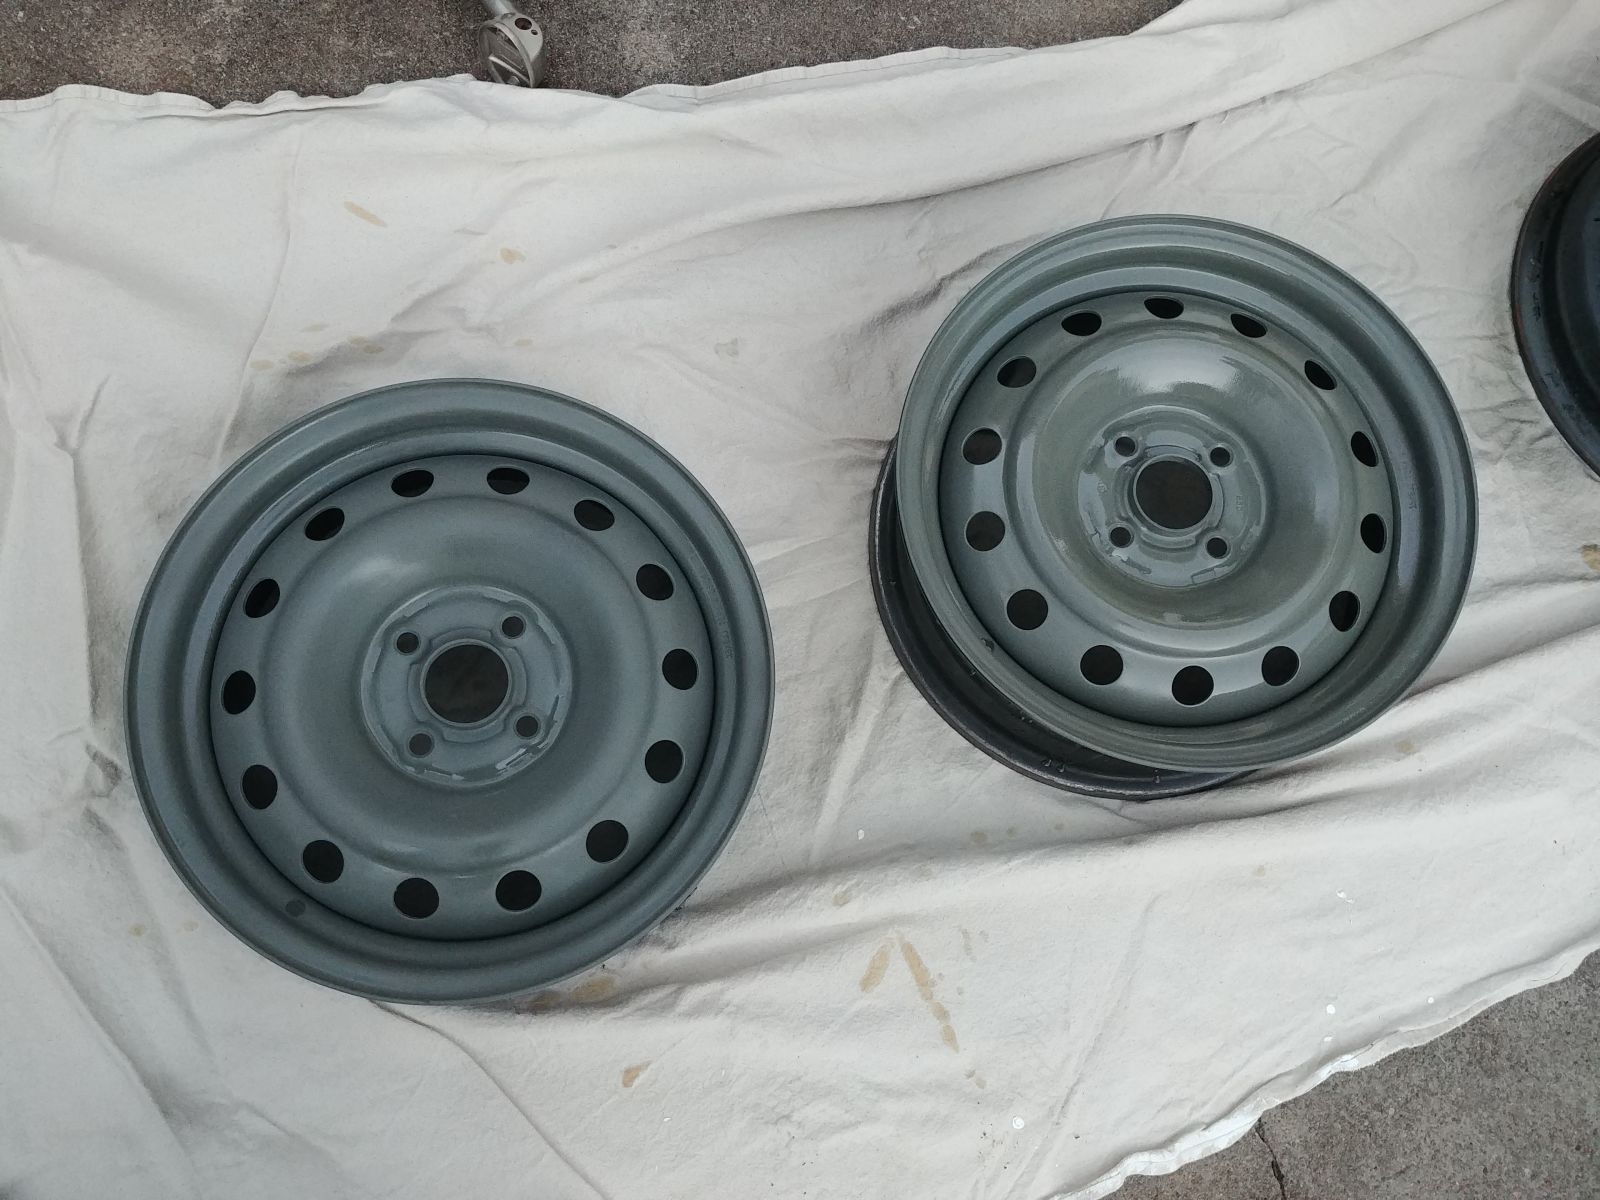
After that dried for a few hours, I hit them with a scouring pad followed by a tack cloth, and then we were ready for paint!
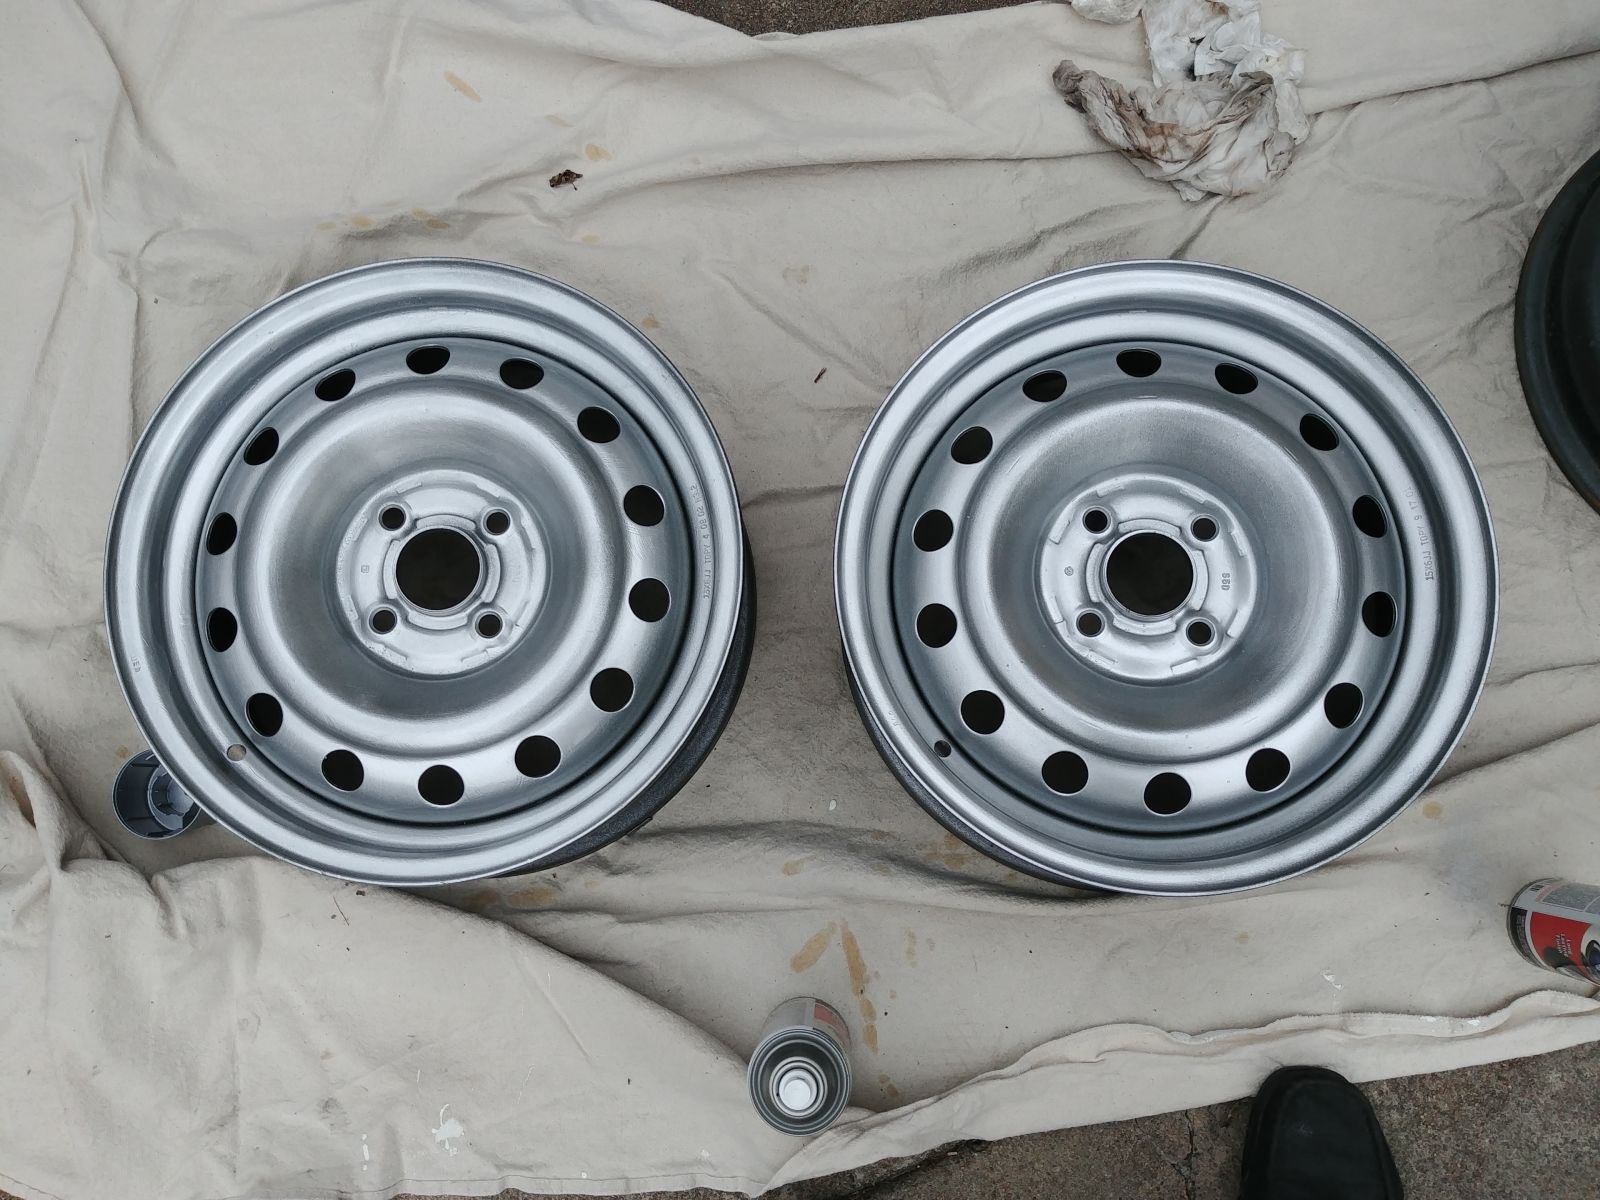
The instructions call for one light coat and then one wet coat in fairly short succession, so that is what I did. Unfortunately I went a little overboard on the wet coat and had a few runs. I decided to live with it rather than sand down, though I did do some touch-ups to help mask my error.
At this point I had a decision to make: black centers or leave them silver? In concept the black centers look very deliberate, but I think I only like the look because stock it would have come with black covers in that position. I asked oppo, but ultimately decided to proceed with all silver, but plastidip black centers. Best of both worlds.
The silver dried quickly, so I followed up with two coats of clear.
Just like that, I had fresh looking wheels!
Now to confirm they fit the car……