
In the winter the dome light on my 2010 Ford Ranger would intermittently stop working, closing and reopening the driver’s door a couple times it would turn on, this leads me to believe it’s the door ajar switch. I don’t know about you but I’d rather not be working on my truck outside in the freezing weather, so I decided to fix in the summer.
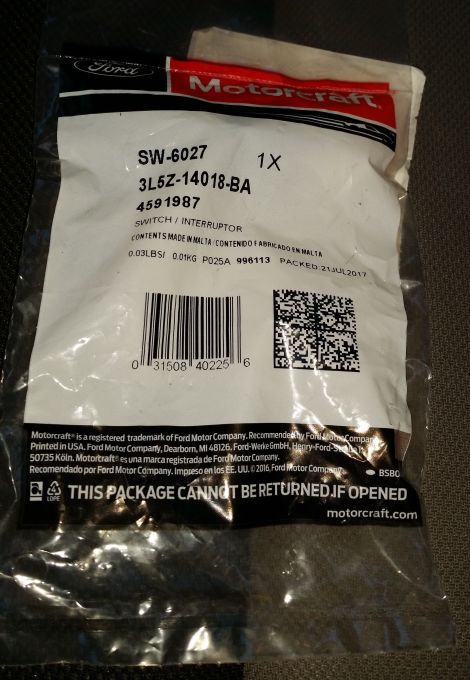
I ordered from Amazon.ca: Motorcraft SW-6027 (3L5Z-14018-BA) $40.88.
Replacing the switch has a book time of 0.8 hrs if you were to get it professionally install but I decided to do it myself.
Tools Needed:
- No. 1 Phillips Screwdriver
- Flat Blade Screwdriver or Panel Pry Tool
- T-20 Torx Driver
- T-27 Torx Driver
- Flashlight
Ford placed the door ajar switch attached to the latch assembly inside the door, which makes it harder to replace then if it was mounted outside the door.
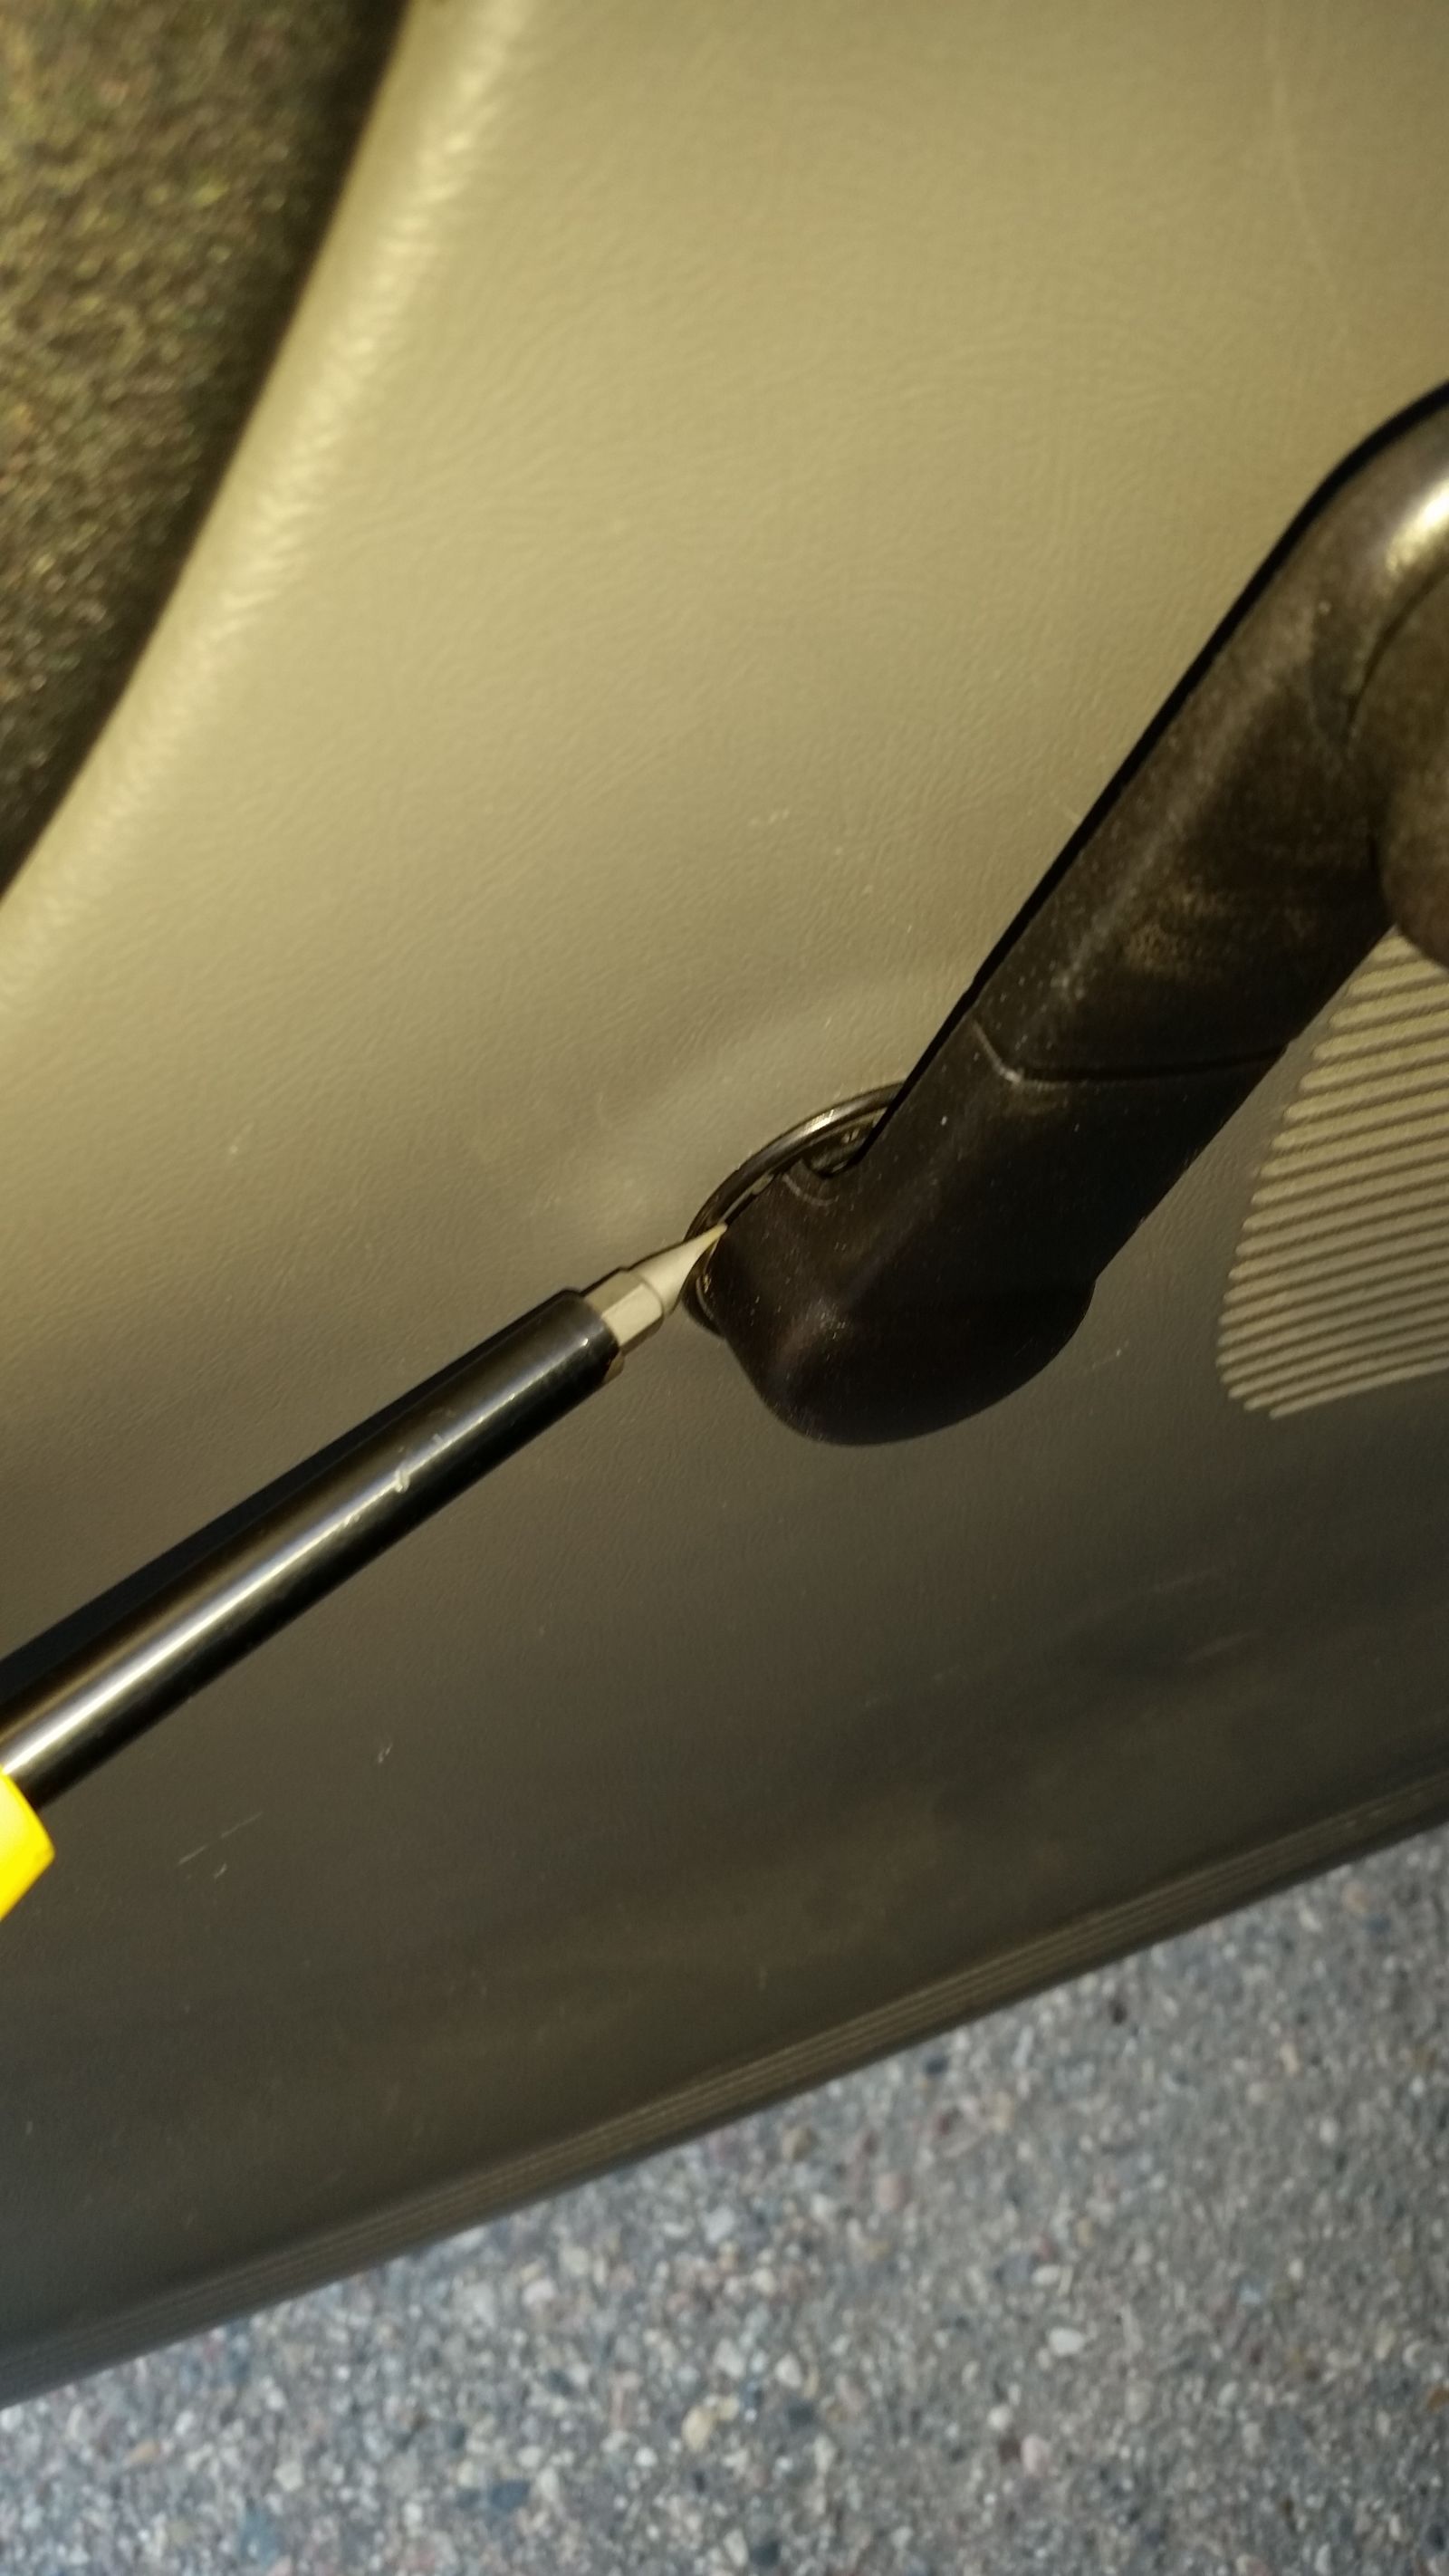
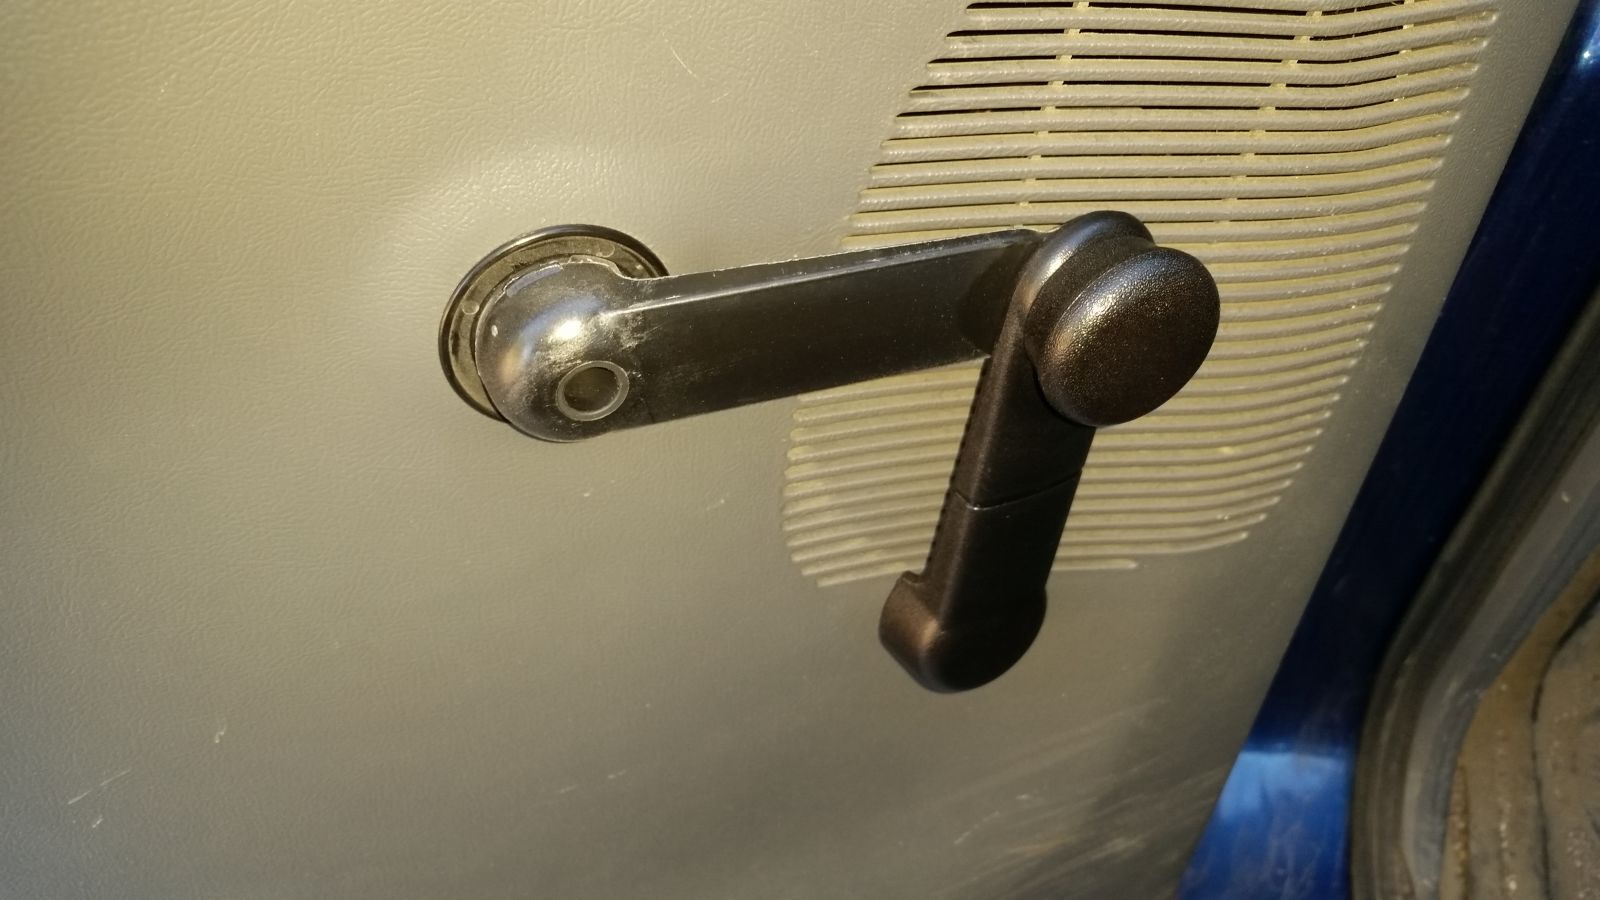
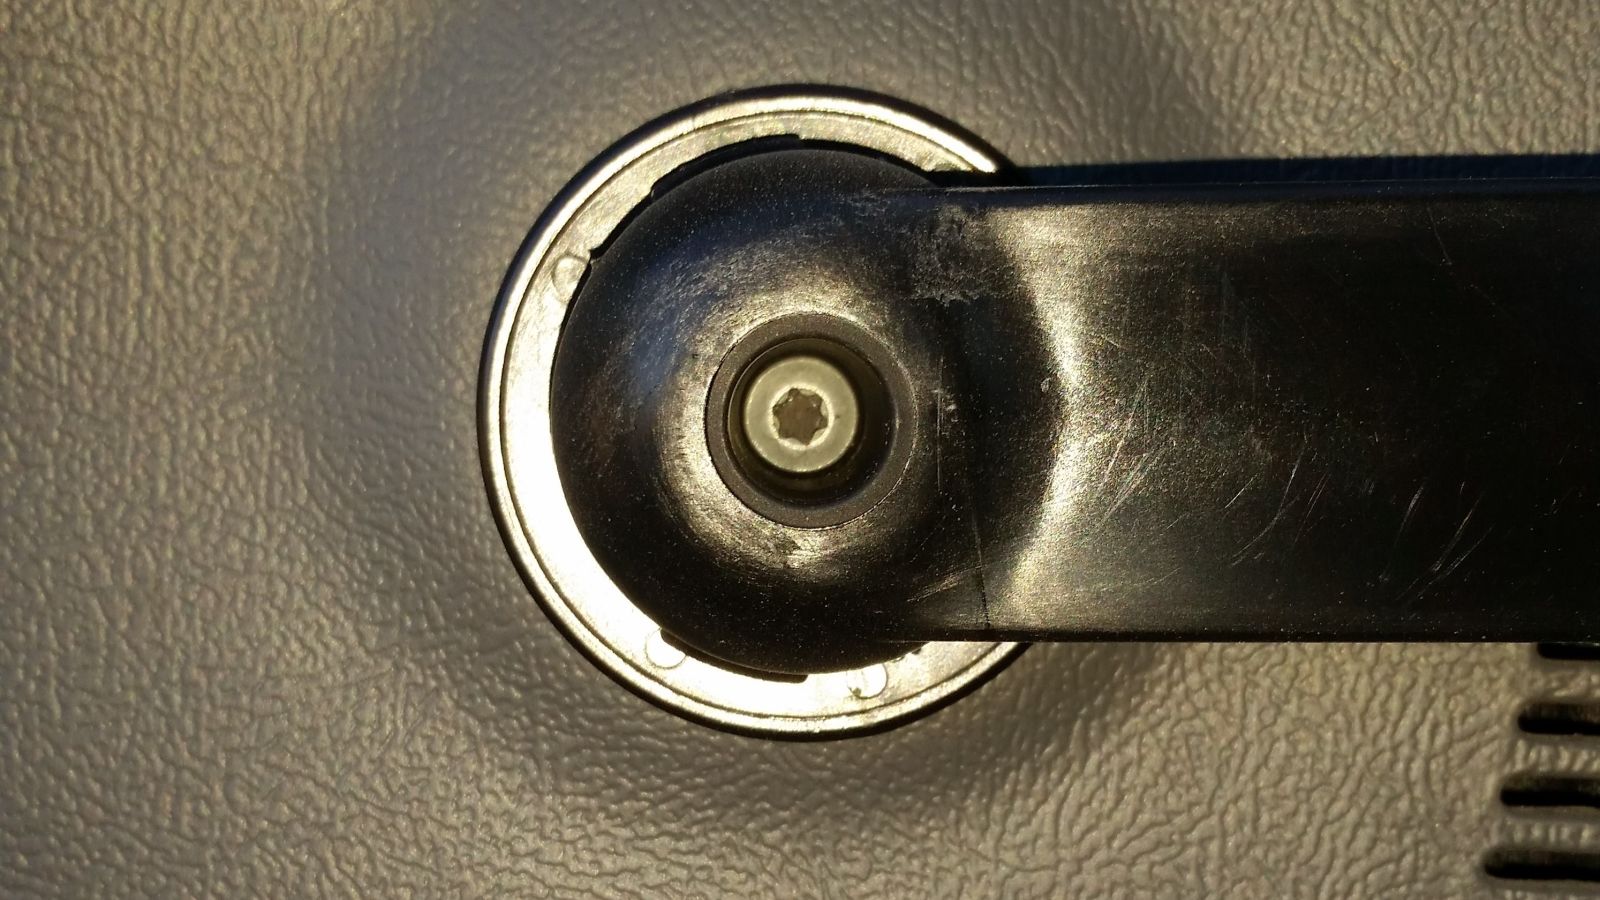
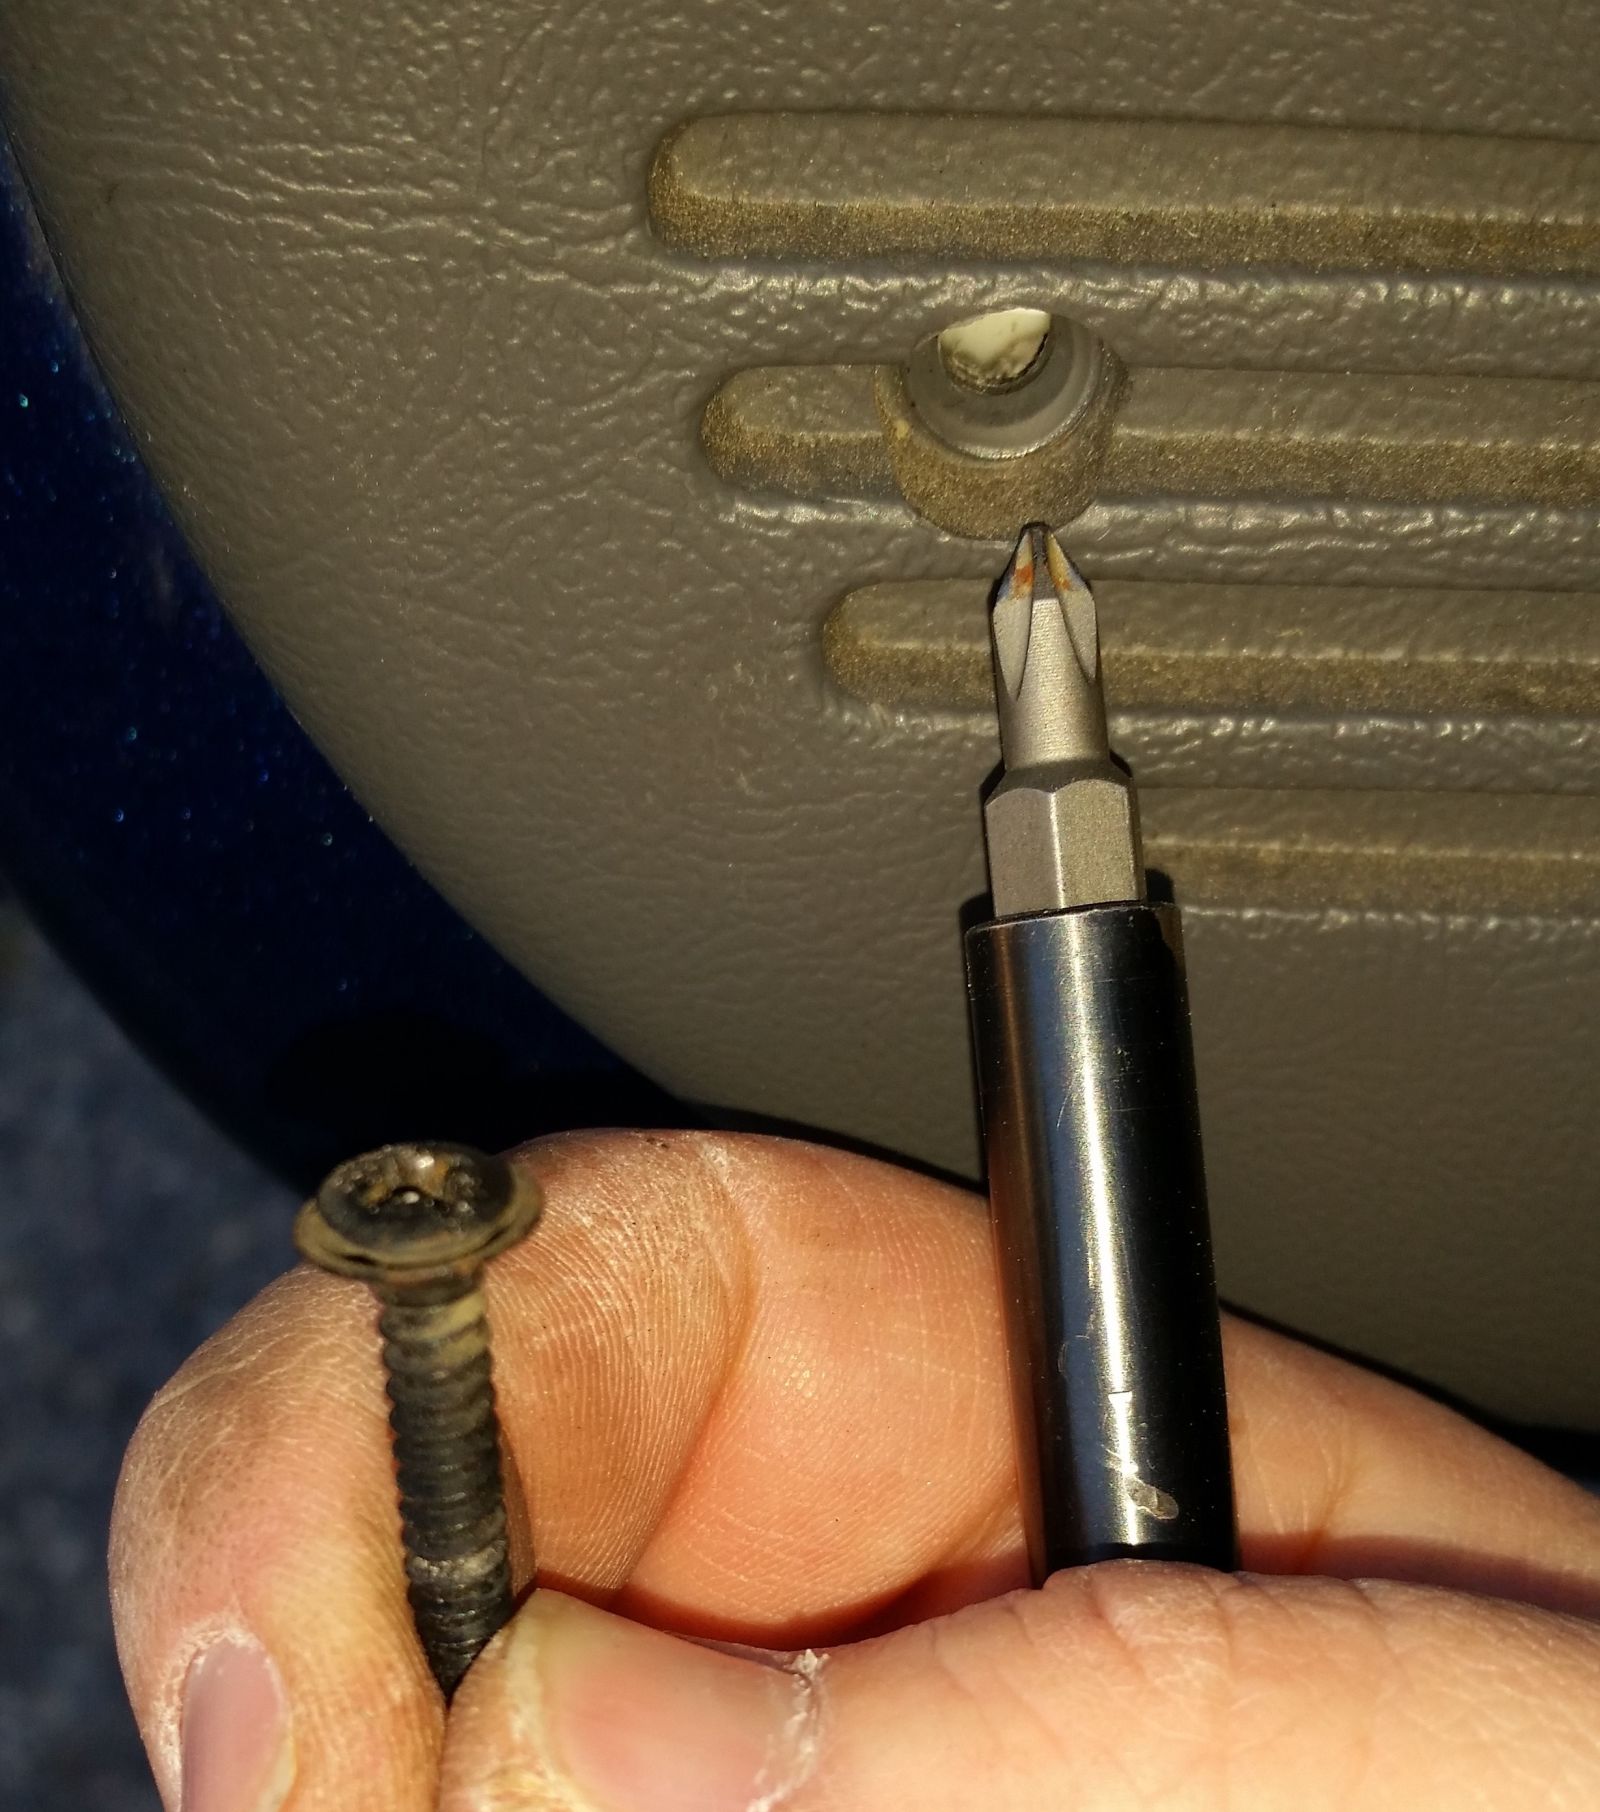
First step is to remove the door panel, held on with two screws and the window crank handle. Start with the crank handle, it has a cover over it that needs to be removed using the pry tool of your choice, when this is pulled aside you can access the T-20 Torx screw to remove the handle.
The No.1 Phillips screw in the lower rear corner of the panel is to be removed, the the No. 1 Phillips screw in the grab handle is removed last. The door panel can now be slid up, then lifted out.
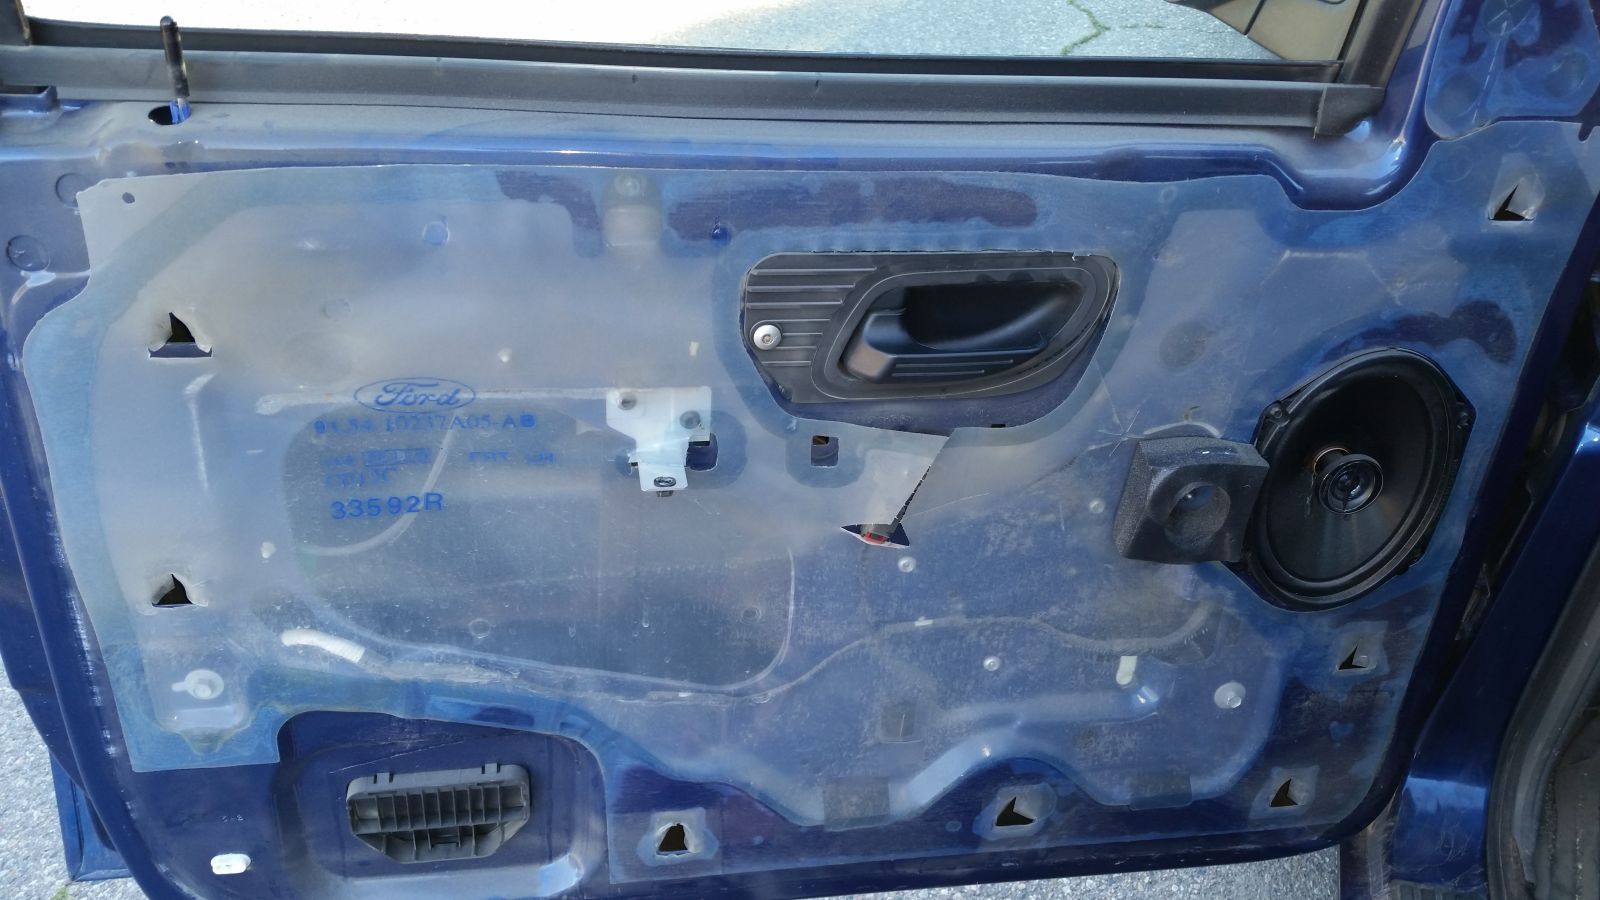
Peel back the plastic on the rear half of the door.
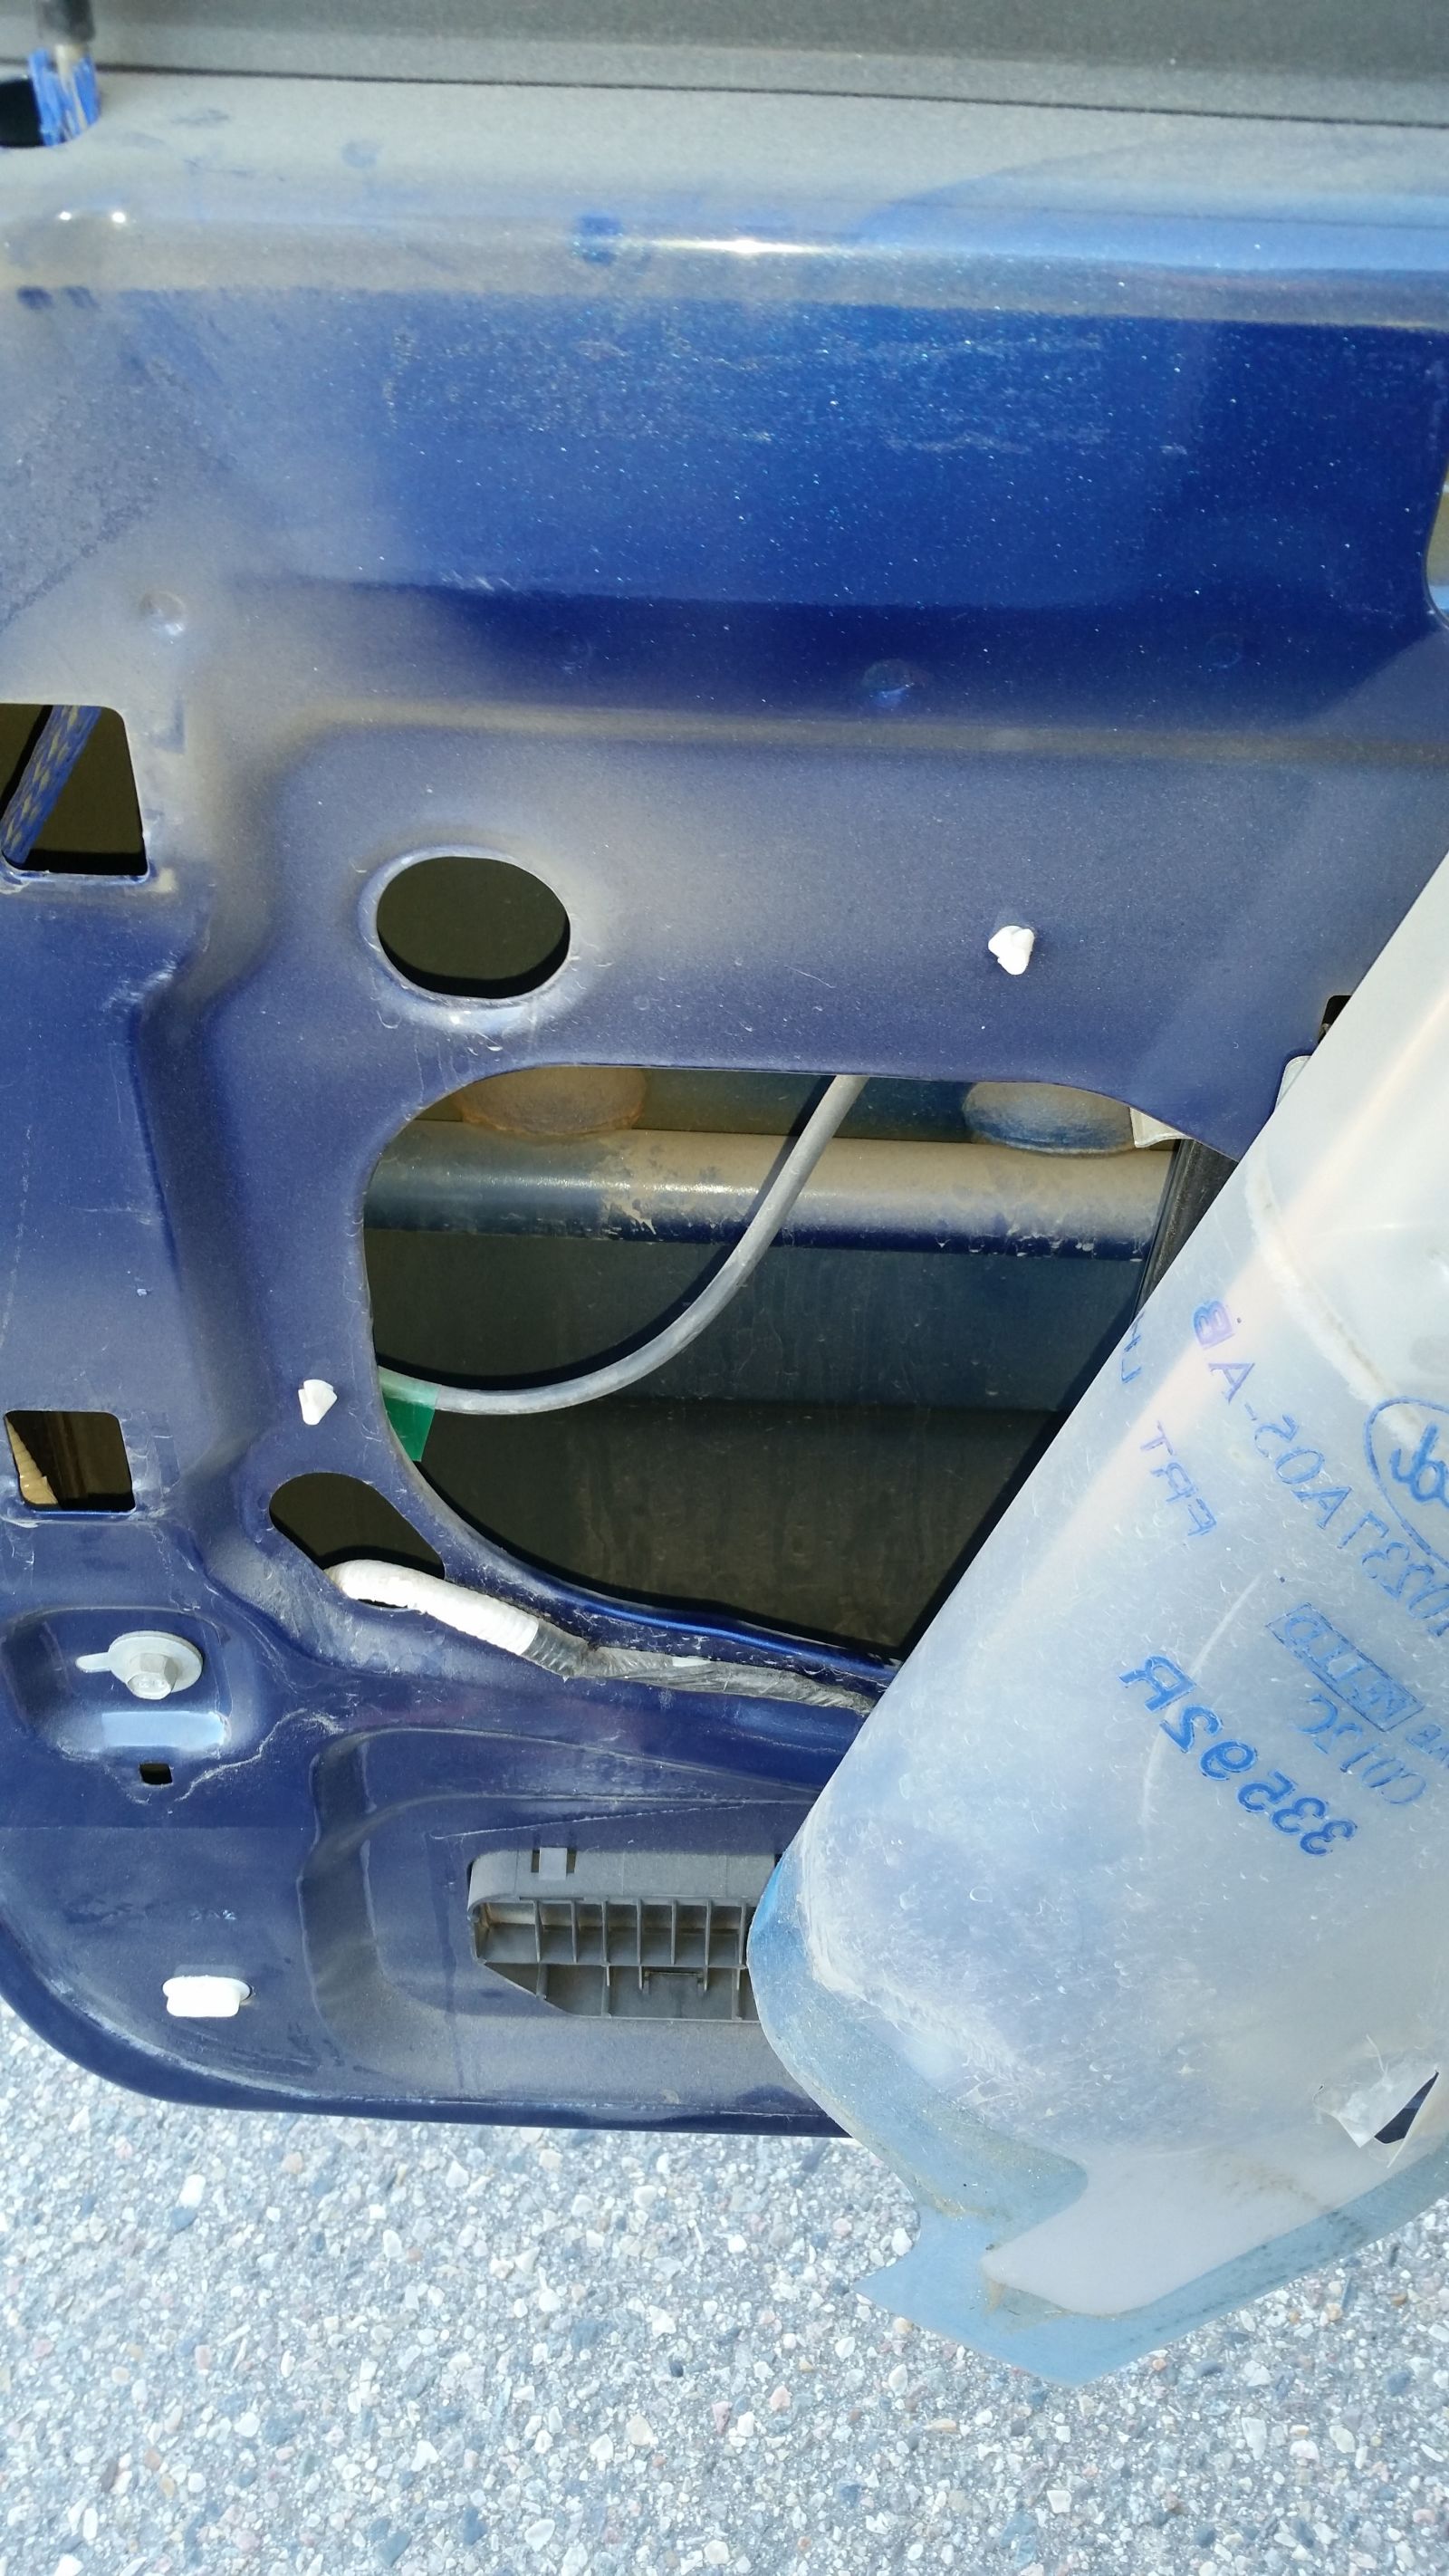
The latch is hard to see at the rear of the door, in order to know what your grabbing at you can stick your head in the door or if your phone is handy put it in the door and take a picture.
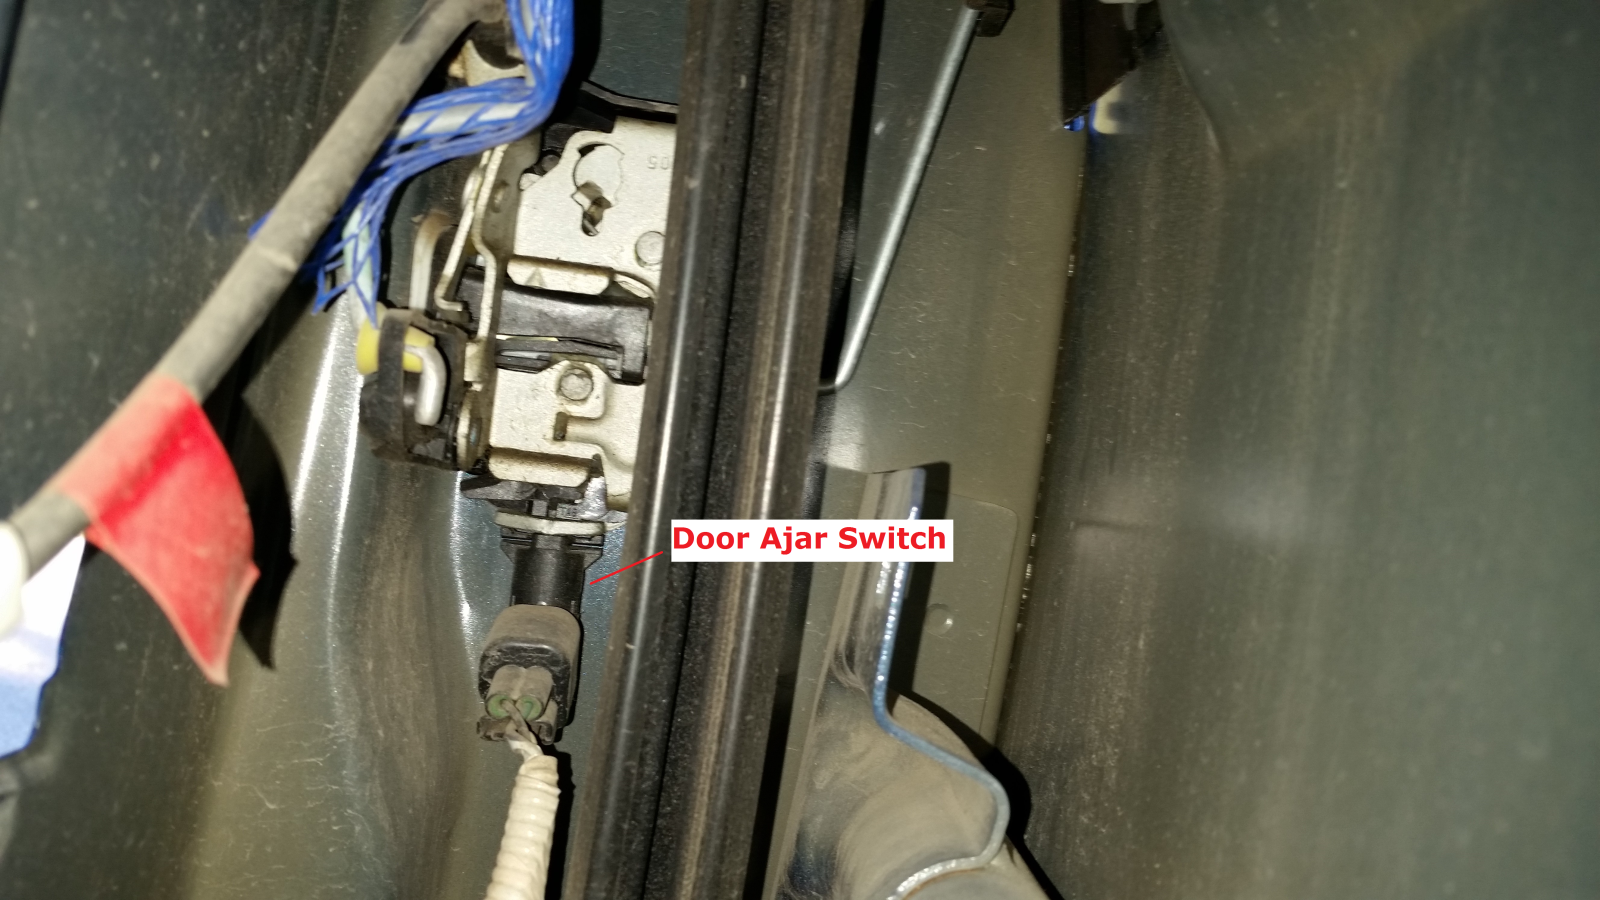
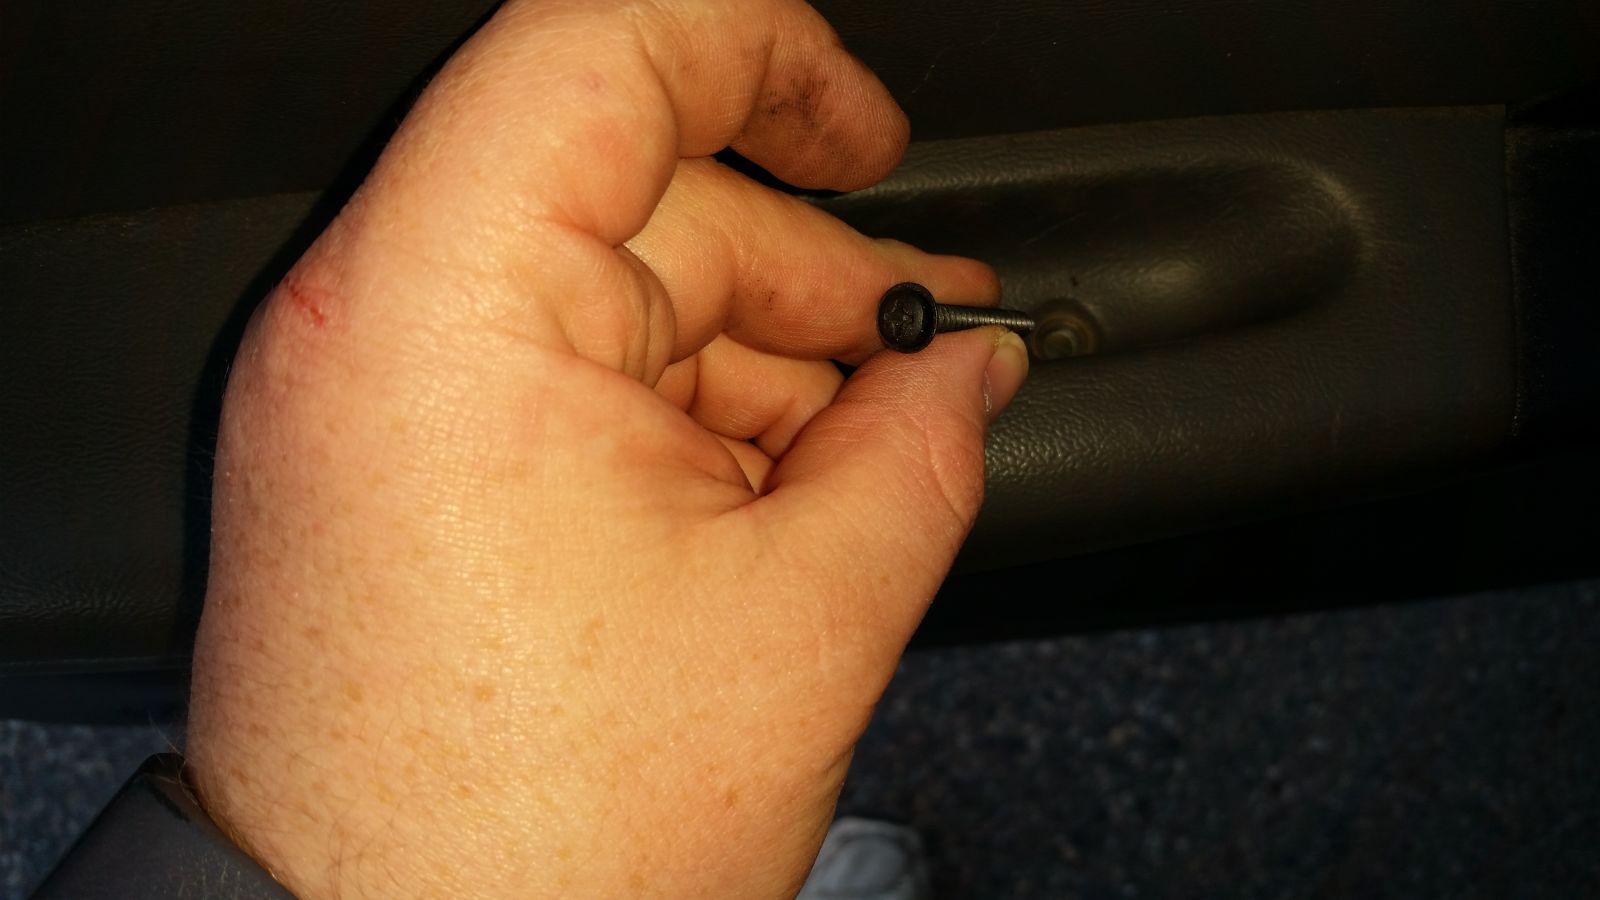
Now we can see the switch at the bottom of the latch and the window guide is blocking the latch. To disconnect the switch from the harness you may want to disconnect the battery from the truck. ( I didn’t, nothing bad happened) Press up on the plastic tab at the bottom on the connector and pull it out towards the front of the truck.
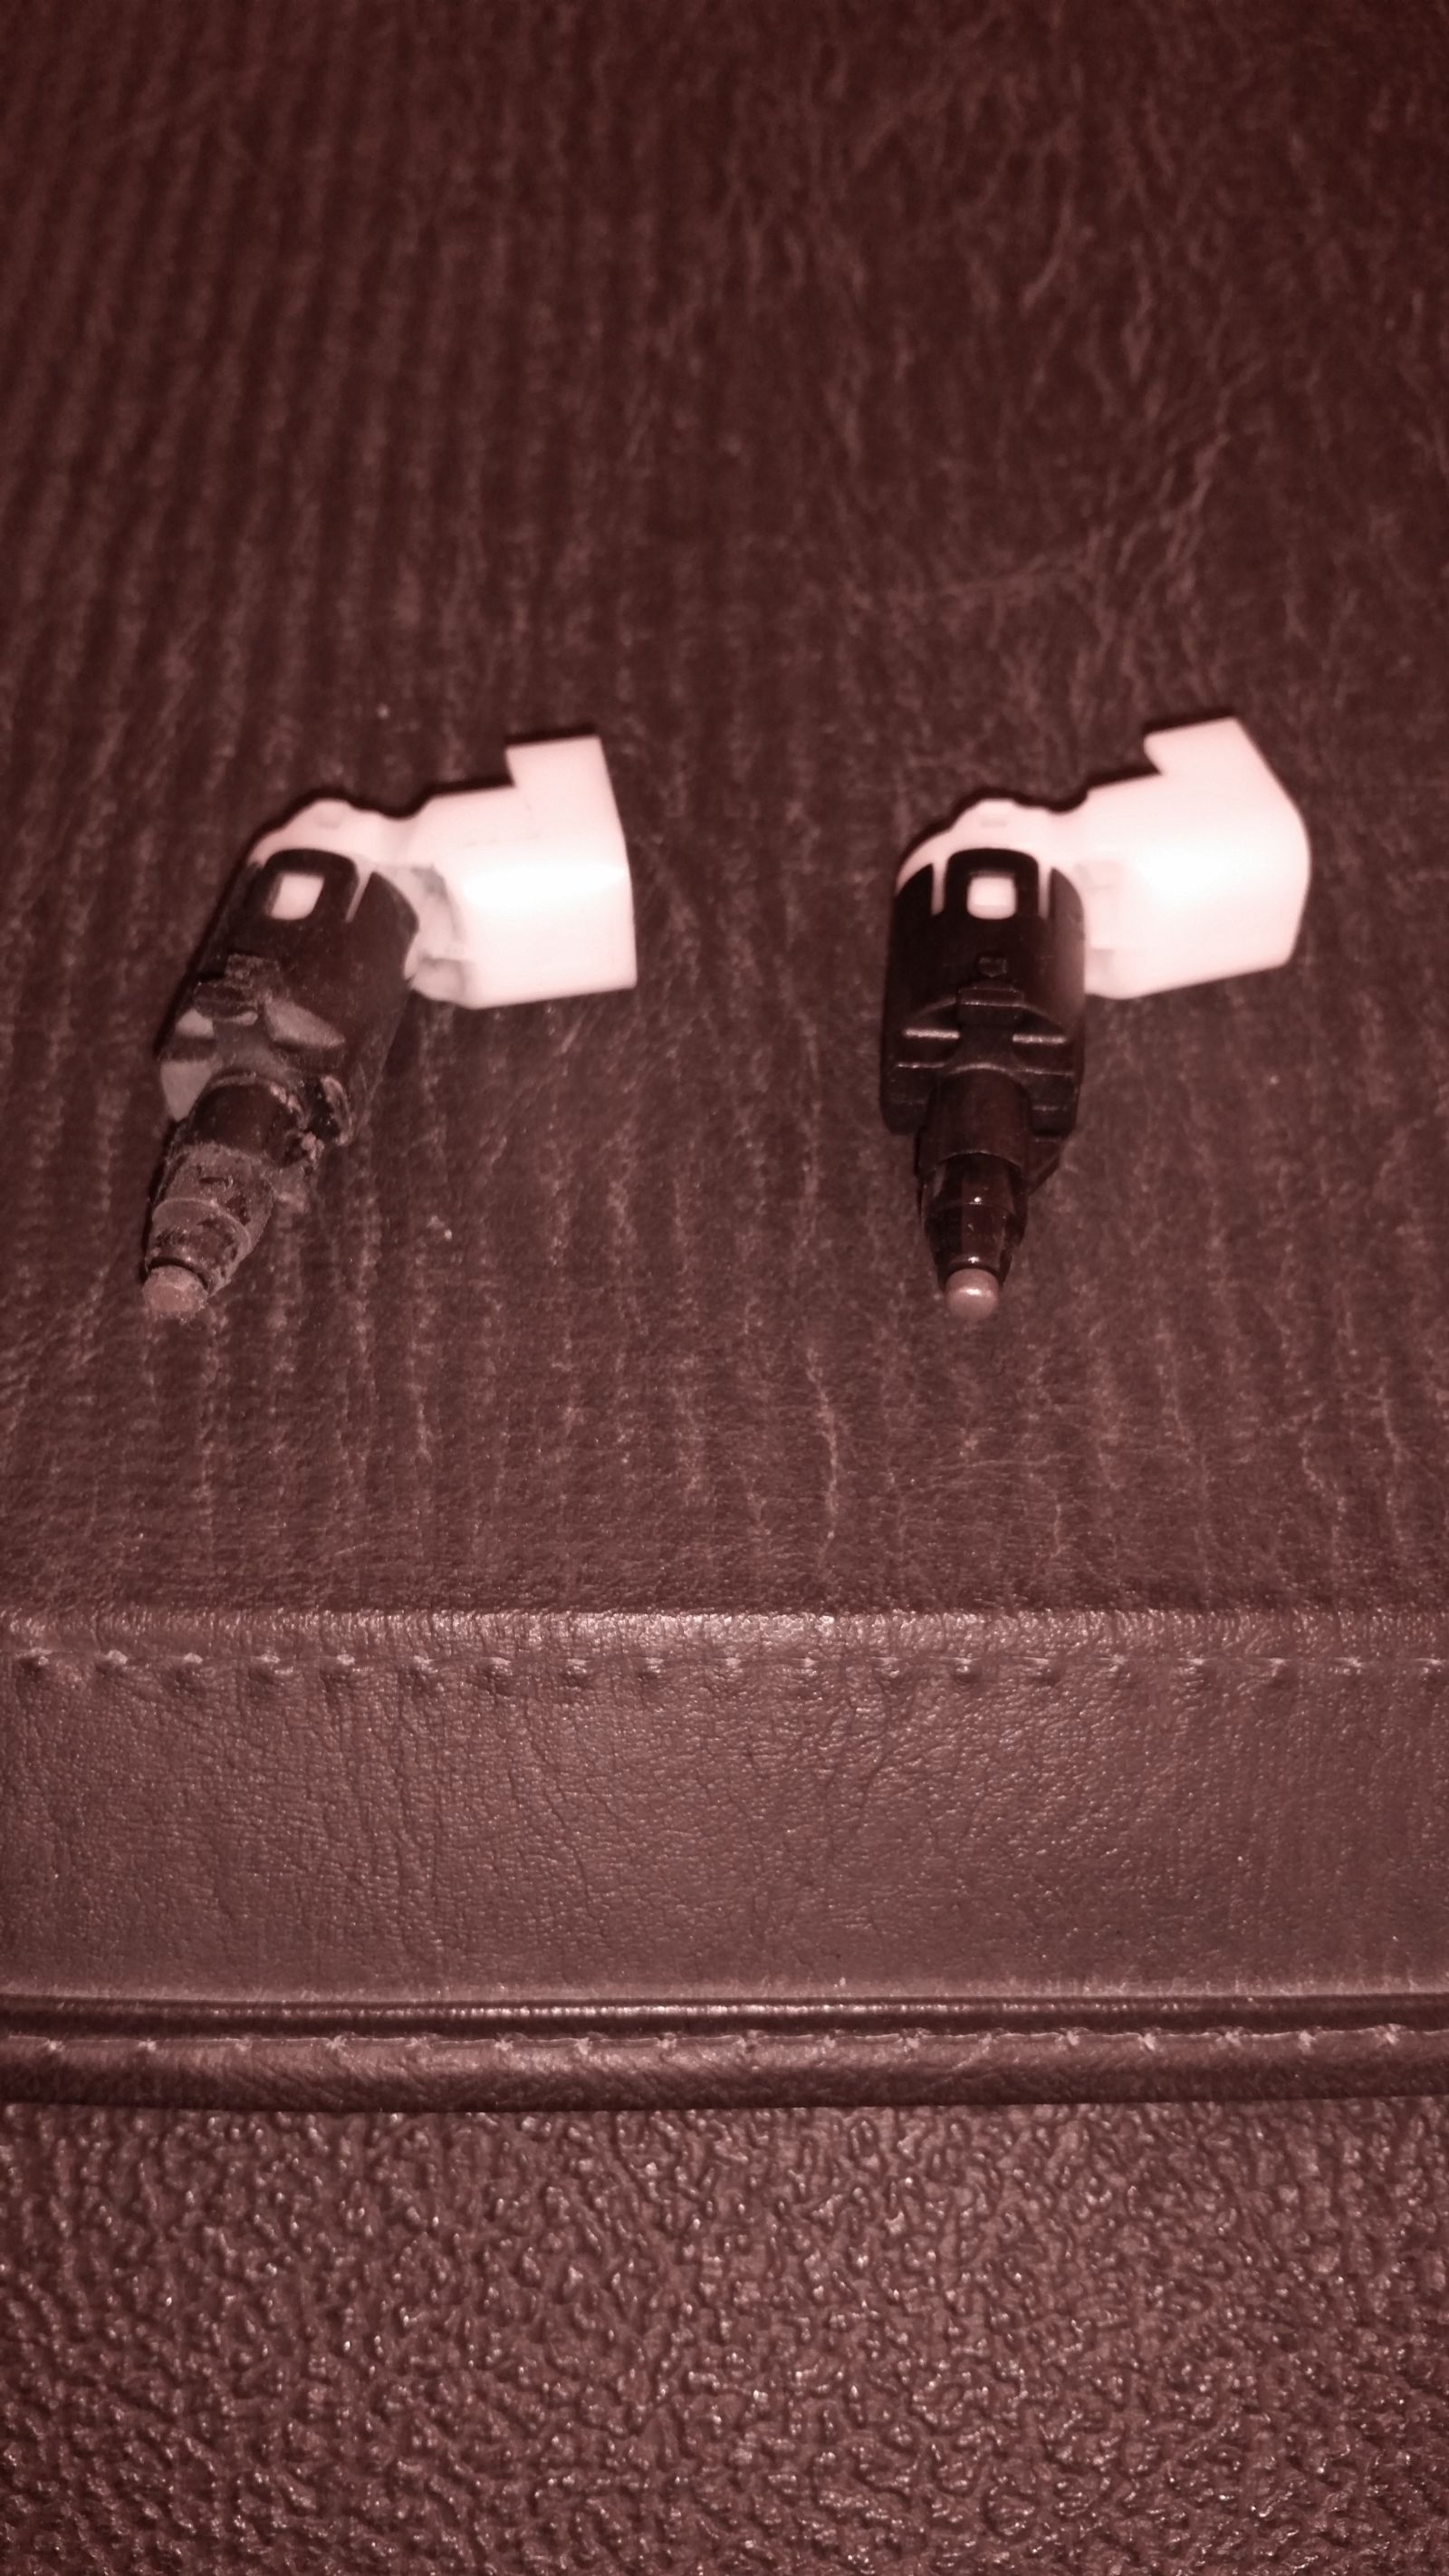
Looking at the new switch we can see a triangle shaped locator pin at the 12:00 position (Relative to the connector), a small rectangular pin at 6:00 and two tension tabs at 3:00 and 9:00. I infer that this is a twist-lock and to get the old switch out I will have to push the switch up into the latch then rotate.
Unfortunately the combination of not being able to apply enough leverage on the switch, with my arm bent 90* in the door cavity and the switch being boxed in by the three sides of the door (Inner, Rear, Outer sheet metals) and the bottom of the latch, interfering with rotating my hand, meant I couldn’t get the switch out.
I decided to unbolt the latch from the door so I could move it closed to the door opening and get a better grip on the switch. The latch is held in place with three T-27 Torx bolts.
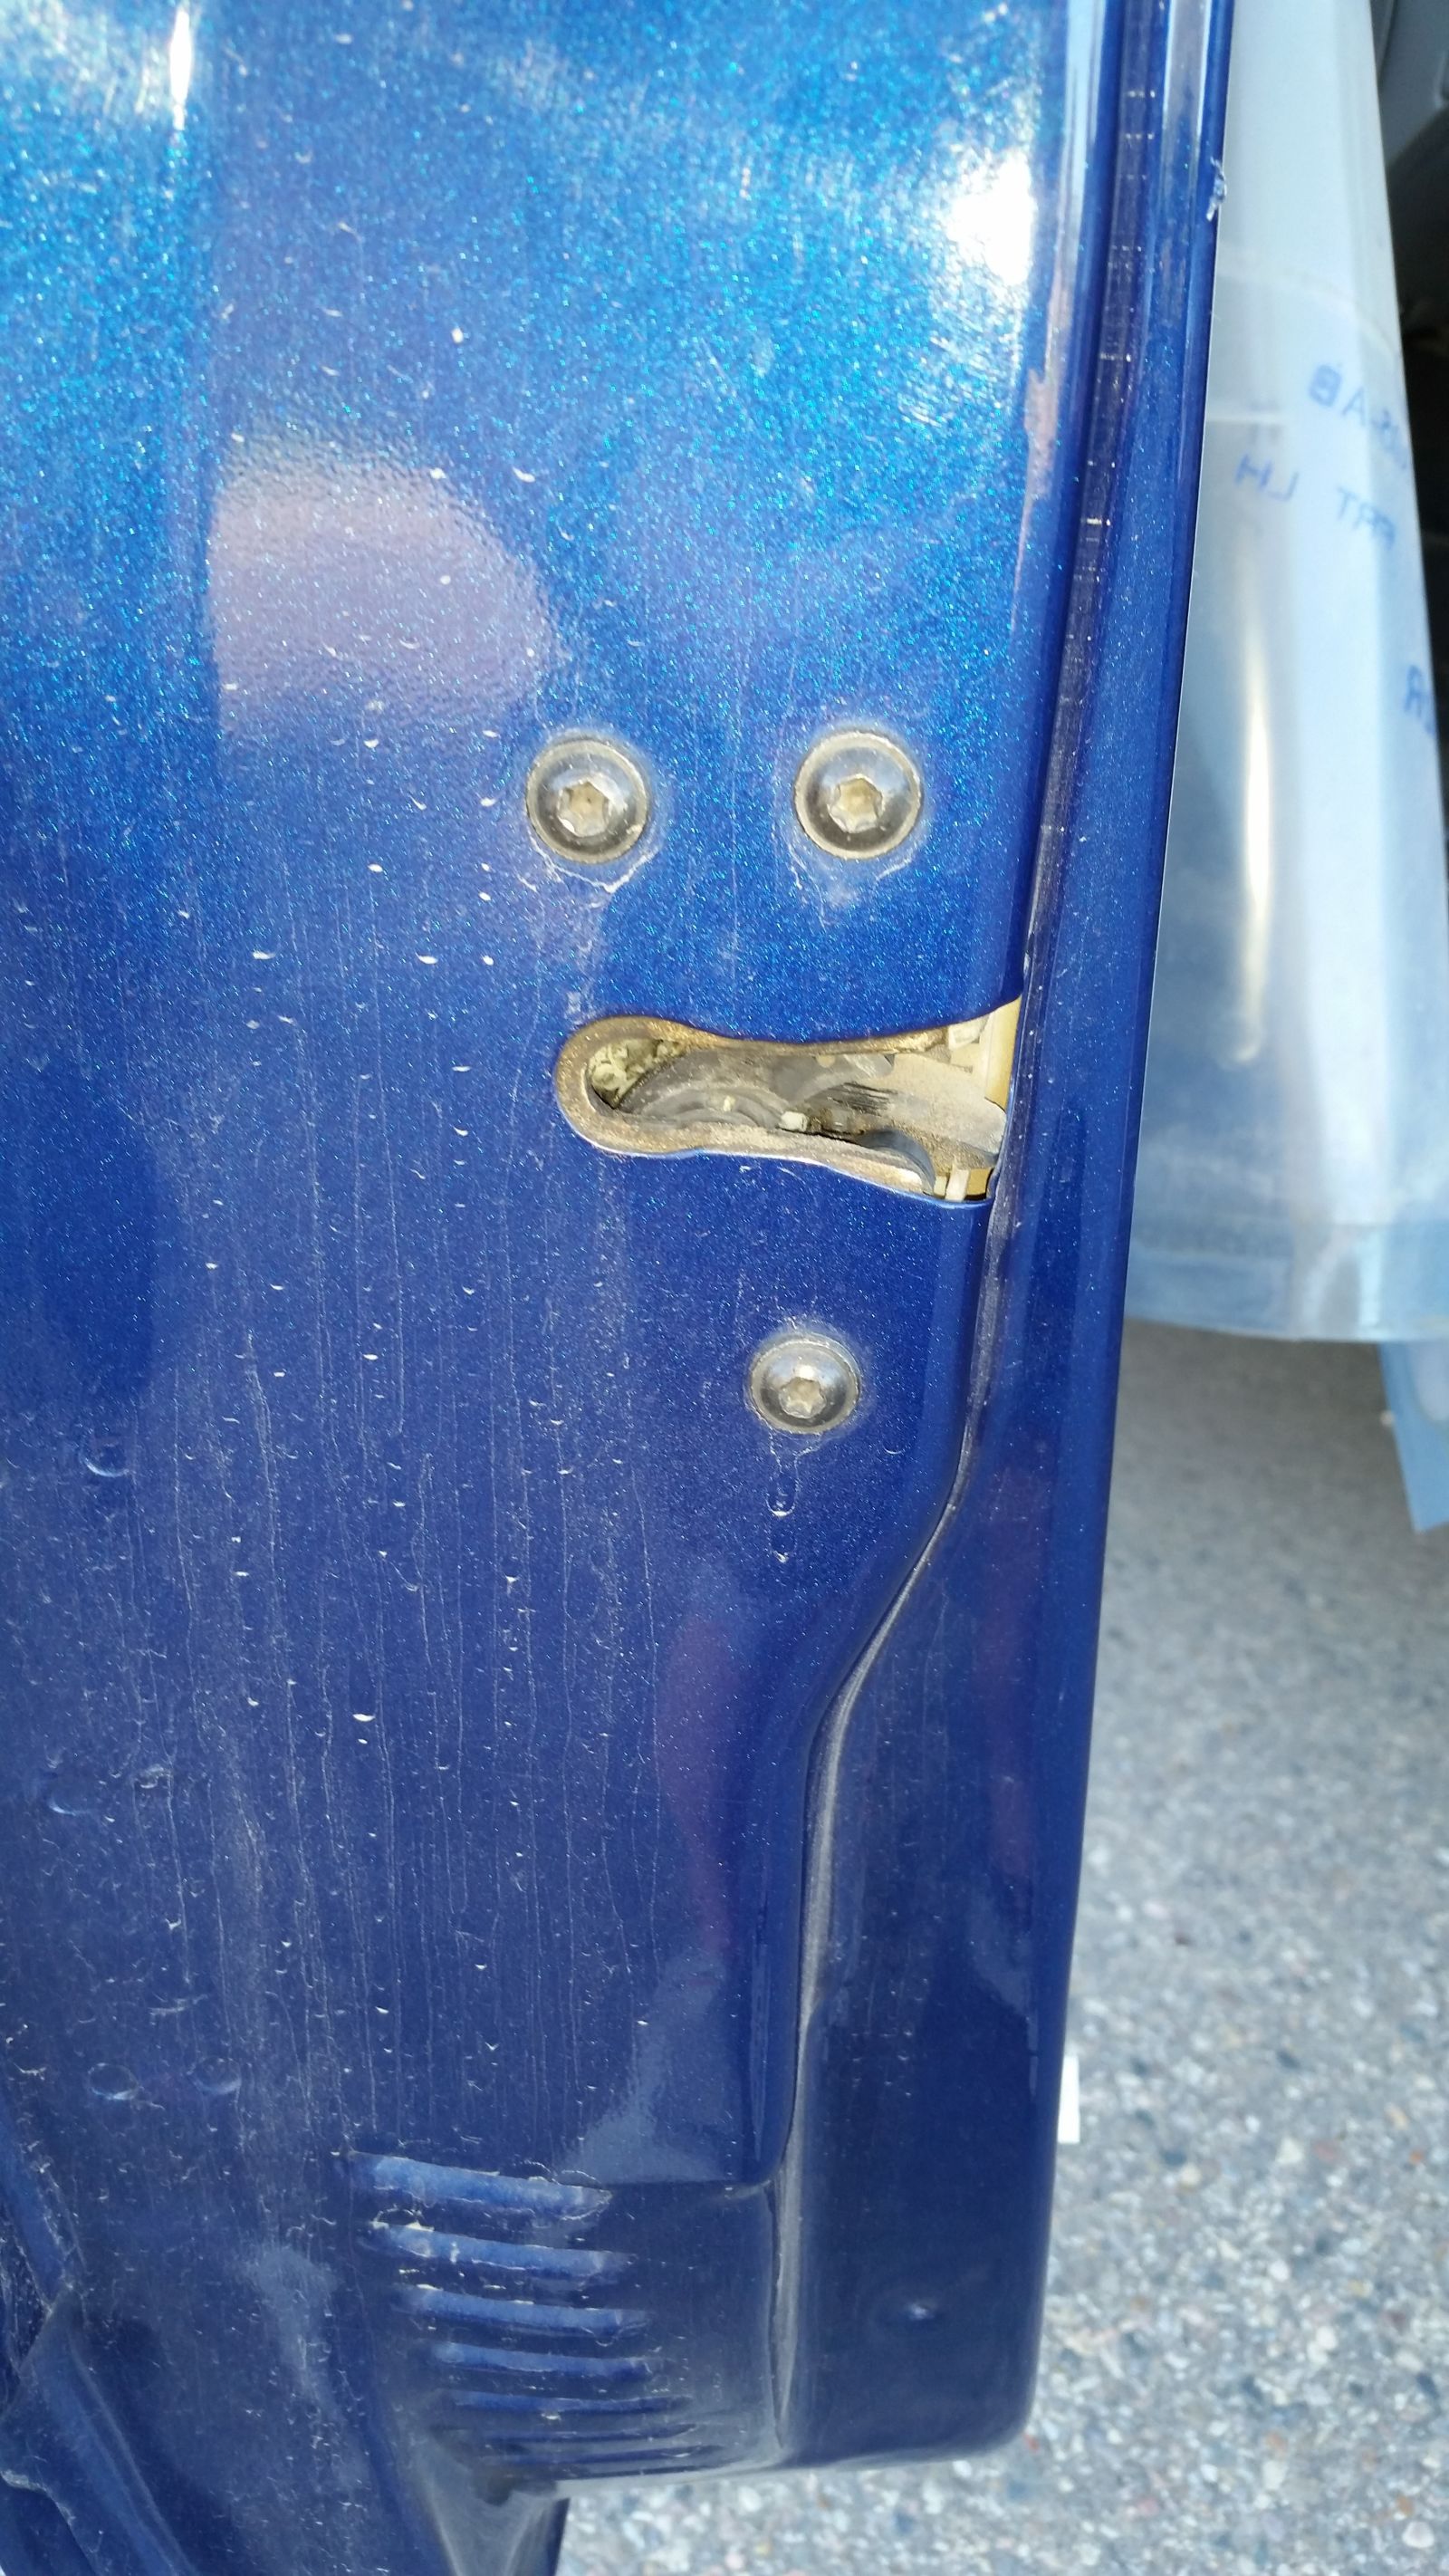
These bolts have blue thread-locker on them. I removed the top two bolts then my T-27 driver rounded off, so I grabbed a different bit and driver. With the bolts removed the latch can be moved closer to the door opening, even with the rods for the lock pin, and key cylinder, and the cables for the exterior, and interior door handles still attached.
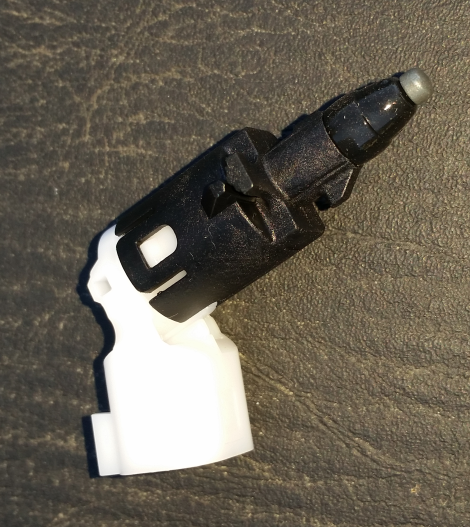
The switch twists out 180* with the connector rotating through towards the outside of the truck then the rear of the door. (If looking down from above Counter-Clockwise)
Installing the new switch, with the connector pointed towards the rear of the door, you press the switch up into the latch the rotate the connector outwards then towards the front. (If looking down from above Clockwise)
Plug in the harness into the switches connector. Bolt the latch back onto the door.( I did not apply new thread-locker) Stick the plastic sheet back onto the door it should still be tacky. (If not then apply some adhesive)
To put the door panel back on start with the bottom hooks then work your way up applying even pressure to the panel while lifting the panel slightly to seat the hooks as you work your way up the panel.
Put the screws back into the panel. When reattaching the window crank handle make sure it is clocked properly so that it doesn’t hit your knee when it’s both full-up and full-down, this may take 2-3 attempts at rolling the window down and up, to get this correct.
Finally check the operation of all door functions separately, the latch should latch and hold the door closed, lock and unlock the door lock pin, lock and unlock the key cylinder, open the door with the exterior handle, open the door with the interior handle, and most importantly the dome light should turn on.
Job done! Hopefully this should solve my cold weather lighting problem. Including getting all my tools out, taking pictures of the process, and putting my tools away this job took me 1.0 hour, which is not bad, very close to book time.