Start with a stock CX500 front end

Remove everything


Add clip-ons, lower the headlight with aftermarket clamps, and remove the broken gauges.

Observe the worst seating position ever and figure out how much material I’ll need to remove to put the clipons above the triple tree.
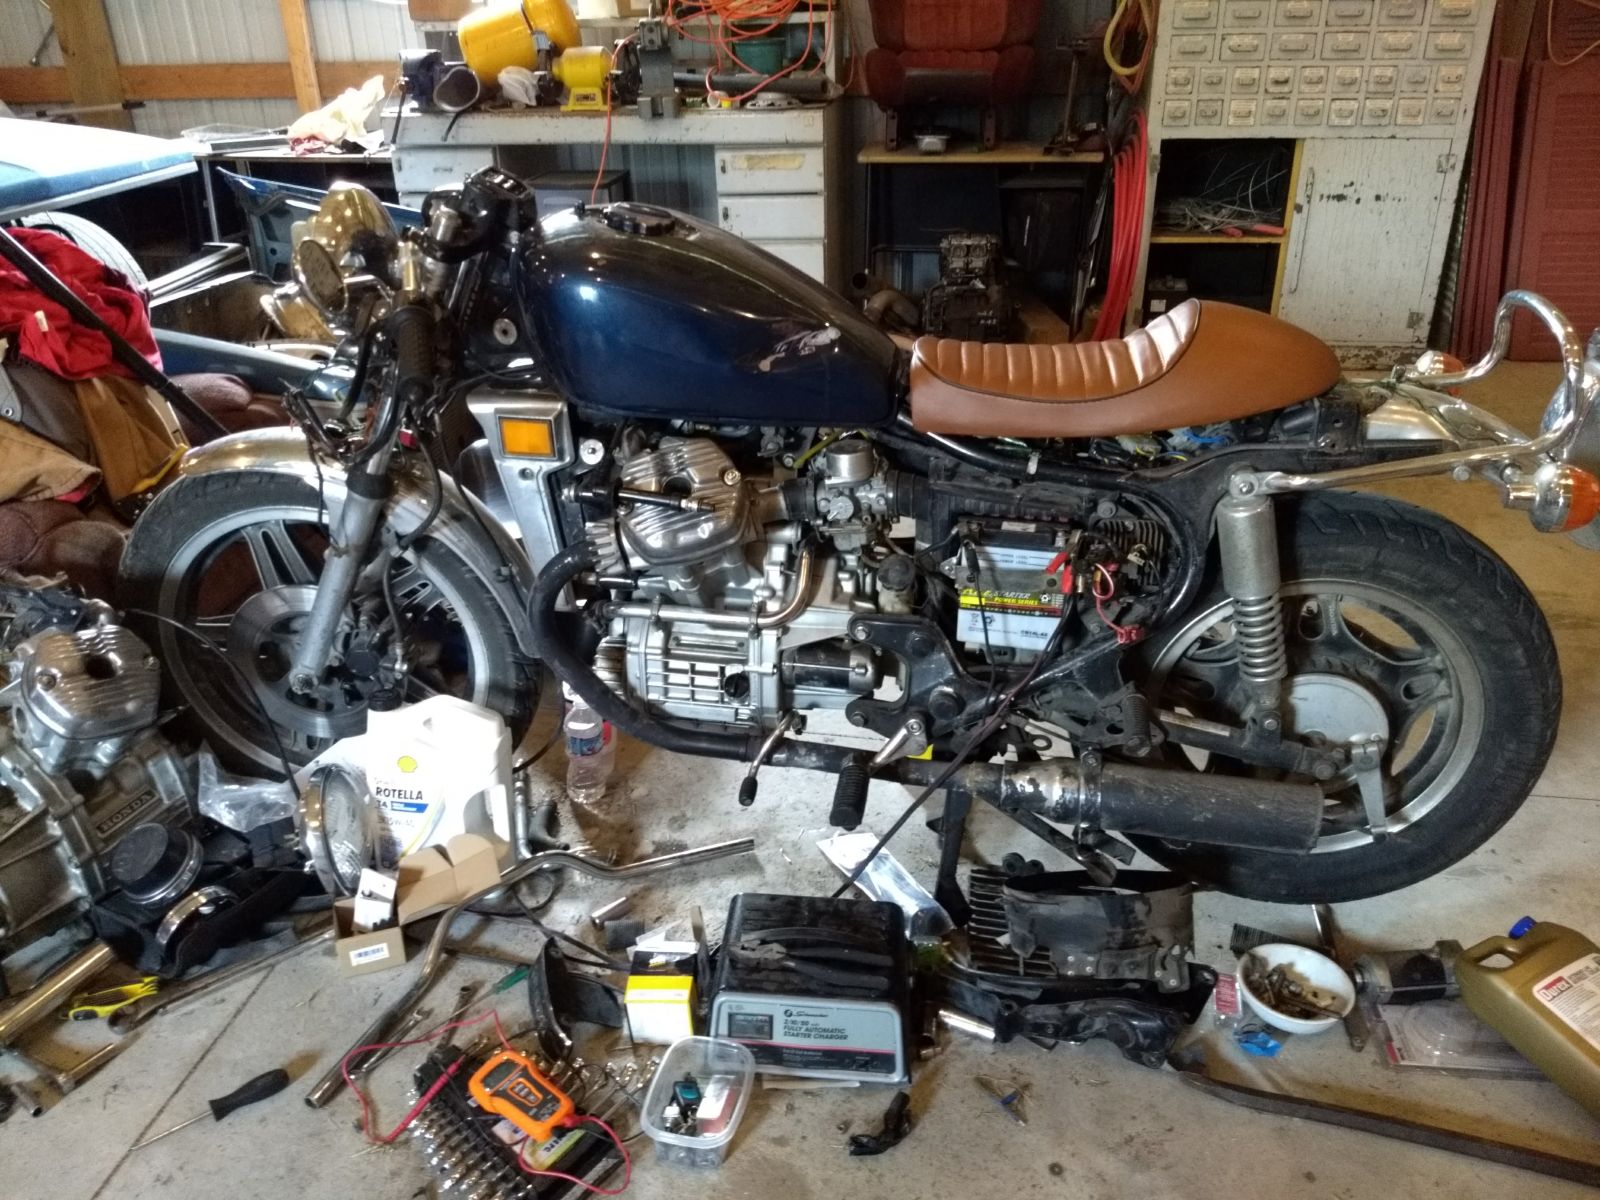
This is what the bike looked like yesterday morning.Test fitting the new seat, front end is all done, things are generally well put together. Annoyingly I was getting no spark with the new engine, so...
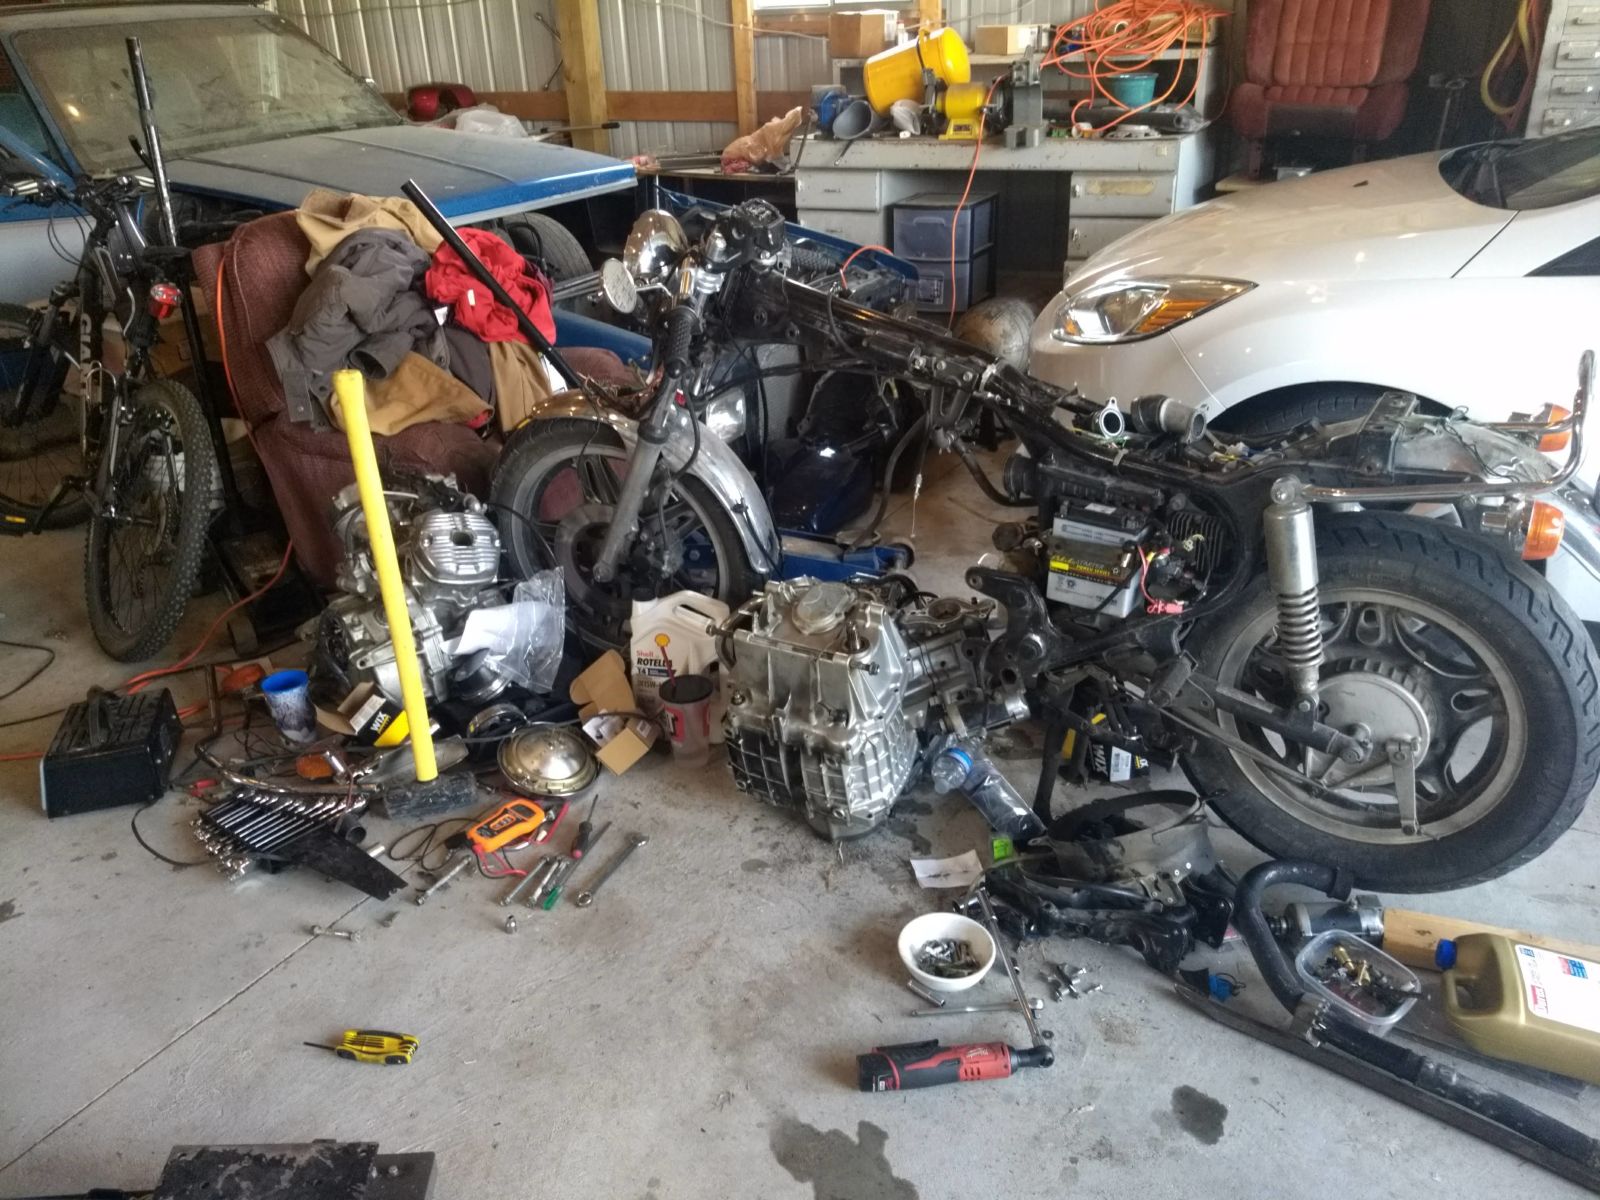
Here we are 2 hours later. Going to be swapping the stator from my old engine, which means buying and waiting for a $20 rear cover gasket to arrive. Yay.

I also started stripping the rear end.The section of frame behind the shock will be all removed. The carbs are also pouring gas from the fuel feed tube so I need to pull them apart and replace the o-rings. Yay?