

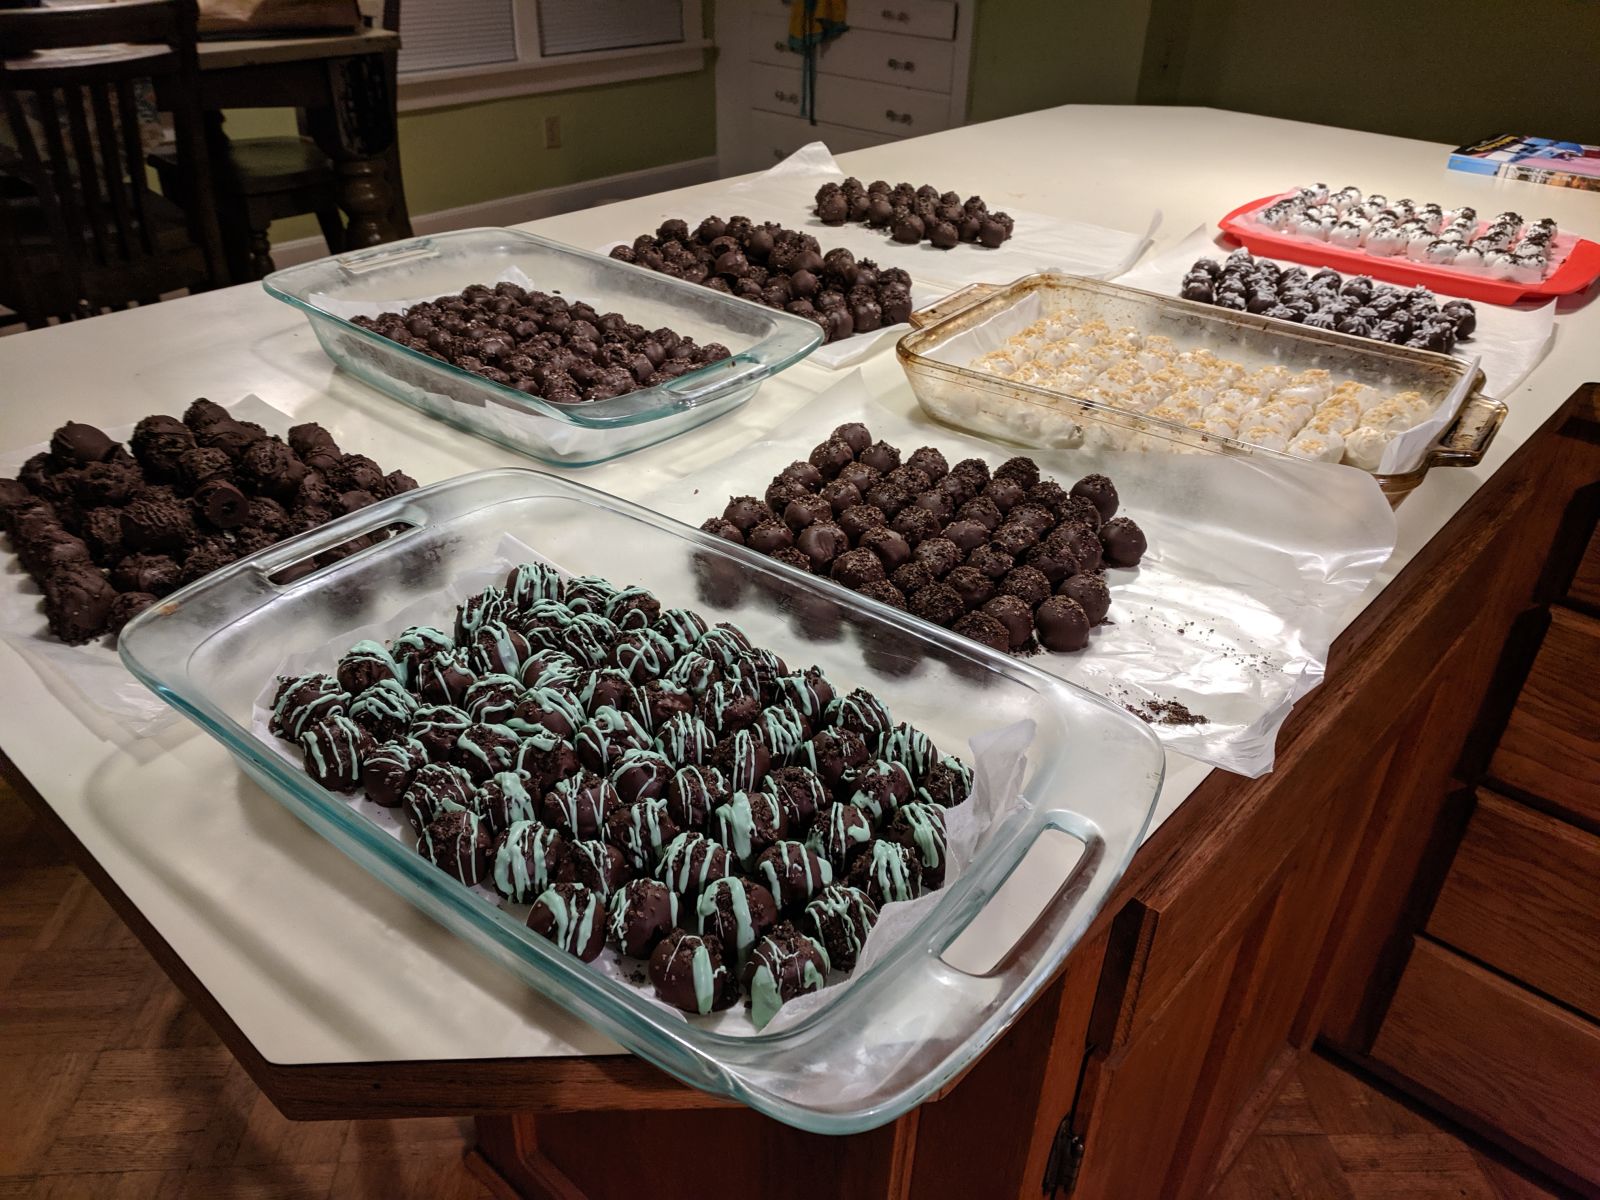
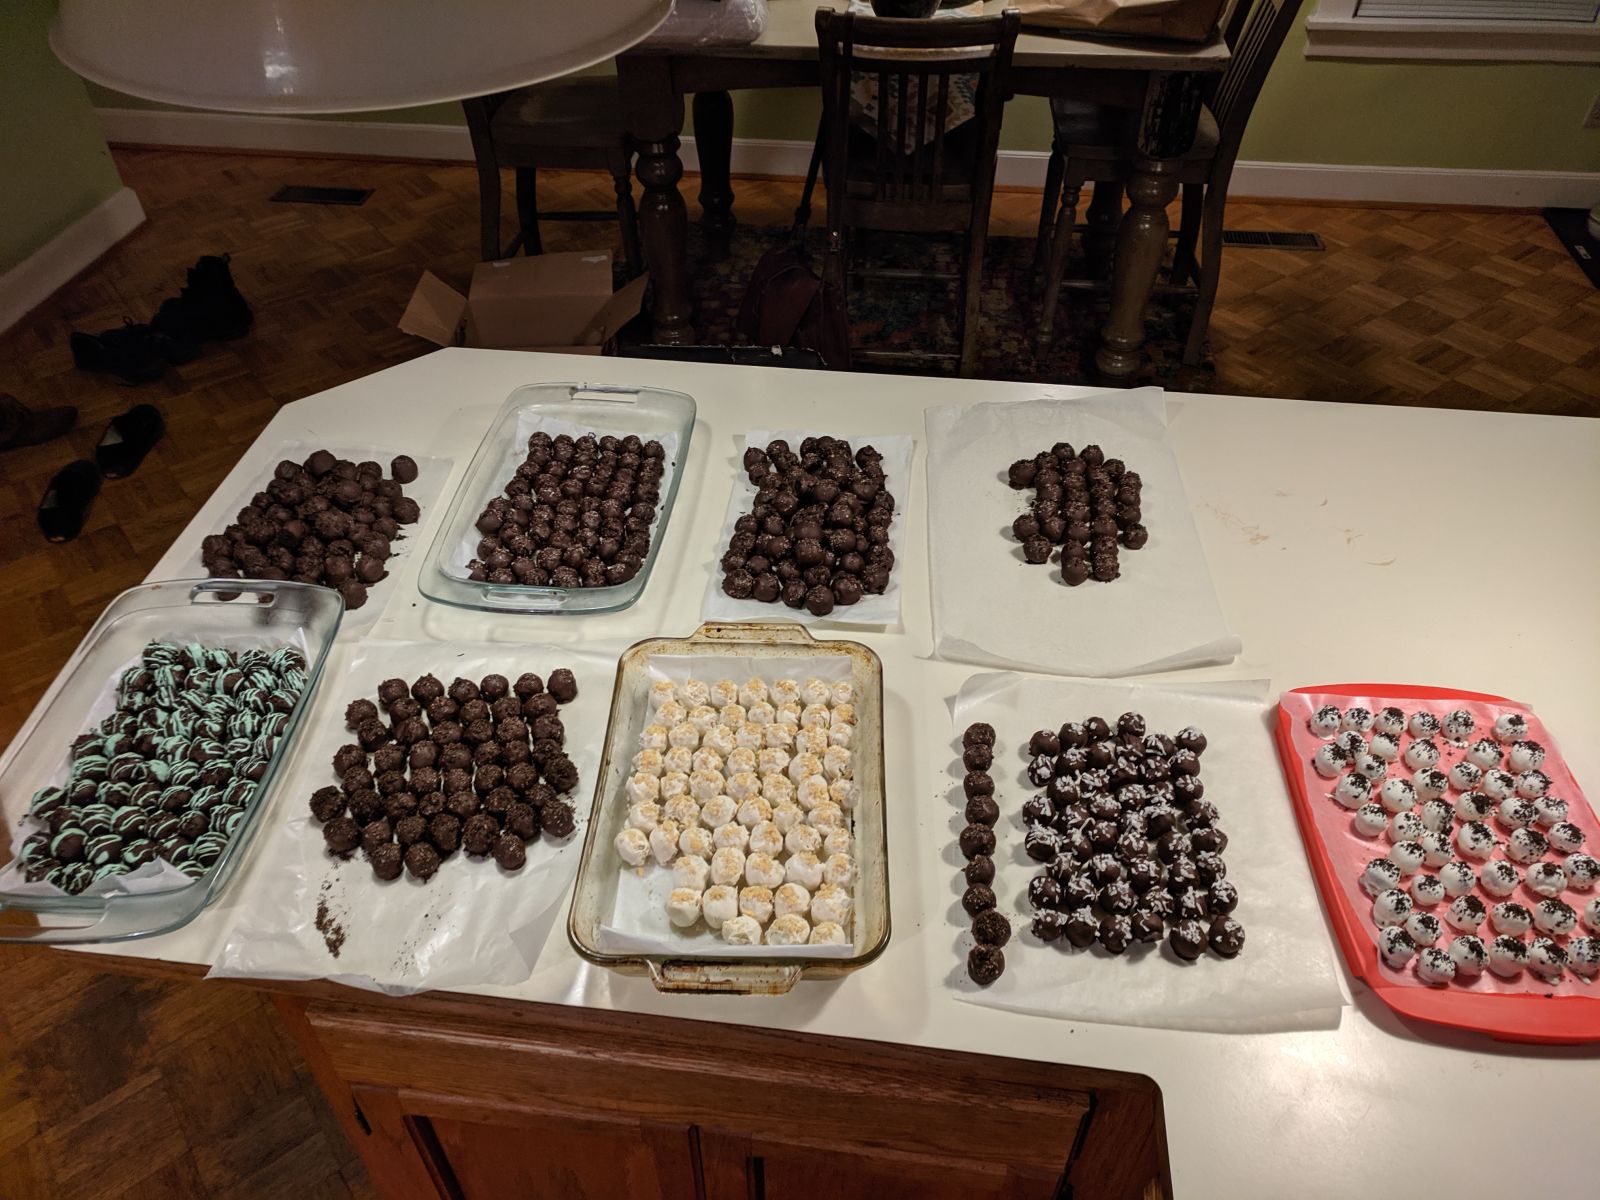
Excluding the ones I’ve eaten along the way, this is about 470 truffles in total.
Flavors this year were:
- original
- chocolate
- dark chocolate
- peanut butter
- mint
- lemon
- coconut
- latte
I’ve been making these every year since 2011. Some of you have asked for a recipe. I will do my best, as this is a heavily abbreviated version of what I did. Most of you do not and should not be making hundreds of these. If it were making one batch, it might be two hours of work (excluding refridgeration). So naturally, this took me nearly twelve for all these.
This is for a single batch:
Ingredients:
- 3 lbs chocolate melting wafers
- 1 block (8 oz) of cream cheese
- 1 package (15.25 oz) of your preferred Oreo flavor
Big notes here: RATIO MATTERS! 8oz of cream cheese per ~15-16oz of Oreo is the ratio you want to stick here. You may notice that various flavors come in various weights. The “family size” original I bought was 25 oz, so I used 1.6 blocks of cream cheese (13 oz), and for the latte (10.1z), I used ~6oz of cream cheese, and so on. Adjust accordingly. Melting wafers are cheap and stay good forever, don’t be afraid to buy too much. Use the bulk food section for bigly savings. Do not use ultra-soft/whipped cream cheeses. X-brand is best.
Tools:
- double boiler/small pot and pan
- rubber spatulas (1 rigid for mixing, 1 flat or concave for dipping)
- long dinner fork
- wax paper
- ice blocks/frozen gallons/bags of frozen vegetables
- food processor (do not use a blender), or a large gallon ziploc bag
- deep mixing bowl that tapers at the bottom
- butter knife
If you are missing some of most of these, just use whatever you have around. That’s pretty much how I got here to begin with.
[Health/hygiene disclaimer: you will be handling many surfaces, products, and tools. Wash your hands regularly, make sure your surfaces are clean, and keep your hands as dry as possible. Always have paper towels within reach, it will get messy.]
1. Separate each Oreo.
2a. IF YOU HAVE A FOOD PROCESSOR:
Throw the separate cookies in the processor, equipped with the propeller-looking spinny blade thingie. Use the pulse function for a few seconds at a time. Crush until as fine as you desire. [I do not recommend them too fine, as it will dull the flavor of the final product].
2b. IF YOU DO NOT HAVE A FOOD PROCESSOR:
This is the fun part. Throw them in a gallon bag, and....
SMASH IT WITH A HAMMAH!
or use a rolling pin, crush them with your hands, etc. This actually makes for a superior truffle, as you get lots of irregular chunks of cookie the final truffle.
3. Throw the pulverized cookies in a deep bowl that tapers sharply at the bottom. Too wide of a bowl will be a pain in the ass to mix. Too shallow in depth will mean too messy when mixing.
4. Cut up the block of cream cheese with your butter knife into 6-8 chucks. Add into the bowl.
5. Time for the firm spatula: begin jabbing down into the various chunks of cream cheese. This will pull in more and more cookie bits. This will take about 5 minutes with a good spatula, 20+ minutes with a crappy one. Eventually, your bowl with be a funky block. If you still see ribbons of cream cheese, push down on the problem area with the flat side of the spatula and “pull” the surrounding mixture through. You want this to be very consistent.
6. Have a flat pan ready with wax paper (aluminum foil will work in a pinch) atop near your mixing bowl.
7. Roll the truffles into little balls with the diameter of a quarter, or [insert relatable currency here]. Even a little smaller is good. Too big will be cumbersome to both roll in chocolate and to eat. You may notice that in some cookies are much stickier than others (mint, especially) and wants to stick to you and not itself. When the rolling become ineffective, pause and scrape off your hands with a paper towel and wash thoroughly and keep complete dry. Then begin again. Place spheres onto pan. Do not let them touch one another.
8. Throw pan into your fridge. These need to be COLDDDDDDD all the way through before you begin the dipping. I learned this the hard way: if you are using mint oreos, please put them in a sealable container when put into the fridge, otherwise, foods in your fridge will taste like mint oreos after a few hours. My asiago bagel did not taste great the next morning!
9. After at least six hours, or the next day: in a double boiler (a small pot half-filled with water with a shallow pan atop), crank the burner up to no more than 2 out of 10.
10. Throw a chocolate melting wafers into the pan as its heating. Just enough to where you can still see the bottom of the pan. Do not add too many to start, or you’re going to have a rough time.
11. With a new CLEAN flat/concave spatula, stir the chocolate. You must have patience. Do not be tempted to crank up the heat. Keep stirring until first batch of chips have completely melted.
12. With base chocolate melted, throw in two heaping handfuls more and stir in. Once those are completed melted, you’re ready to start dipping.
13. Remove spheres from fridge. Place the tray onto frozen item on your countertop. Ice packs, frozen vegetable bags, bags of ice, you can’t go wrong, but it must be frozen. THIS IS CRITICAL. YOUR TRUFFLES WILL FALL APART IN WHEN DIPPING INTO THE CHOCOLATE IF THEY APPROACH ROOM TEMPERATURE. THEY MUST STAY COLD.
14. Have a separate new trap and wax paper ready on another icy surface ready. You’ll find that when you dip these, they will be much larger and there won’t be room to put back onto the original tray. This will help the chocolate shell cool quickly and not thin out or mix with the truffle center.
15. One at a time, throw the sphere into the pool of chocolate. With the spatula, fold over a wave atop the remaining exposed truffle to completely engulf it. Then gently scoop it with the same spatula.
16. With your other hand, get that long dinner fork and get under the truffle. Shake your wrist quickly back and forth to shake off the excess chocolate. Do NOT bang on the side of the pan, the truffle will usually fall apart or become misshapen. You do not want bit of truffle contaminating your melted chocolate. Pause to add more chocolate when necessary.
17. Touch the tip of the fork to the surface of the wax paper and gently shake so that the truffle slides down. If it rolls off, it will still be delicious but have ugly fork marks facing up (see my lemon truffles). Garnish with sprinkles, crushed cookie, whatever before it cools. Do not let the truffles touch one another. It will trap heat and moisture and will ruin (read: be ugly or tear a big chunk off) one or both when you try to snap them apart.
18. Refridgerate overnight. Again, you want these colllllld all the way though.
Aaaaaaand... you’re done! :)
Thanks for reading.