

I got sent home to work from my dining table about five weeks ago, and, quite frankly, it’s been great. I do miss the social interactions with colleagues and students, but I’m weirdly super productive here.
I’ve also been pretty productive with Land Rover projects. I try every day to work on the Defender at least for one hour. It gets me away from the laptop and the Zoom meetings, and exercises both my body and the other half of my brain.
I’ve been getting a jump start on re-structuring our camping/storage situation in the rear of the van. The shots here are what it looked like before (I took those photos in Uganda, I think, not long after we bought the car.).
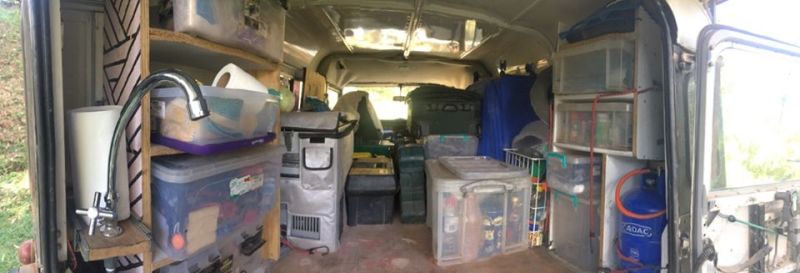

The original set-up was built by the previous owner around the 42L Snomaster, a large drawer between the wheel wells, a 55L water tank with pump, filtration, and a faucet, and the myriad plastic tubs on shelves. It worked for what it was, but had its limitations for sure. Crawling in and out to access the tubs and boxes was a pain, the lid on the fridge wouldn’t open all the way without hitting the roof, I wasn’t wild about having the propane inside, and there weren’t really enough tie-downs to keep our stuff from sloshing around in there.
So, out it all comes.
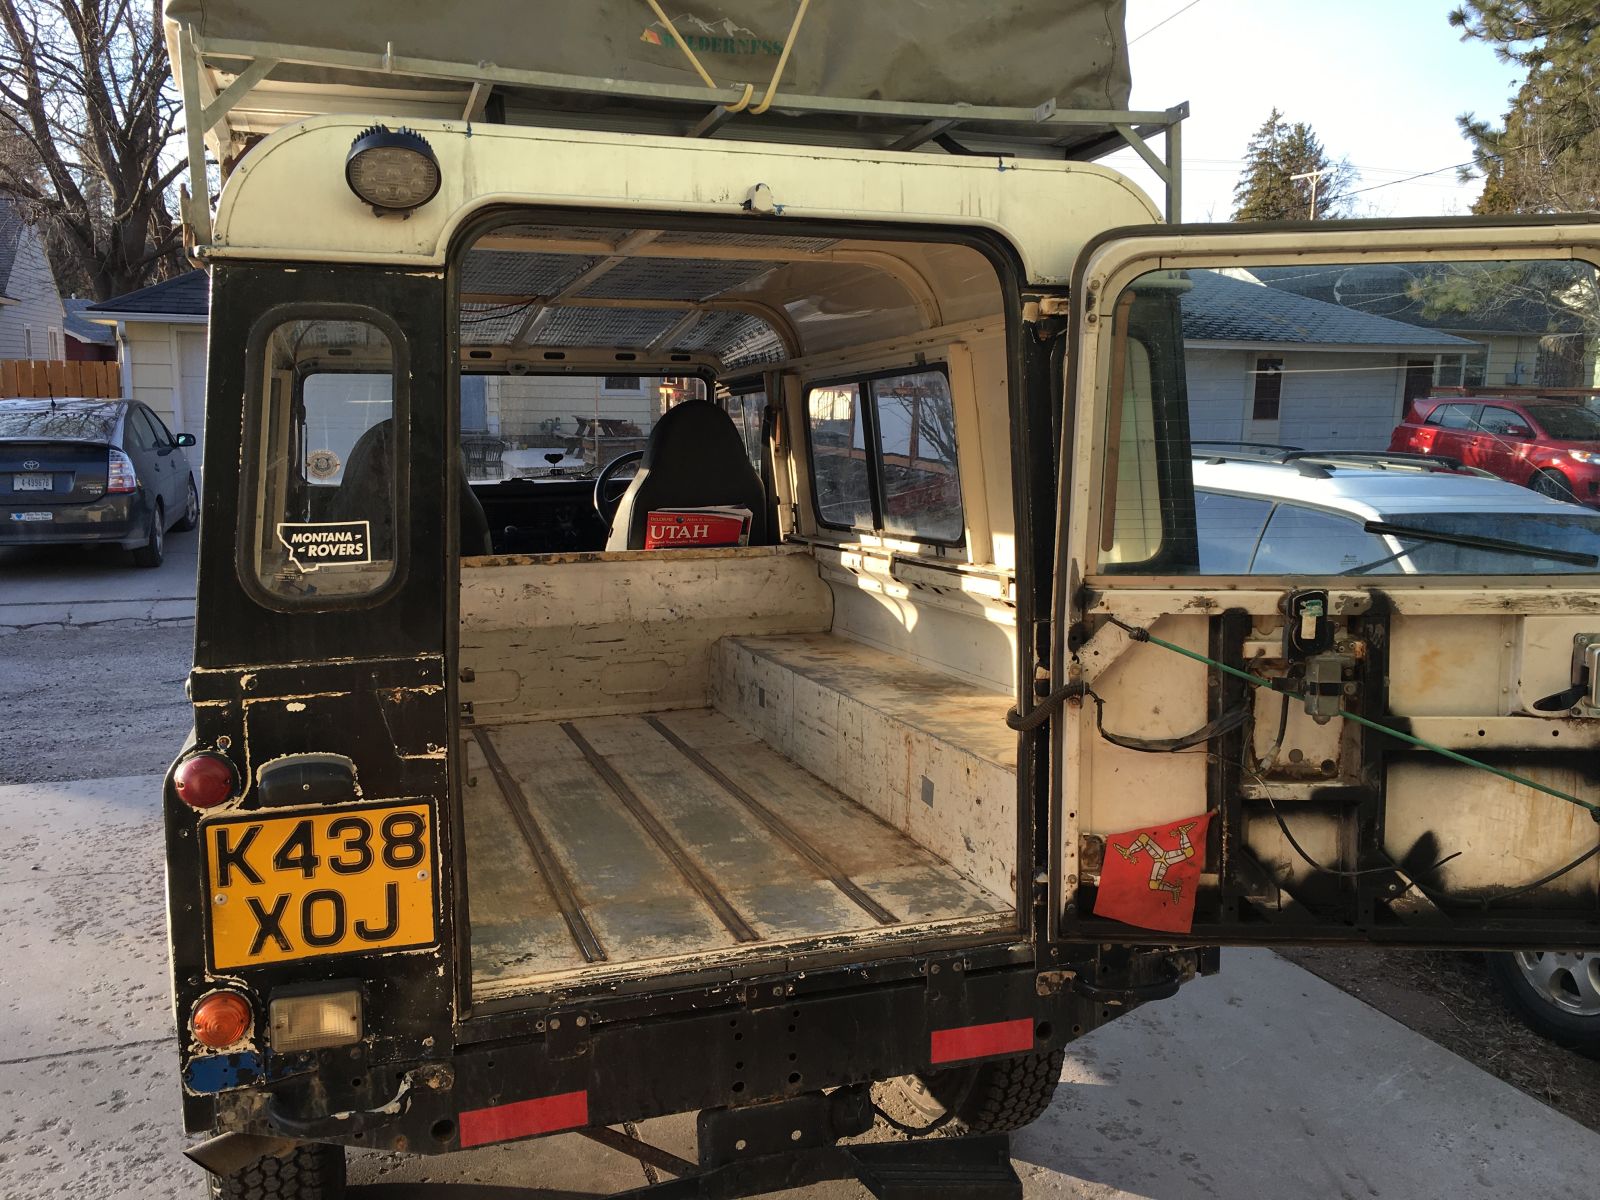
As you can see, there’s not much between us and the road, other than thin-gauge aluminum. No headliner, no carpeting, no... anything. So, insulation and sound deadening are first on the list, plus sprucing up the headliner situation.
Insulation-wise, I’m starting with a layer of off-brand Dynamat butyl-rubber sound-deadening material. In this case, “Mat 66" from Amazon. Made in Russia! Mat 66 sound-deadens you!
At first I was a little skeptical, since the adhesive backing didn’t seem terribly sticky, but once that stuff is slapped in place and hit with the heat gun, it’s not going anywhere. It’s easy to trim, and pliable enough to fit in odd corners and such.
The packaging claims that mashing down the “bubbles” on the foil side with a roller indicates when it’s properly installed. I couldn’t really get that to happen very well, but it seems to be staying in place so far, even on the ceiling. It took me about 3 hours to do the entire vehicle, except the floor and wheel wells. I’ve got different plans for those.
I scored some second-hand 110 headliners from a fellow Land Rover masochist enthusiast I met on the Montana Land Rovers Facebook group. Unfortunately, only two out of three of them fit, since his old Defender was the four-door, rather than the van.
I covered the forward headliner in a jaunty shade of turquoise outdoor fabric, and the middle panel in grey marine vinyl, the same material I used on the door panels I made. I’ll have to fab up a headliner section of my own for the final third of the roof, but that won’t be too tough. My upholstery skills are not the best, and the material I have isn’t really designed for it, but this Defender isn’t perfect, and it won’t ever be, so if there are a few wrinkles in the headliner, so be it.
Next up comes the flooring, and more insulation before moving on to the wiring and plumbing. Once that’s done, I’ve got plans for the interior build that I’ll share next time.