
With thoughts of a properly big trip starting to crystallize in my head. I have been trying to budget it out. Part of which is seeing what I need to get done on the truck over the next few years. So not wanting any nasty suprises I thought I would give it a couple of tests to see what sort of health the engine was in and if I need to think about rebuilding or refreshing at some point in the future.
The first test is one many would be familiar with, cylinder compression test. This is where a gauge reads the cumulative cylinder pressure as the engine is turned over on the starter motor. The second test might not be so well known but in my opinion is generally much more informative, this is a cylinder leak-down test.
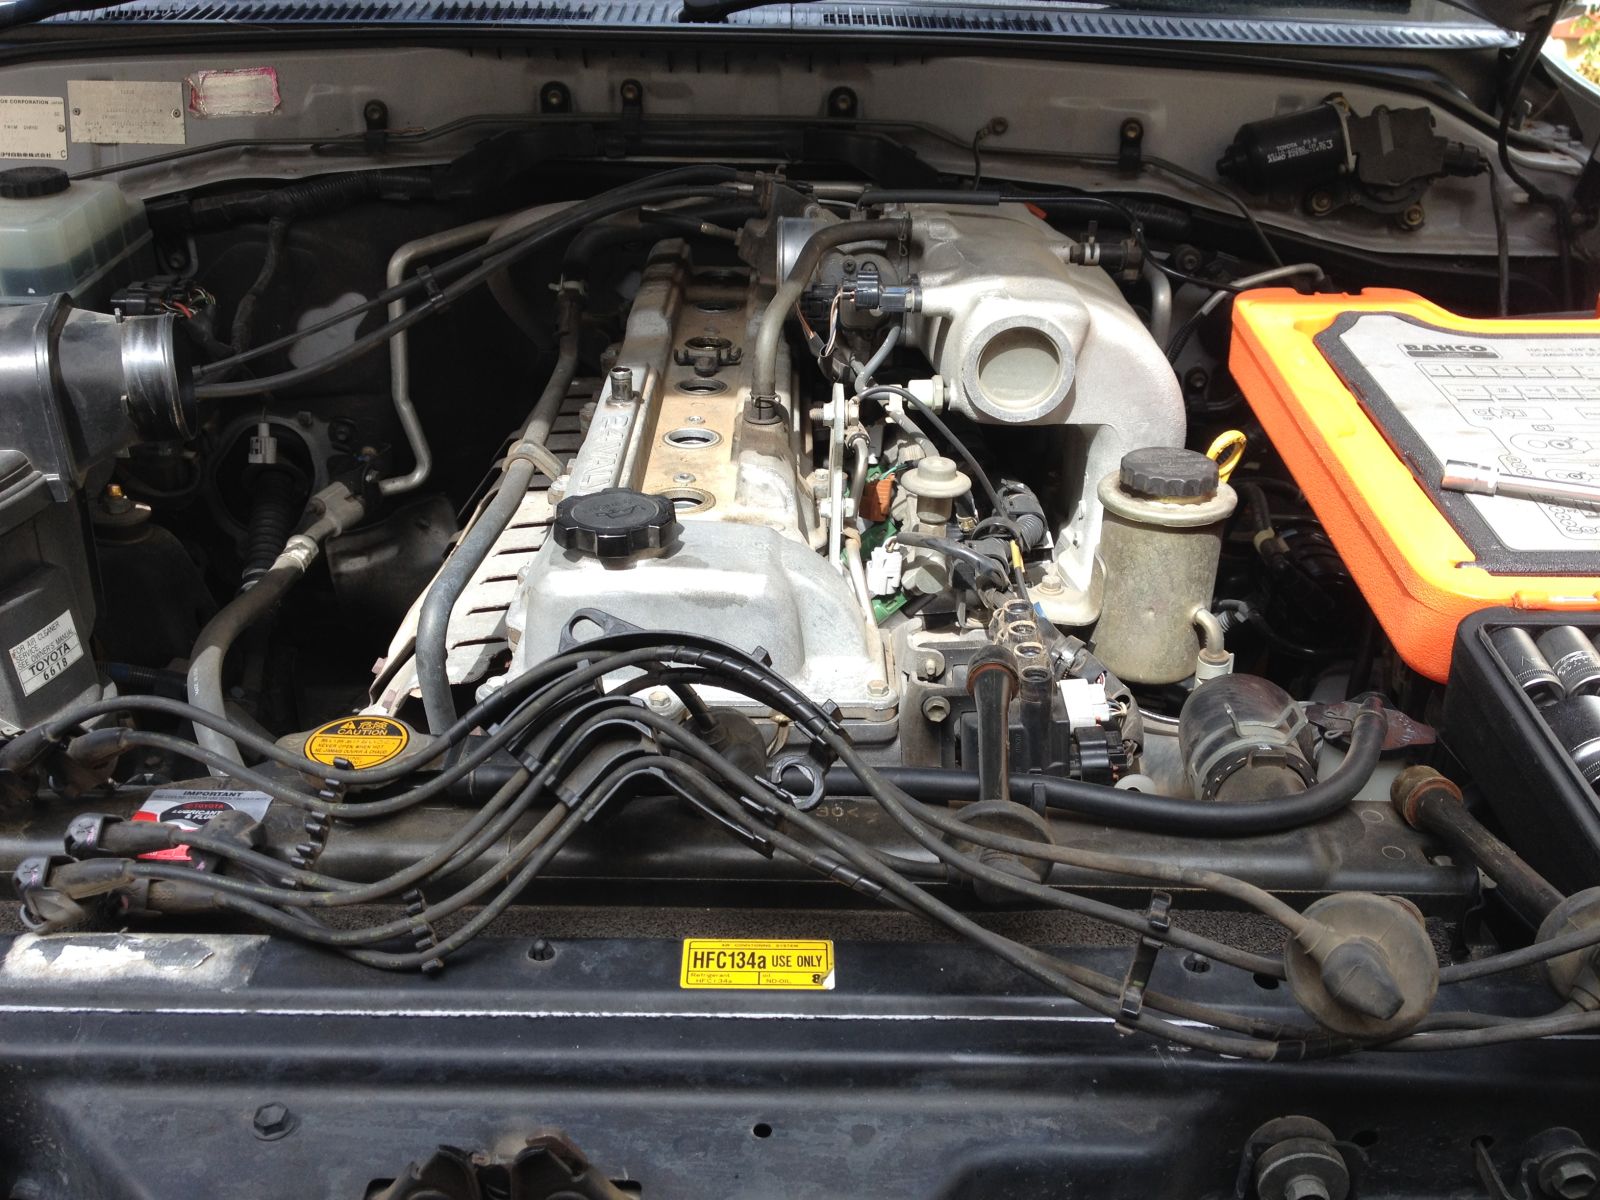
First up, as usual get your work place set with what you think you are going to need. A small ladder like this is very useful on anything of the Land Cruisers size.

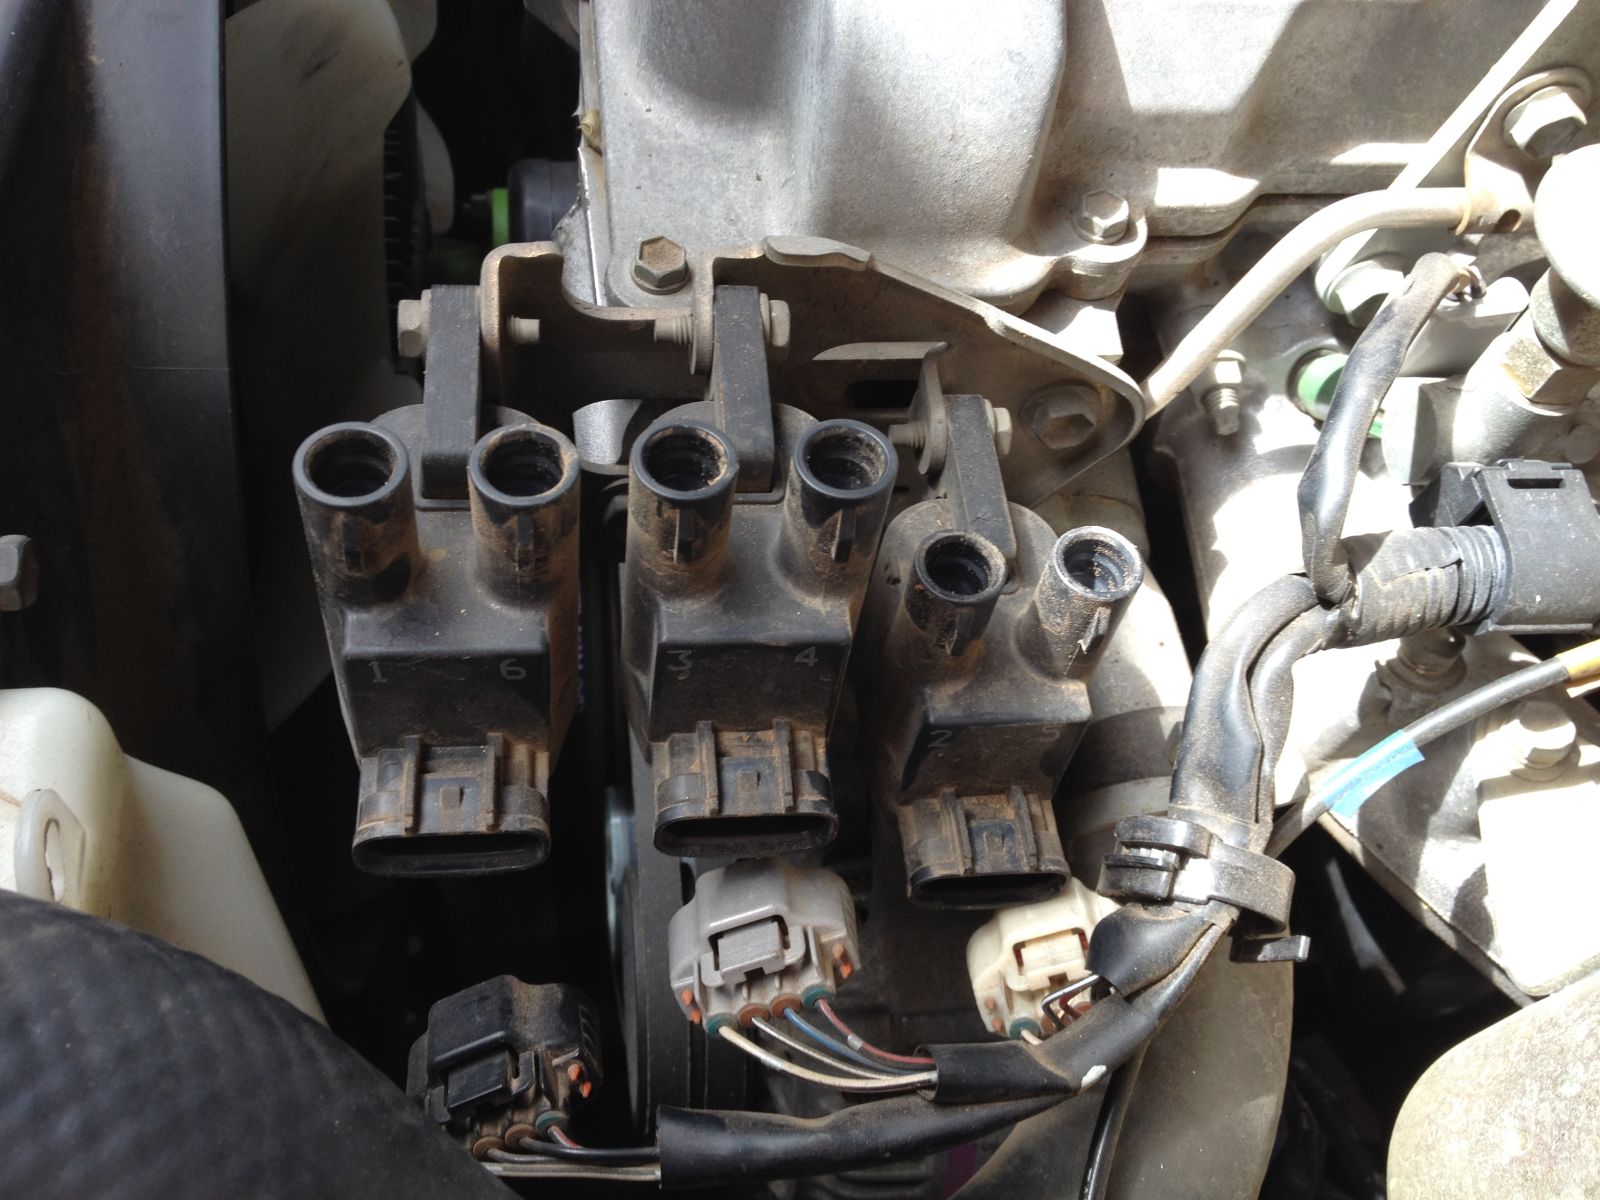
You need to remove all the spark plugs, so this means removing the intake hose, ignition lead covers and the ignition leads.
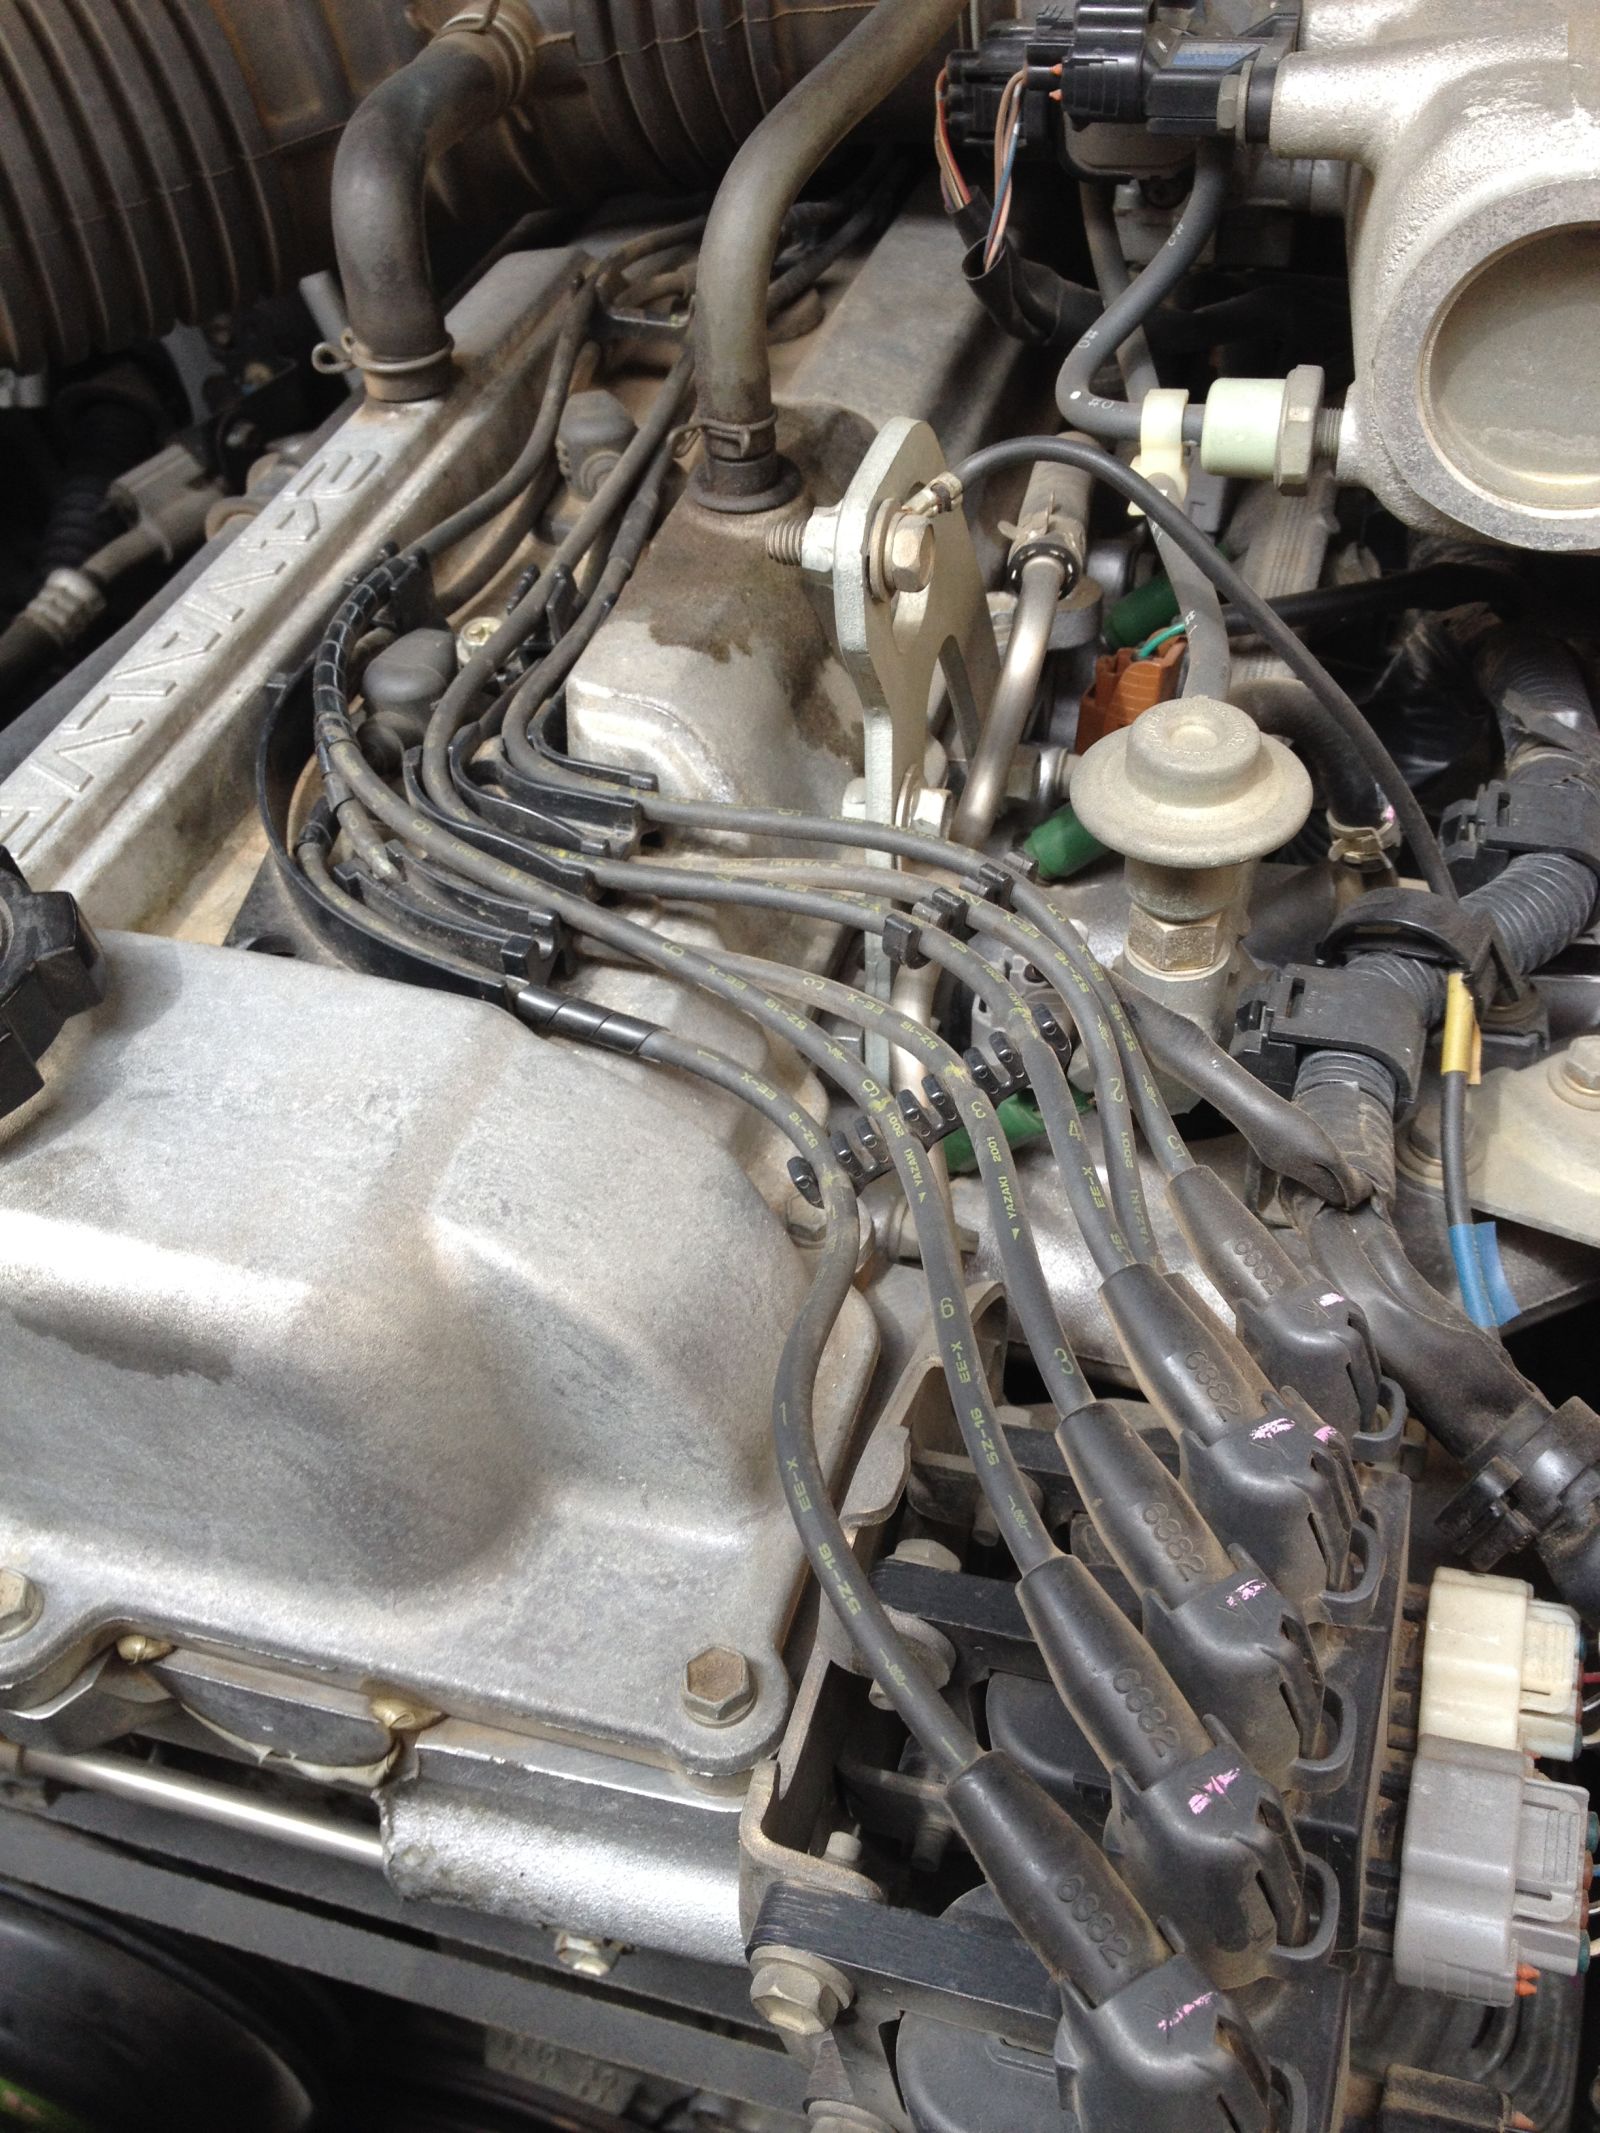
Thankfully Toyota have labled the ignition leands and the respective coils outputs from factory, so you can just take them off, if not just mark them yourself before dis-assembly.
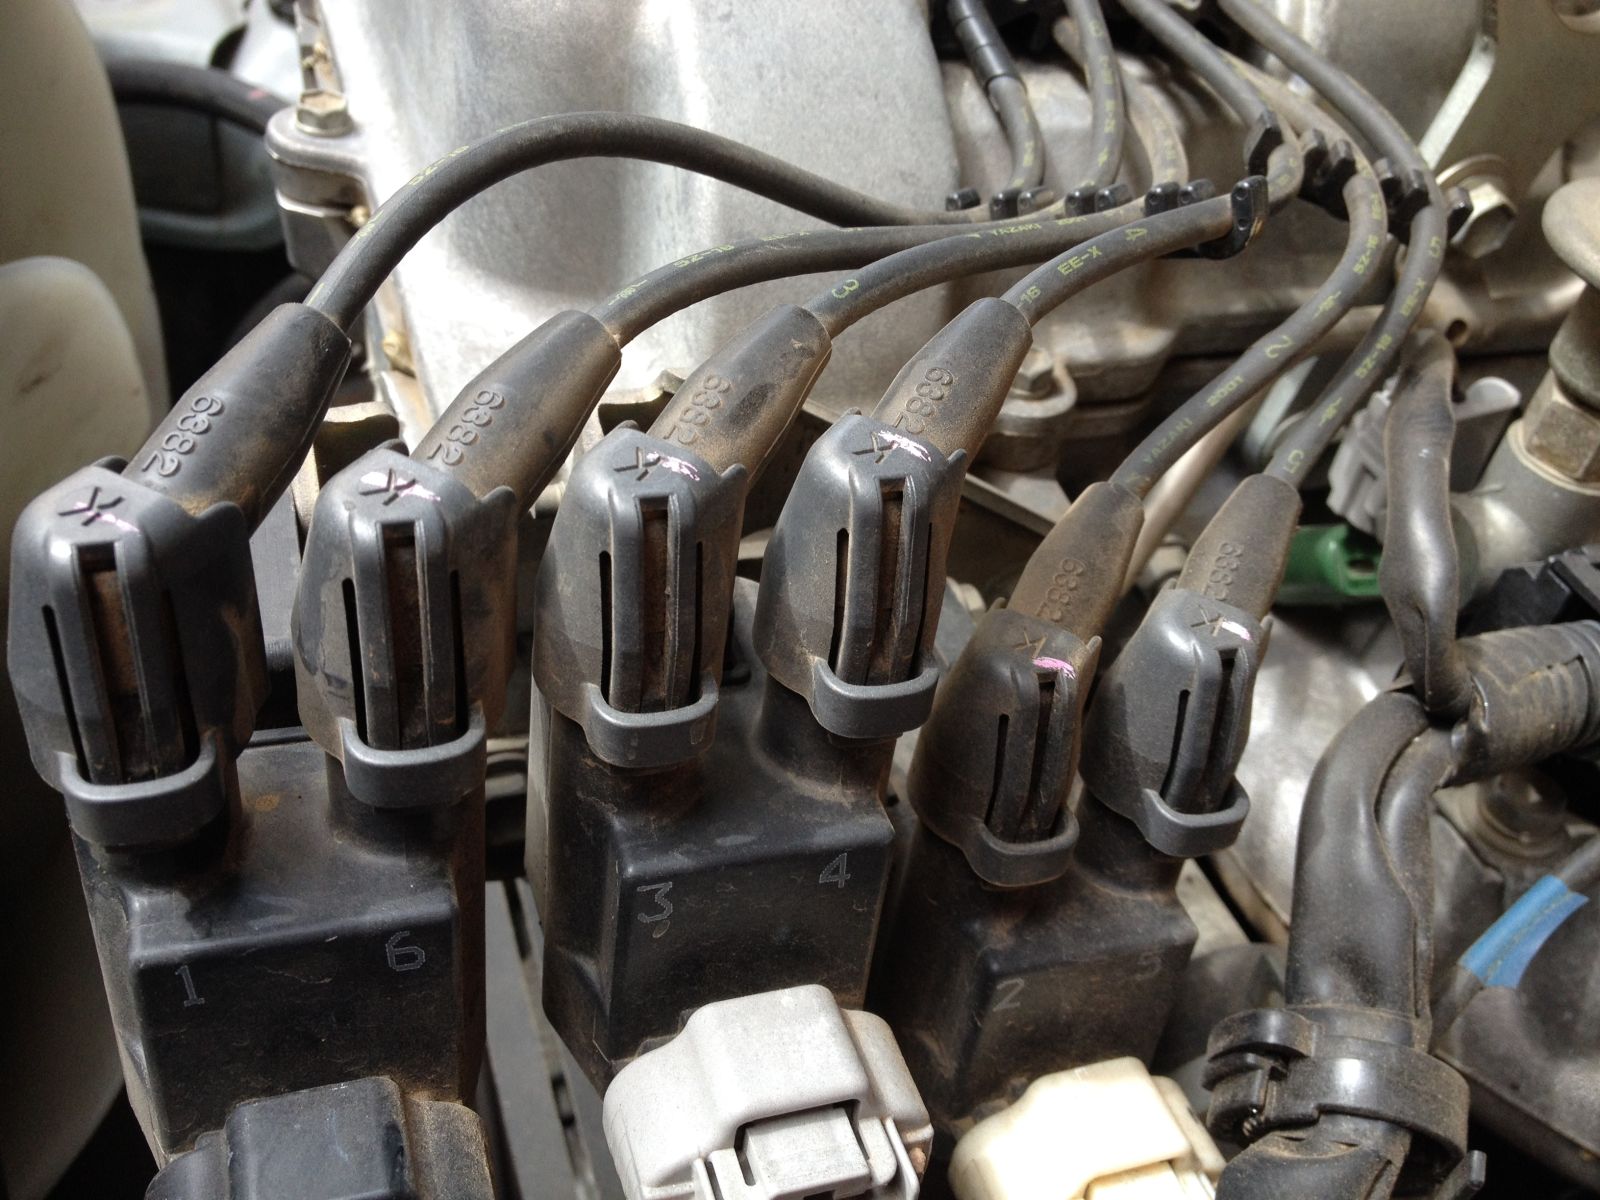
You can just take them off as a complete assembly.
Now take all the spark plugs out. Keep them in the order they come out so if any look different you can track which cylinder it has come from.
{these plugs are just a touch blacker than I would like, ideally they would be more grey for efficient combustion, more on this later}

Here is the old plug vs a new plug.
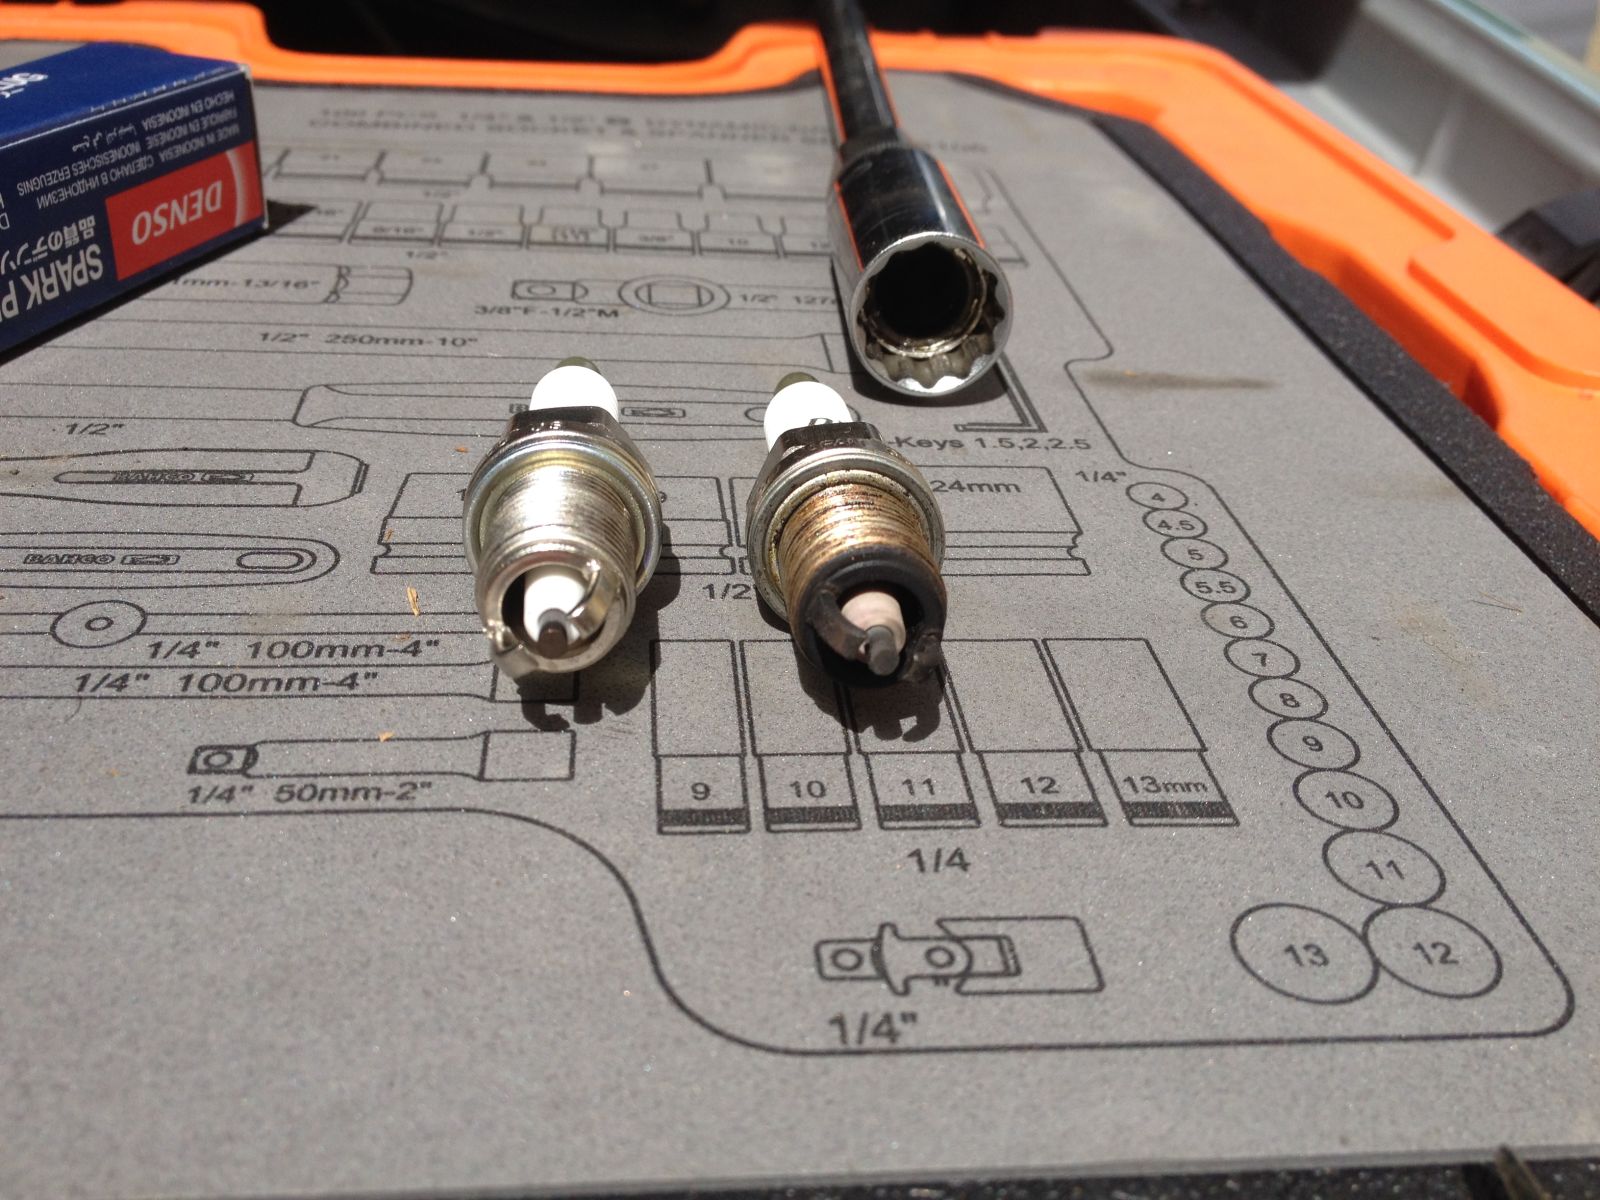
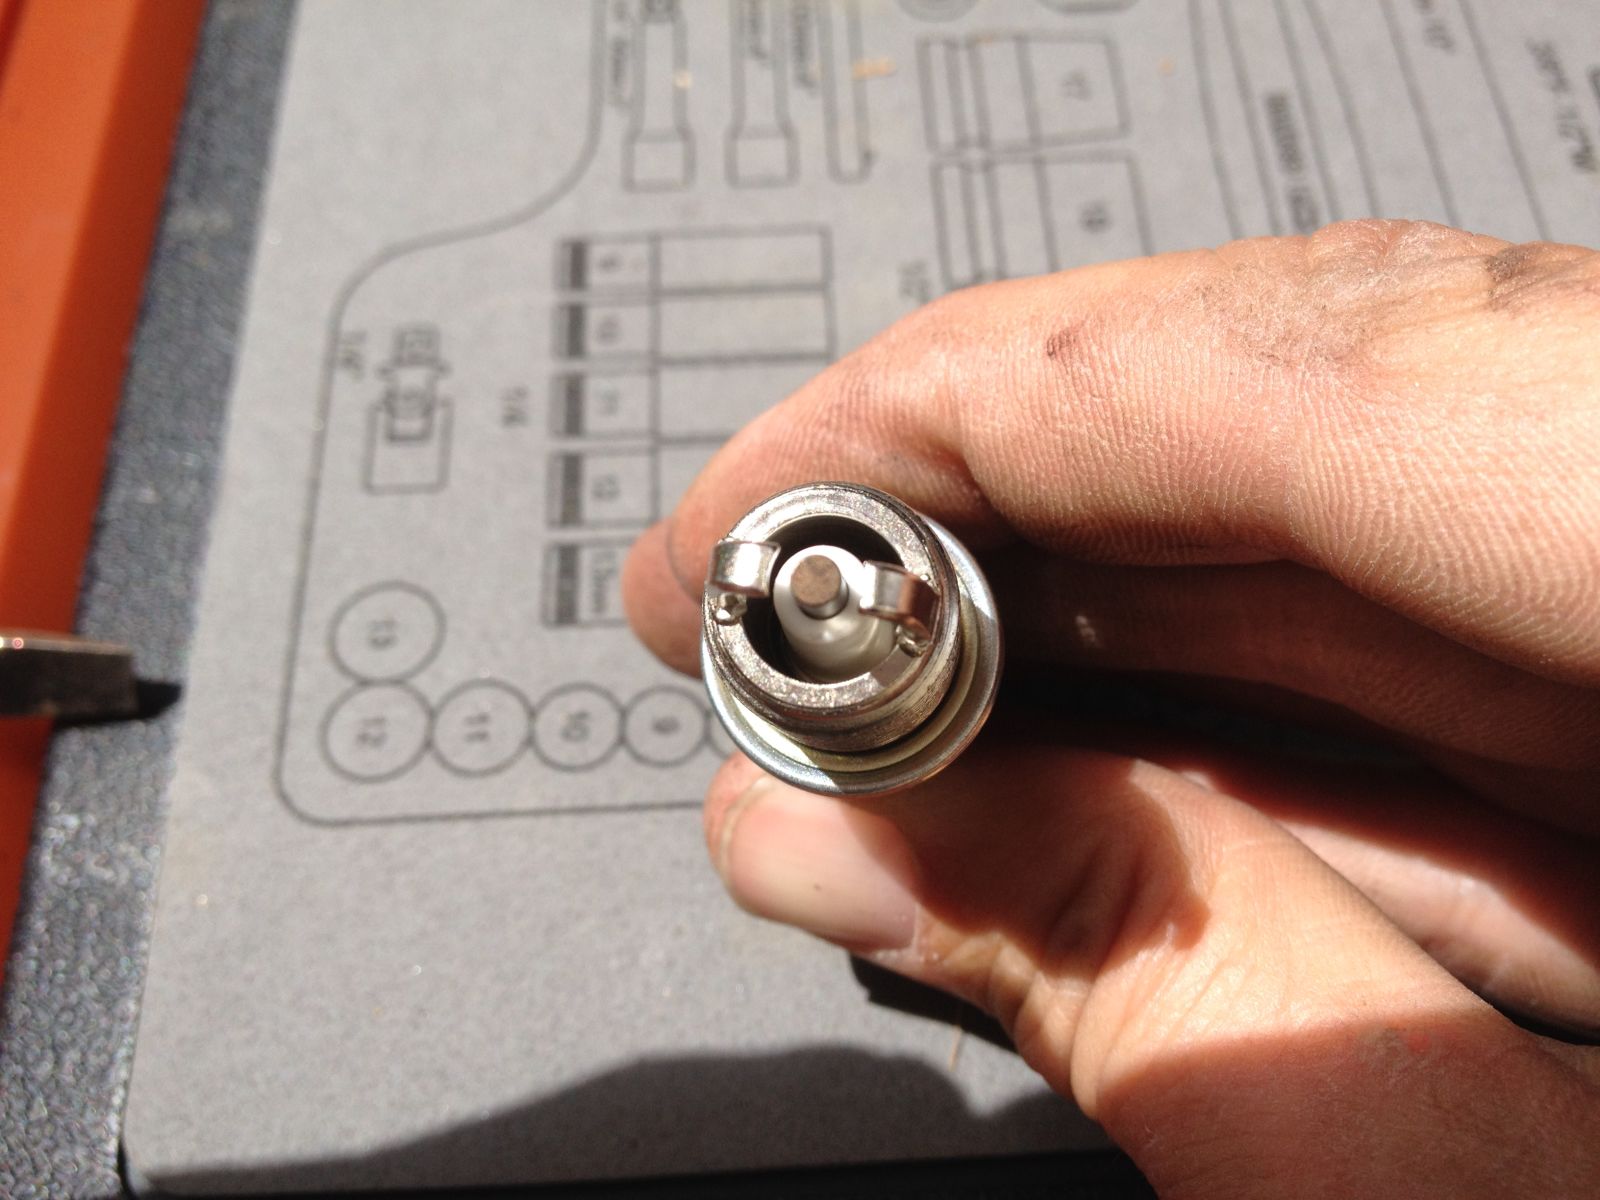
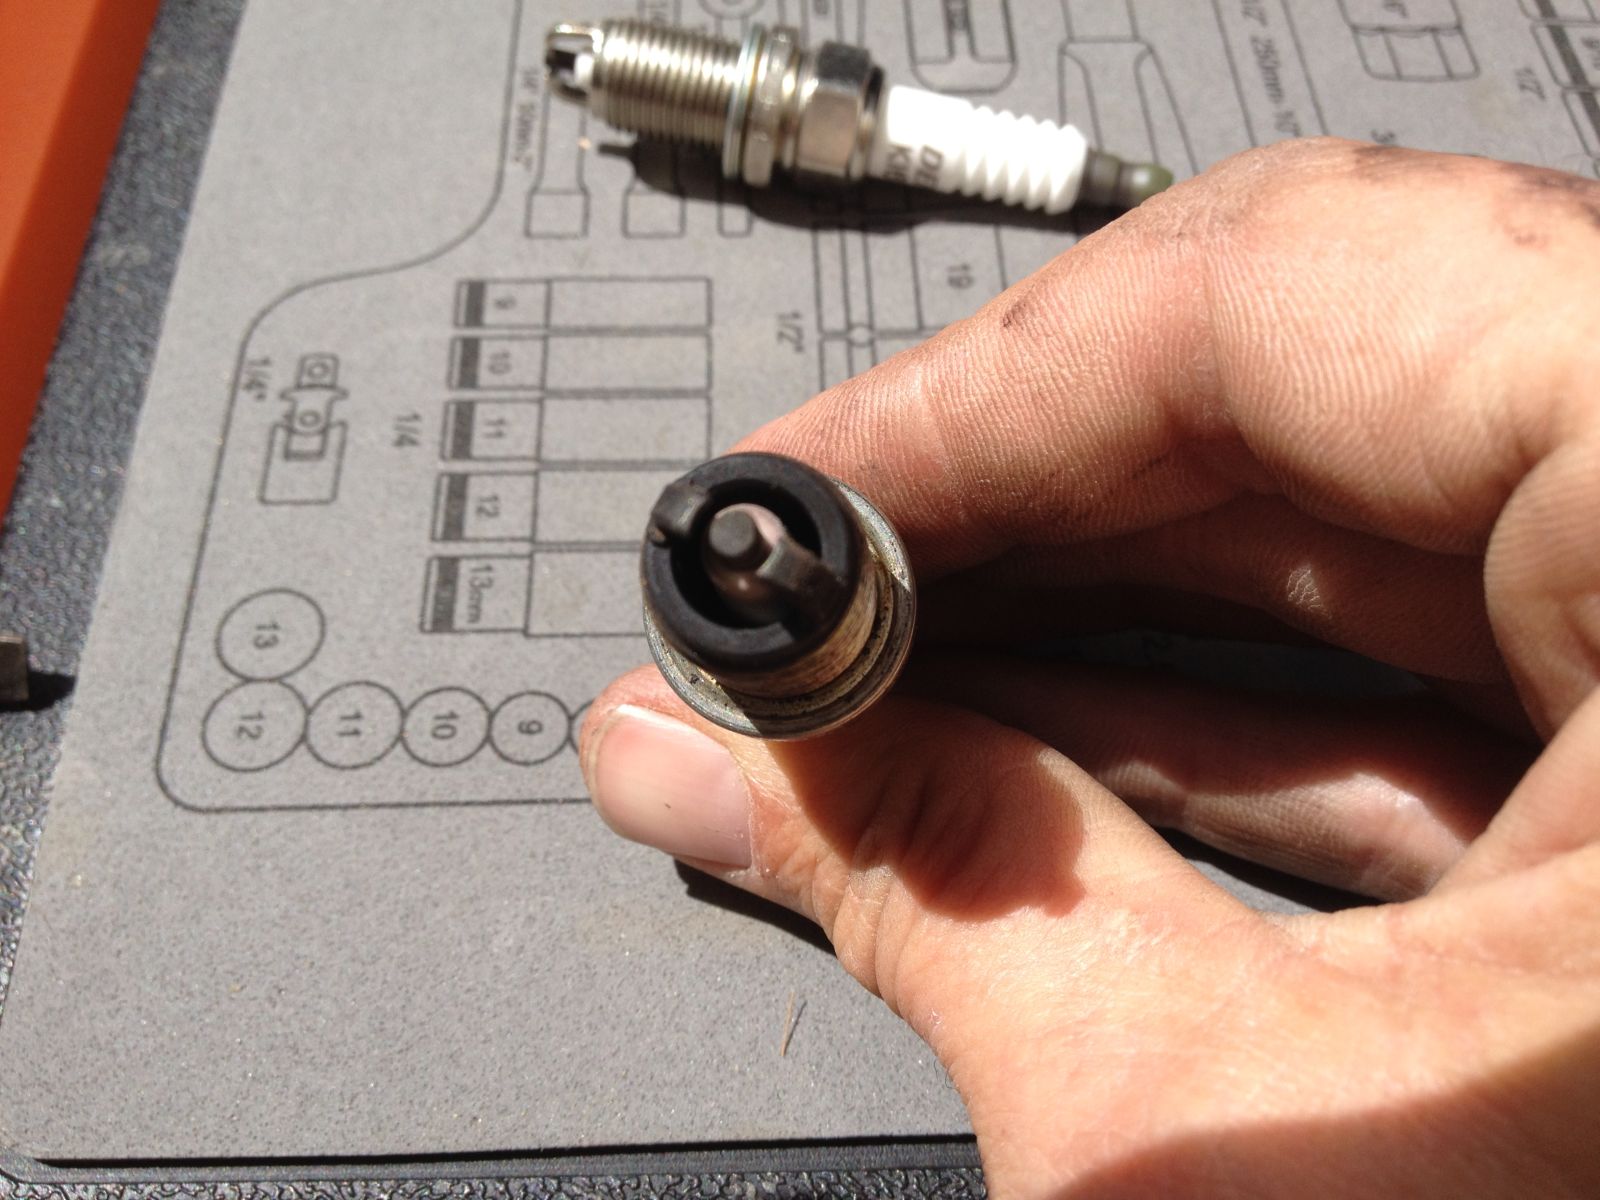
What are you looking for here? The edges on the electrode and the grounds (the LC runs these twin ground plugs, I can’t explain exactly why this is beneficial, probably in the name of efficient mixture burning, must be why it is so fuel efficient...) on the new plugs are nice and sharp, the electrode (the round bit in the middle that the spark is generated from) is an even shape. Whereas on the old plugs, the electrode and the grounds are both worn into slightly less fine shapes, these plugs have done 20,000 km, so they’ve done a bit of sparking in that time, time to change them out (if you run platinum or iridium ‘long life’ spark plugs, still pull them out regularly, to have a look at what the business end looks like and to prevent them welding themselves into the cylinder head).
So with all the plugs out we can kick on with the tests. Firstly you need to stop the sparks and the fuel while you are cranking the engine over, disconnect the plugs to the coils, then disconnect the wiring to the fuel pump (there are other ways to do this, pulling the crank/cam/engine timing sensor should achieve the same thing).
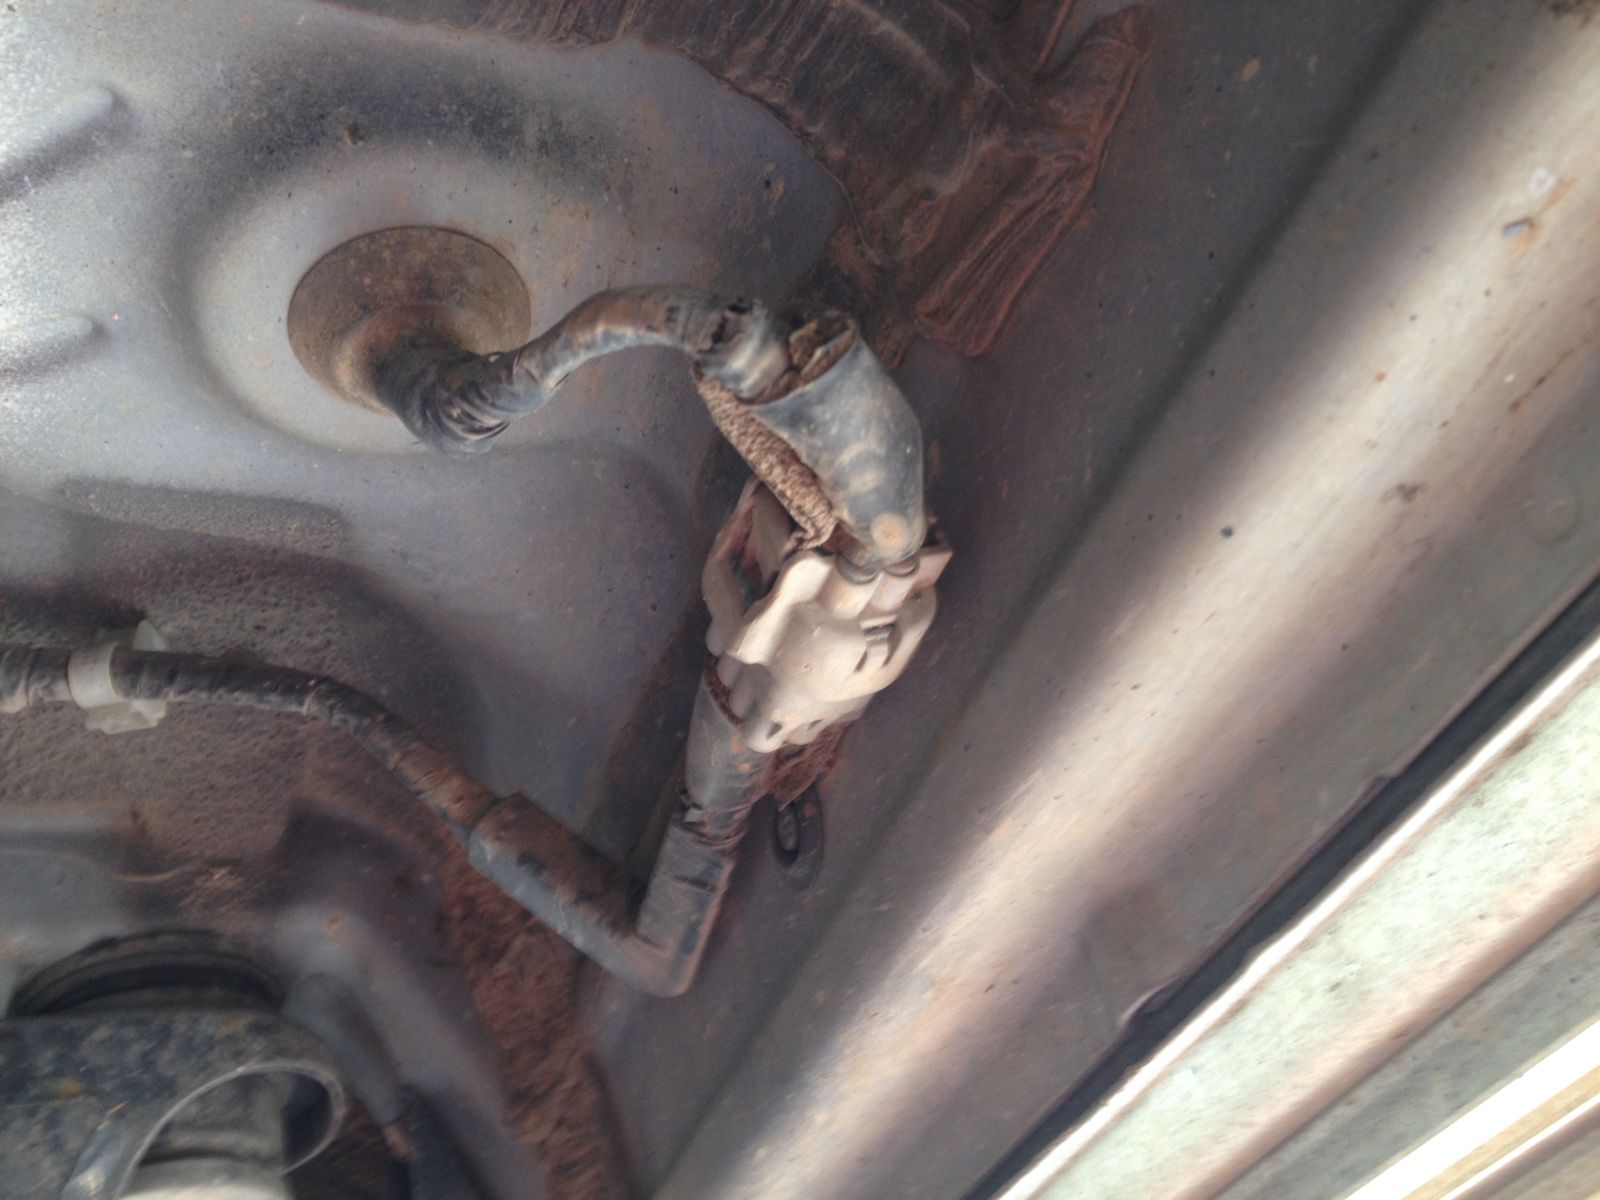
The wiring for the fuel pump and sender on a 105 series is on the LH side of the body next to the fuel tank (this is one tough connector, some grips come in handy for getting this undone/re-connected).
This way you won’t have any unplanned mixture ignition outside the engine.
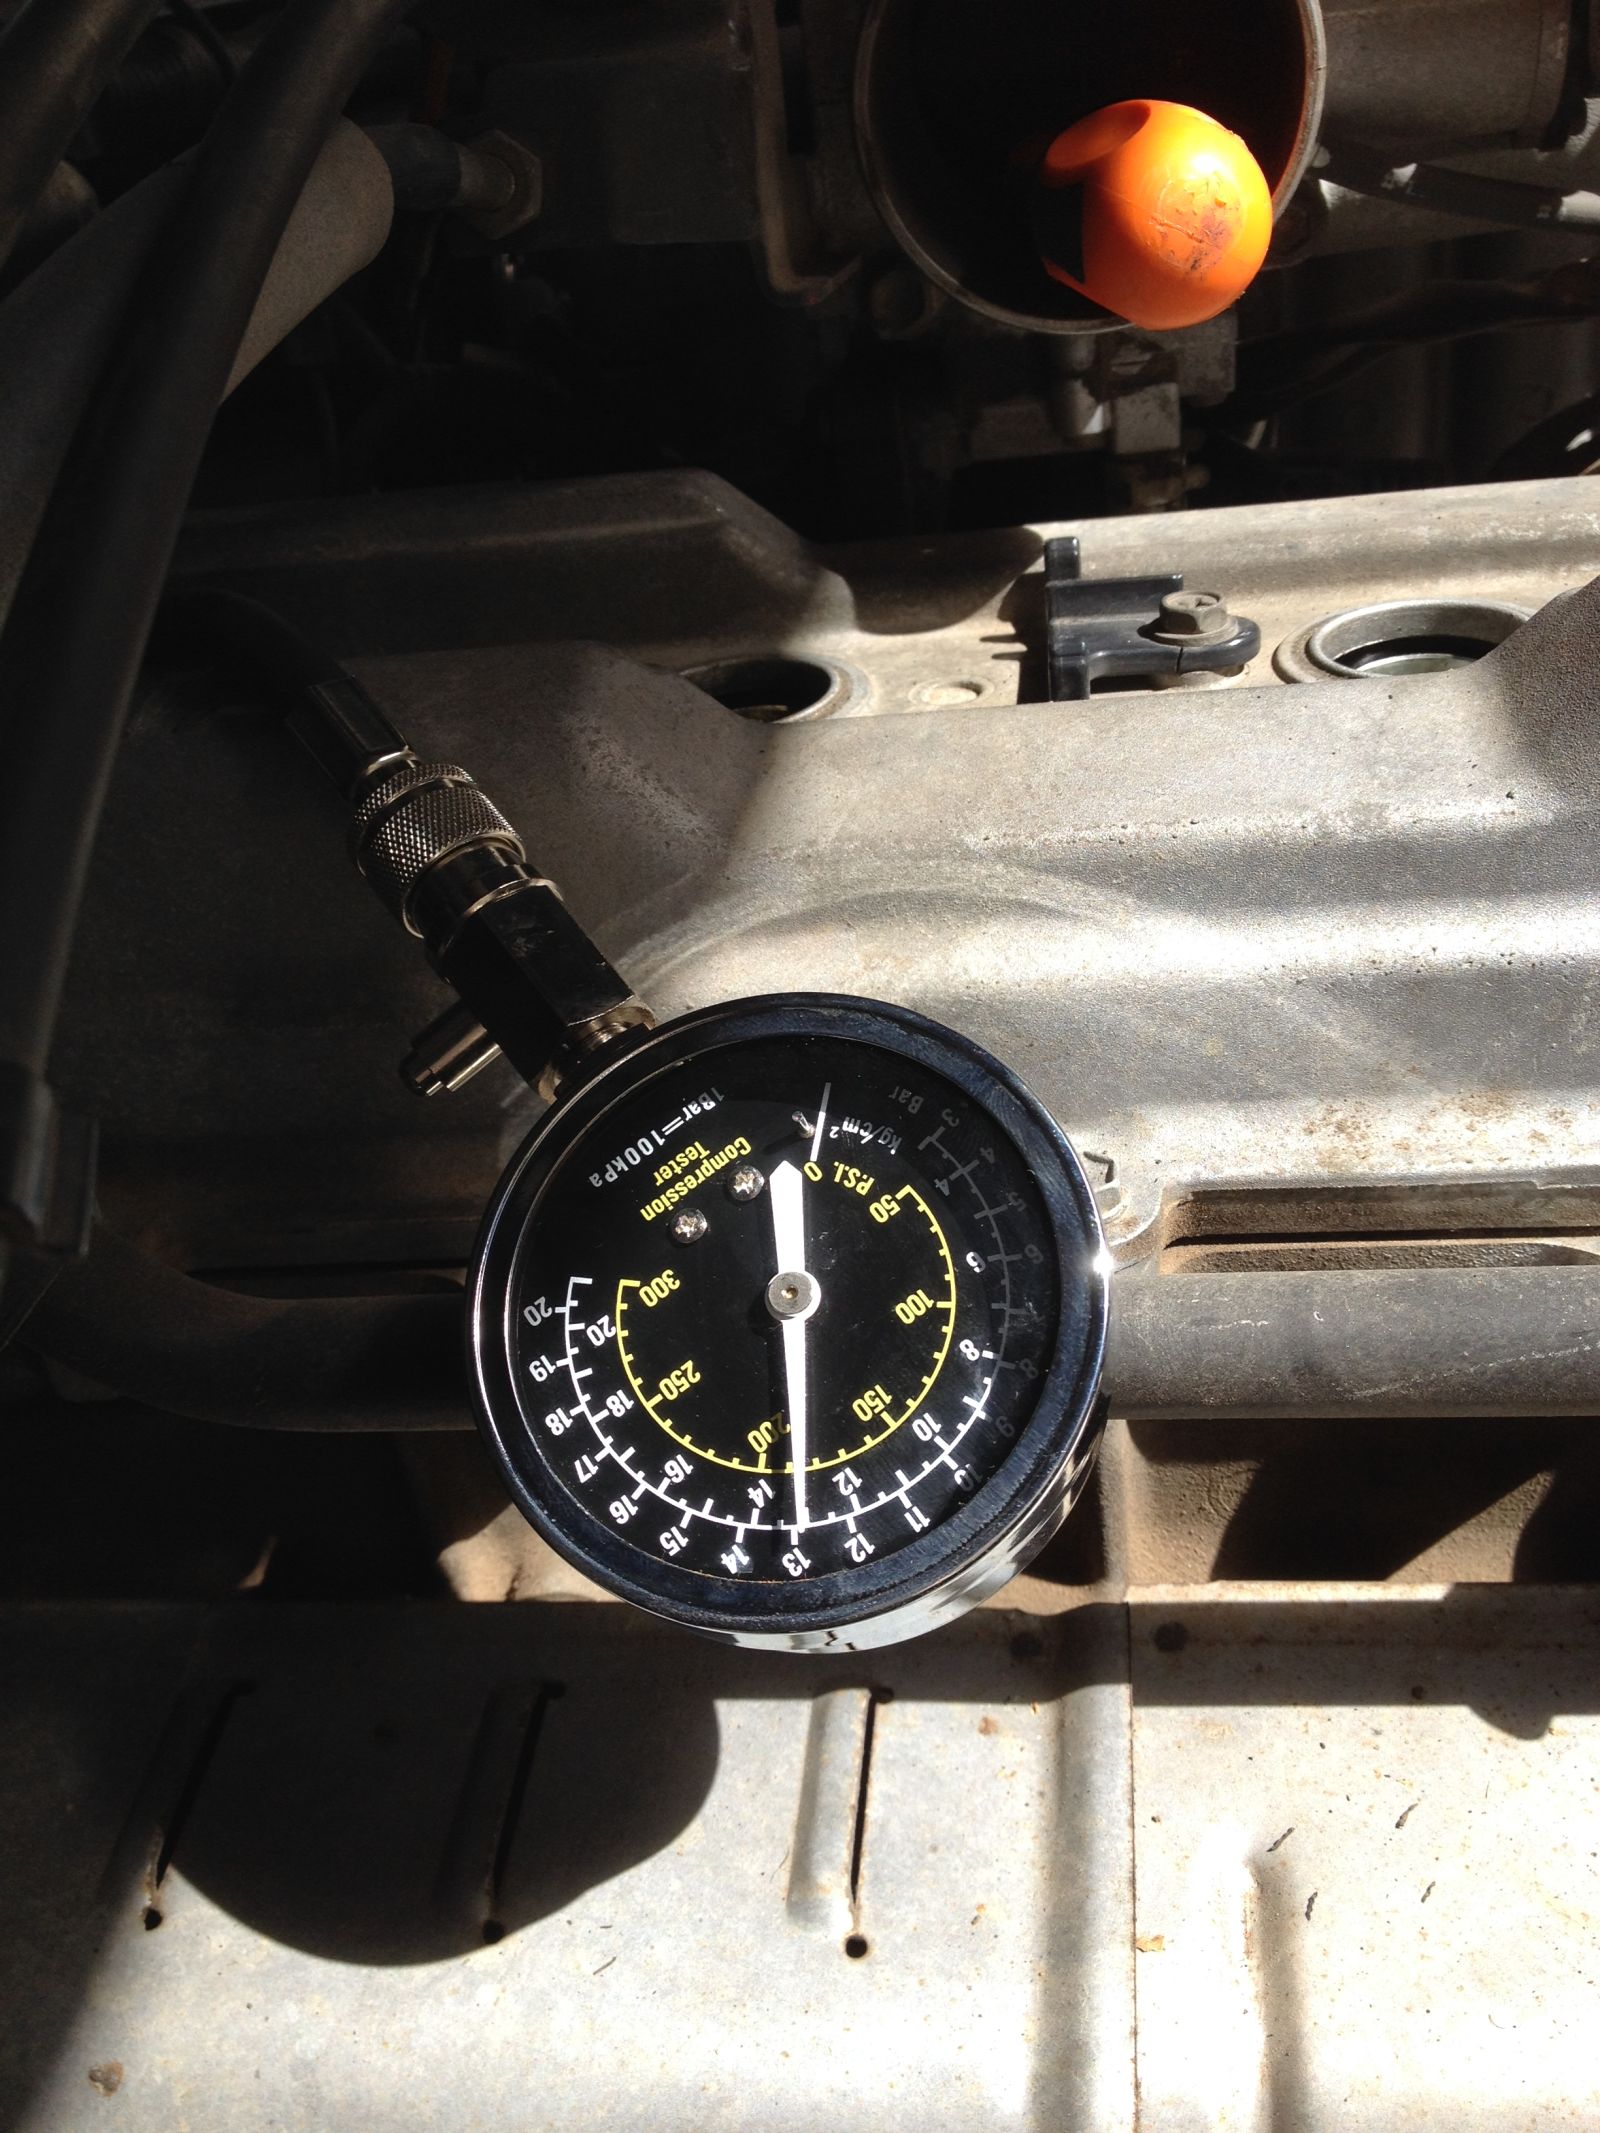
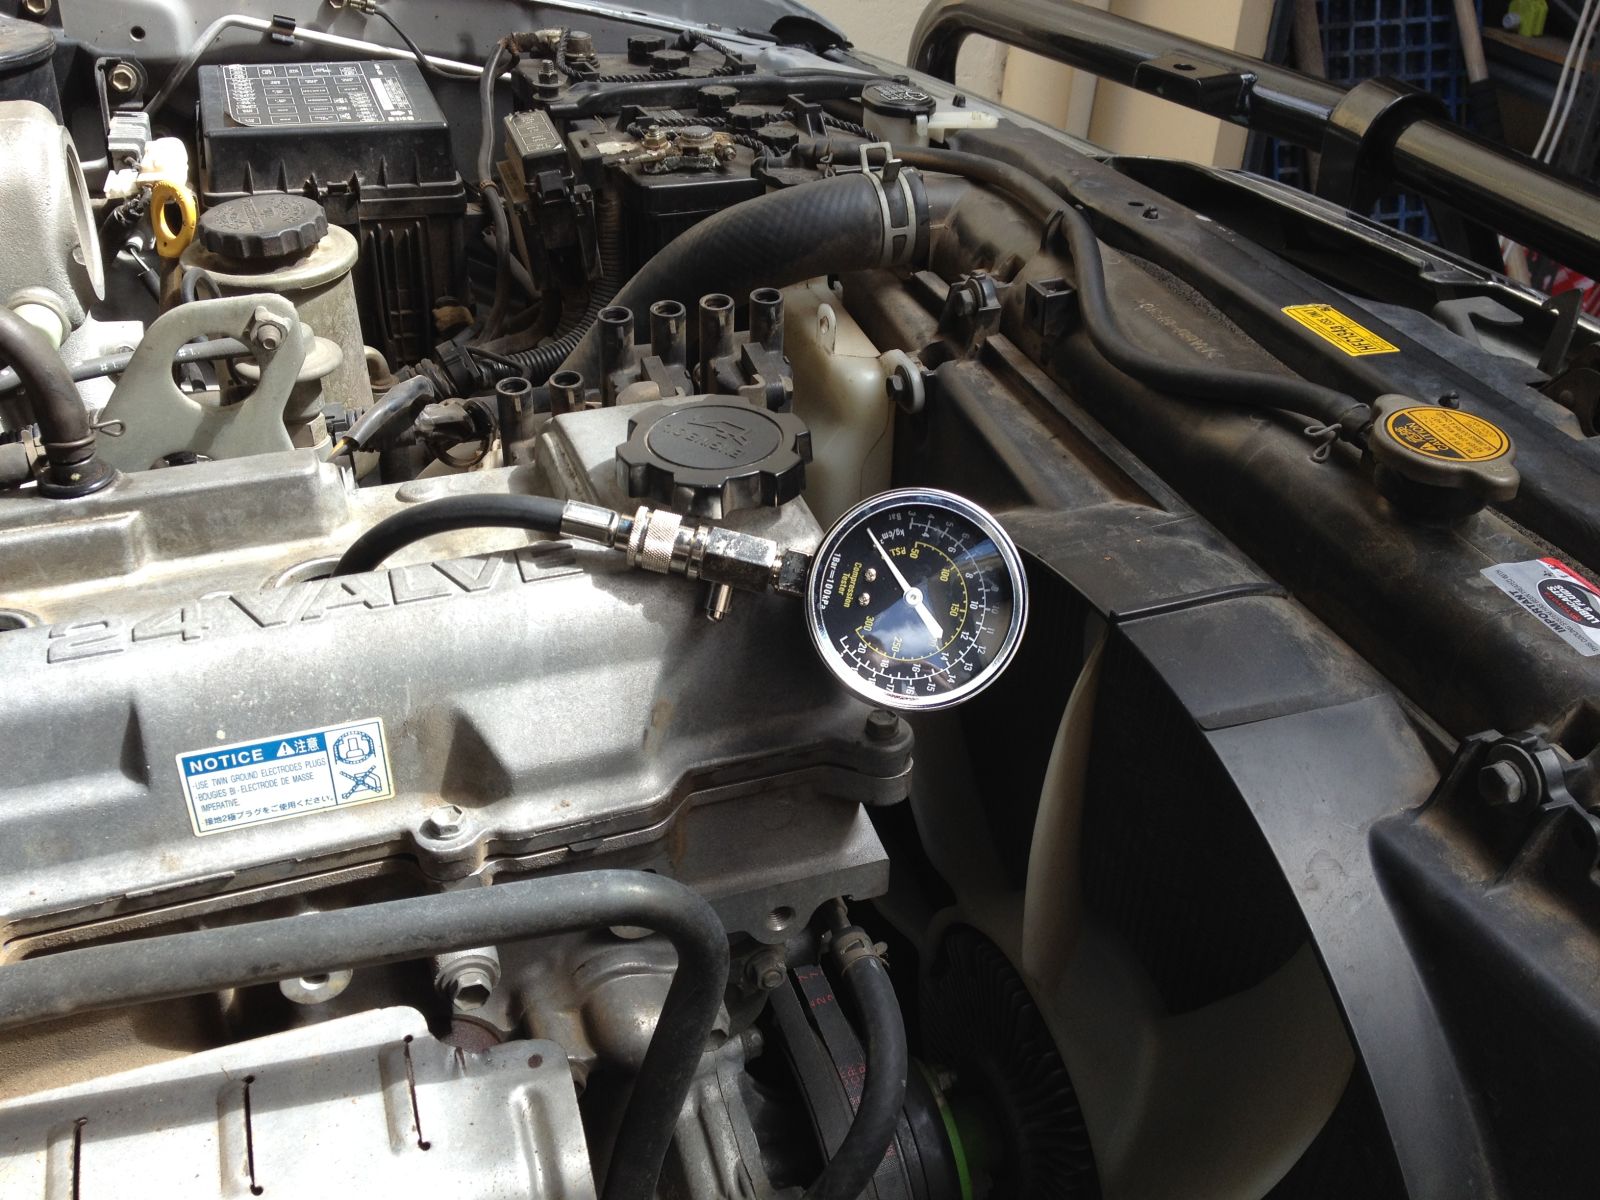
You will need an compression tester, these are not expensive and easily available. This one has an adapter that you screw into the spark plug thread till finger tight and then connect the gauge.
{note: see sticker advising about the twin ground plugs, I’ve already expressed my opinion about buying genuine parts, so not a worry}
Now you can crank each cylinder in turn on the starter, it’s best if there are two of you but if not you should be able to position the gauge so you can see it while your other arms snakes into the cabin to turn the key (WAY back in the day some vehicles had starter buttons under the bonnet, I may still own one of these said vehicles...)
The engine will turn very easily, as it has virtually no compression. As well as the final value you are looking at how the cylinder pumps up the gauge. Does it get to close to it’s maximum in 3-5 pumps, if so good. If you have to hang on that starter for many revolutions, your engine is probably getting a bit tired.
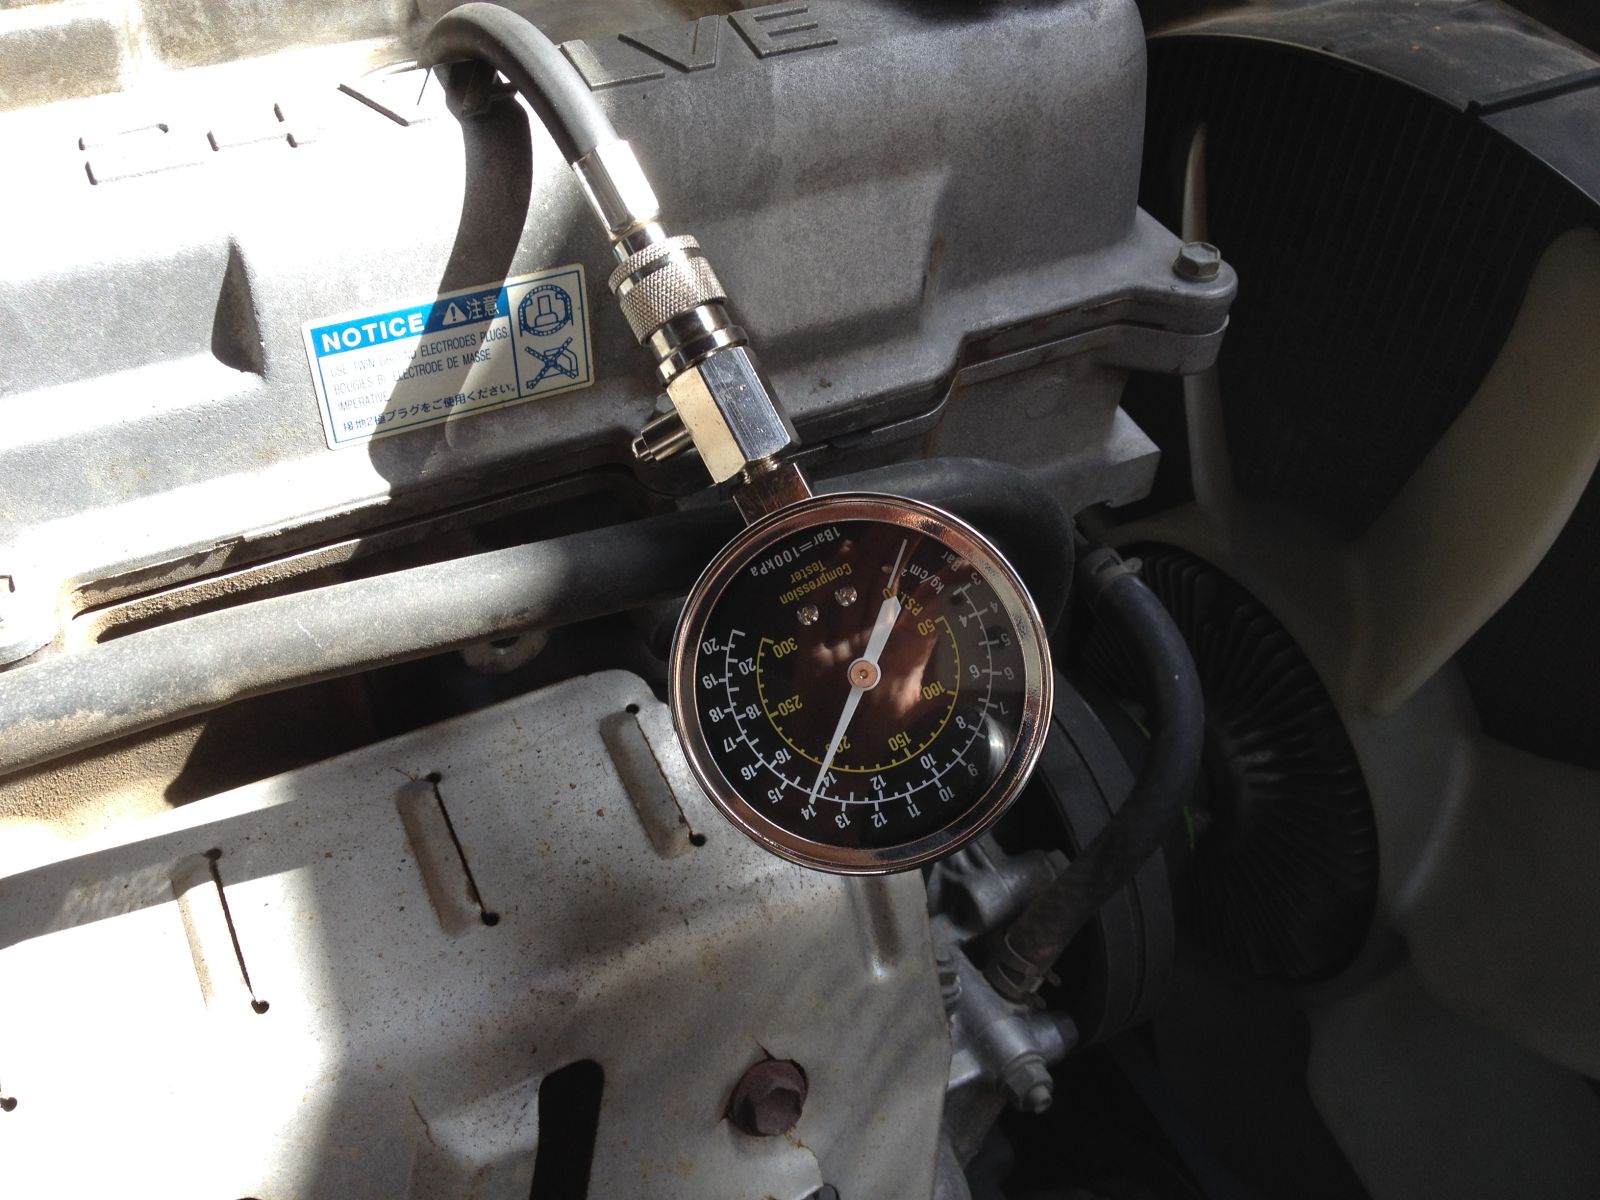
Work your way through each of the cylinders, noting the results as you go.
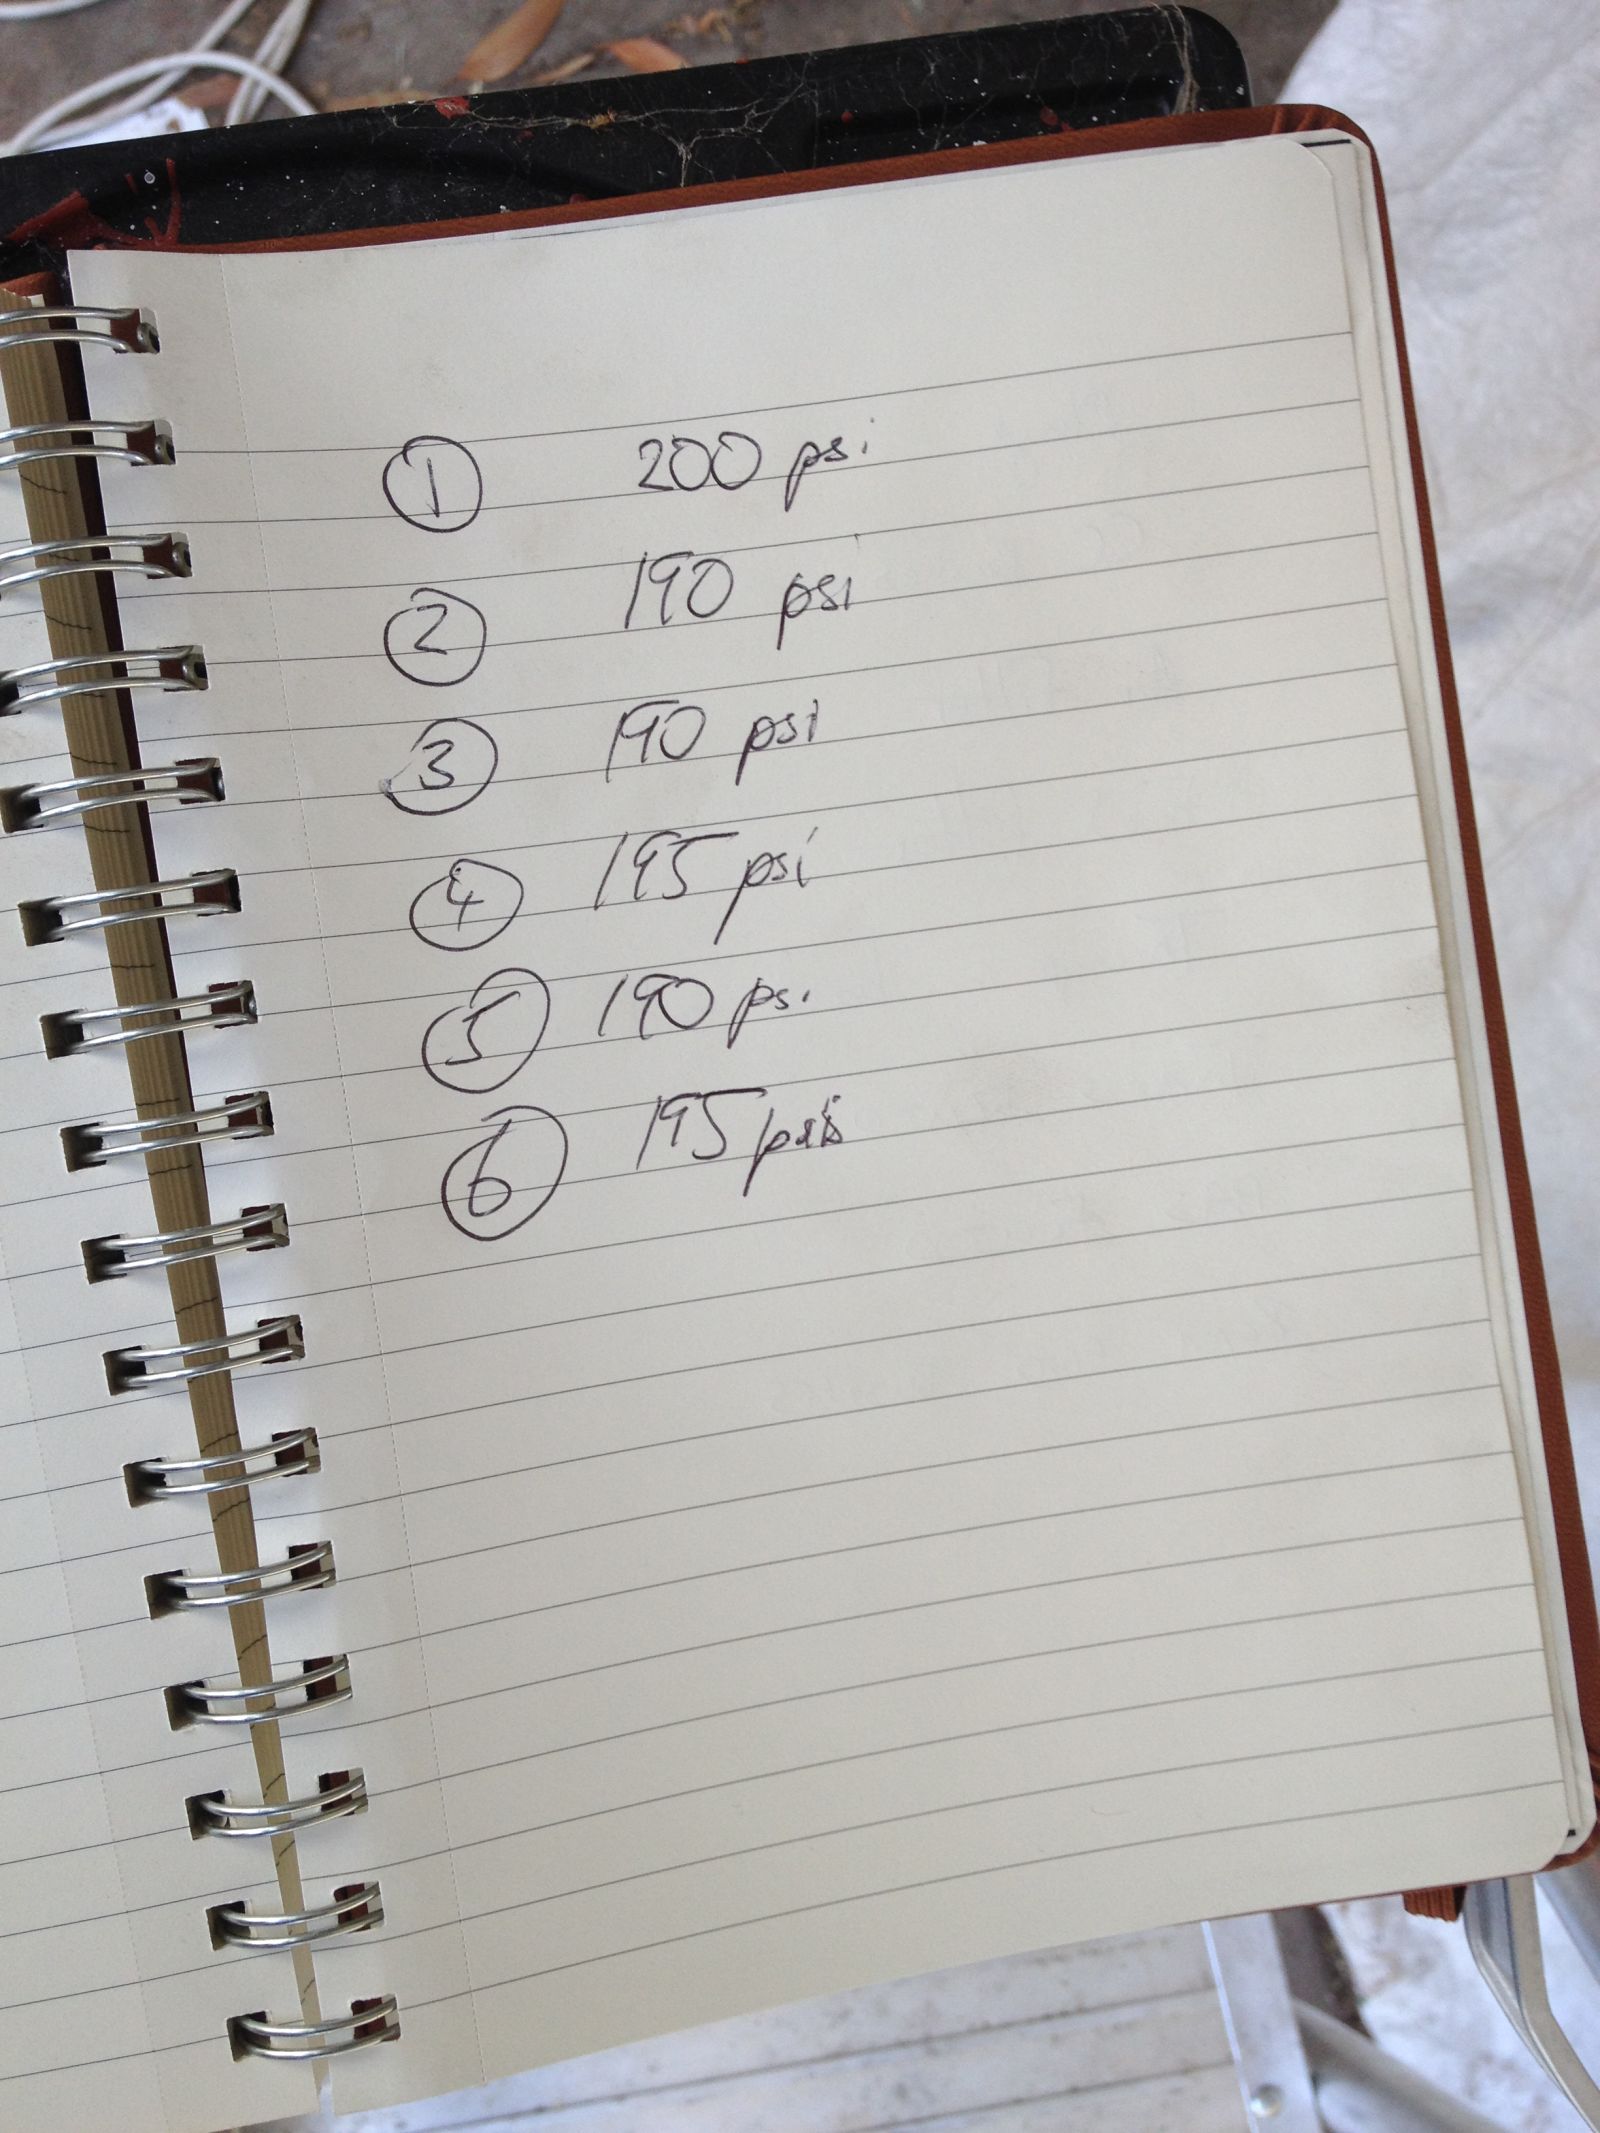
From memory, a 5% variance between the cylinders is considered acceptable/good, which this is. The real test was to follow...
The fact that the compression test is dynamic and accumulative by nature, means it can hide certain flaws. If your engine or a cylinder is properly stuffed it will show up. However, if you are trying to find a less obvious problem, a sharper tool is required.
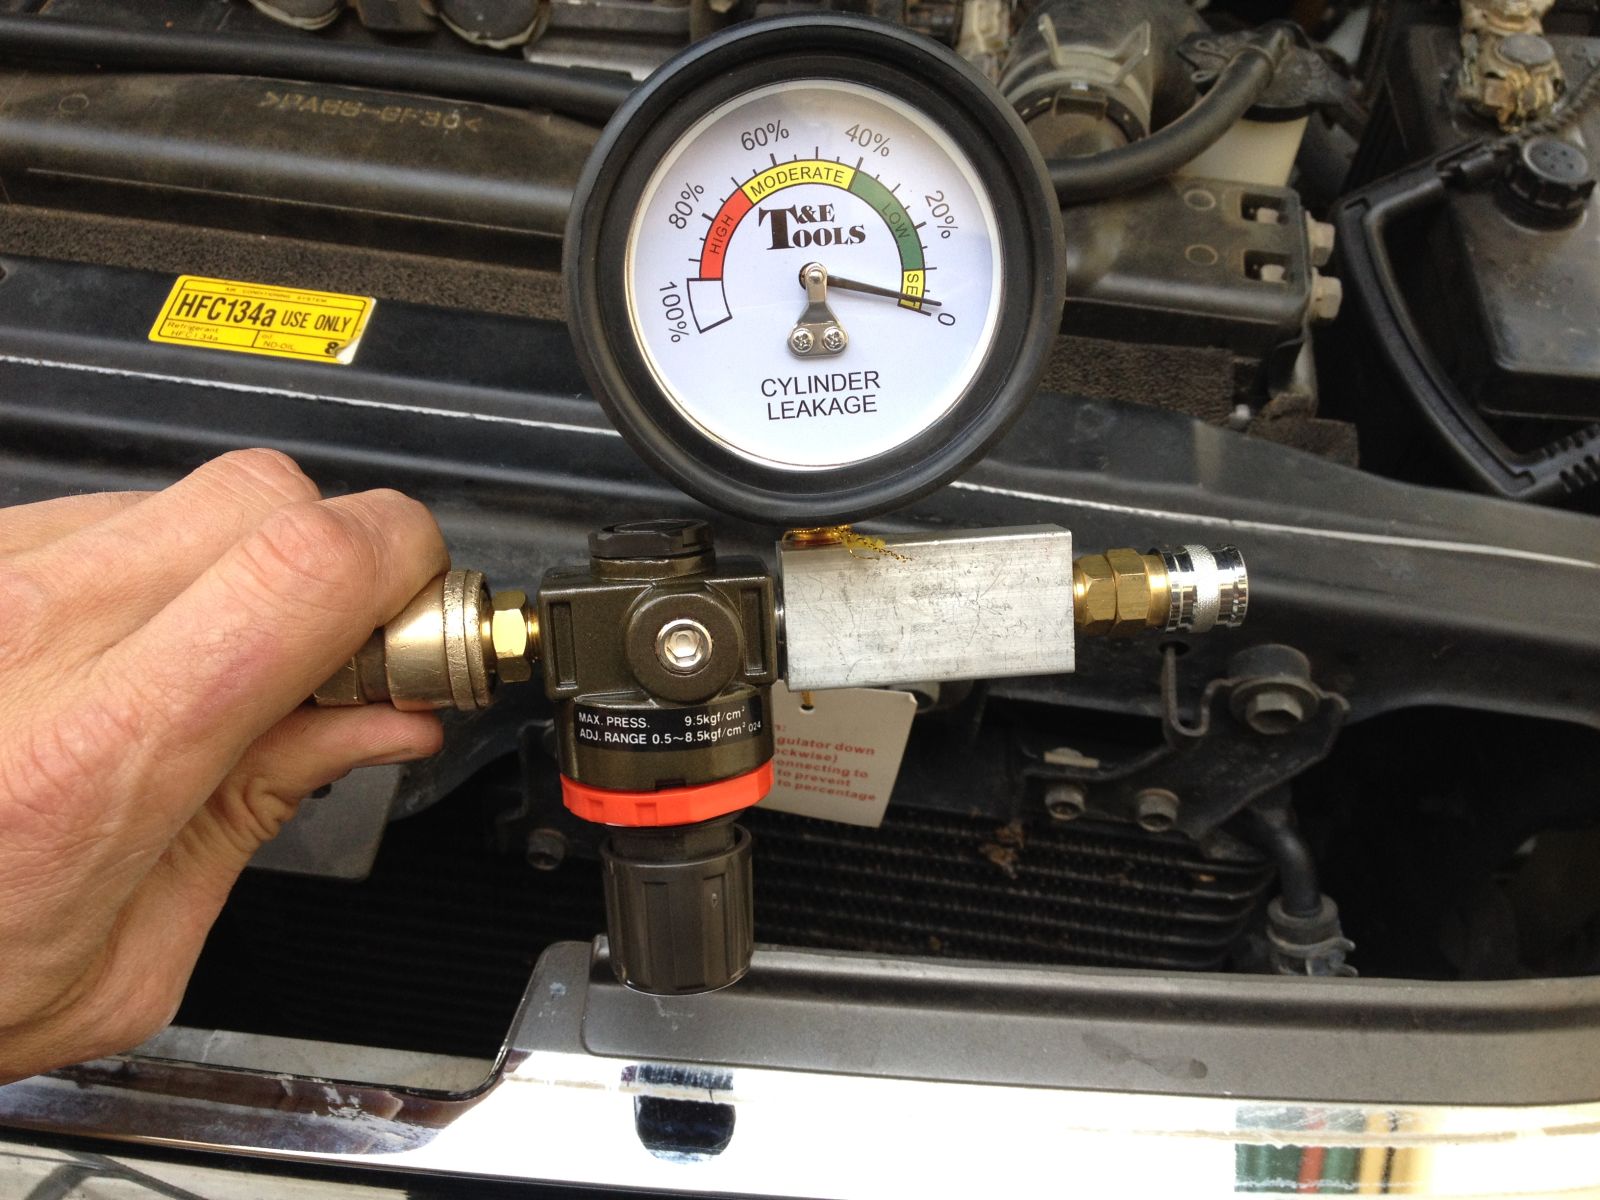
This test pressurizes each cylinder statically and allows you to analyze where the problem may lie.
{I bought this kit while trying to get to the bottom of a misfire on my unlucky Pajero, it correctly diagnosed leaking valves caused by the fact someone had got a bit carried away speccing the uprated valve springs for the LPG conversion, which also led to the timing belt becoming un-tensioned and then jumping a tooth when you re-started, great days Eddy...)
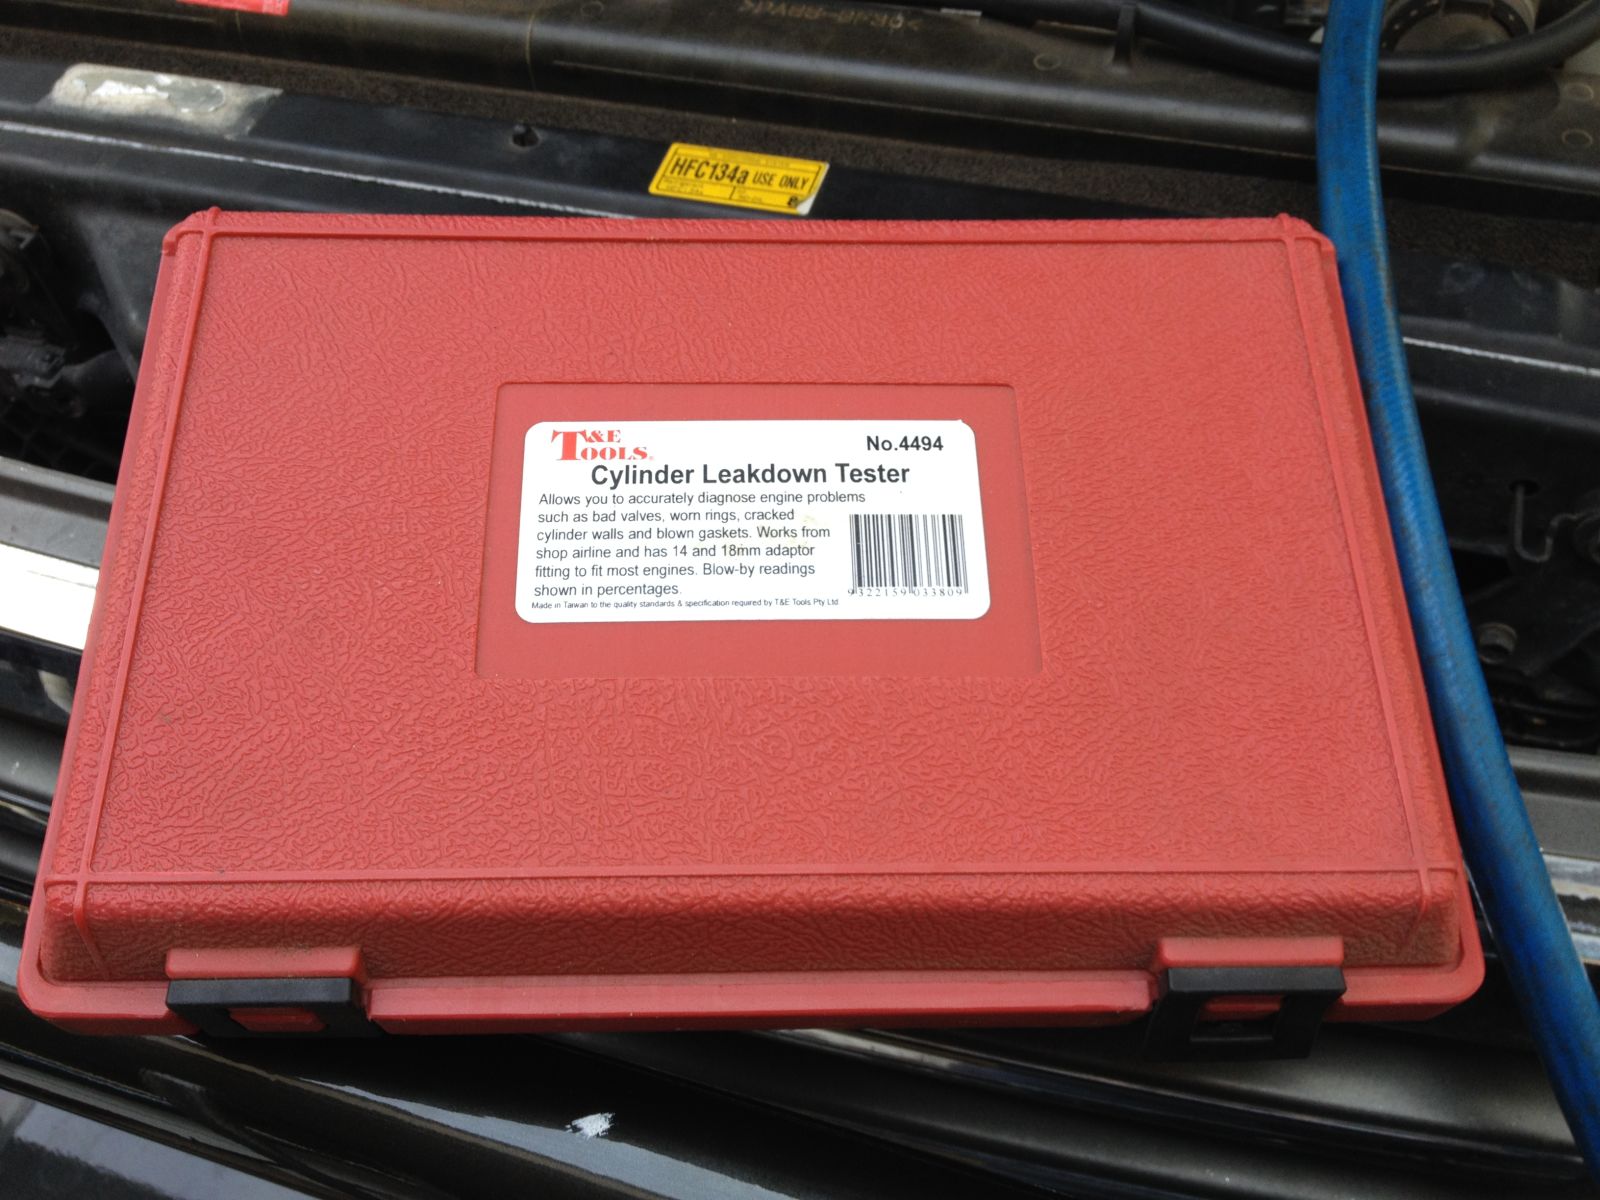
Ok, for this you will not only need the kit itself (normally special order and reasonably expensive from memory, you will also need a pressurized air supply. I borrowed my mates work truck as it has this on board) even if you don’y get all this yourself, if you have an engine problem and your workshop haven’t done this, then it’s time they did, or you get another workshop...
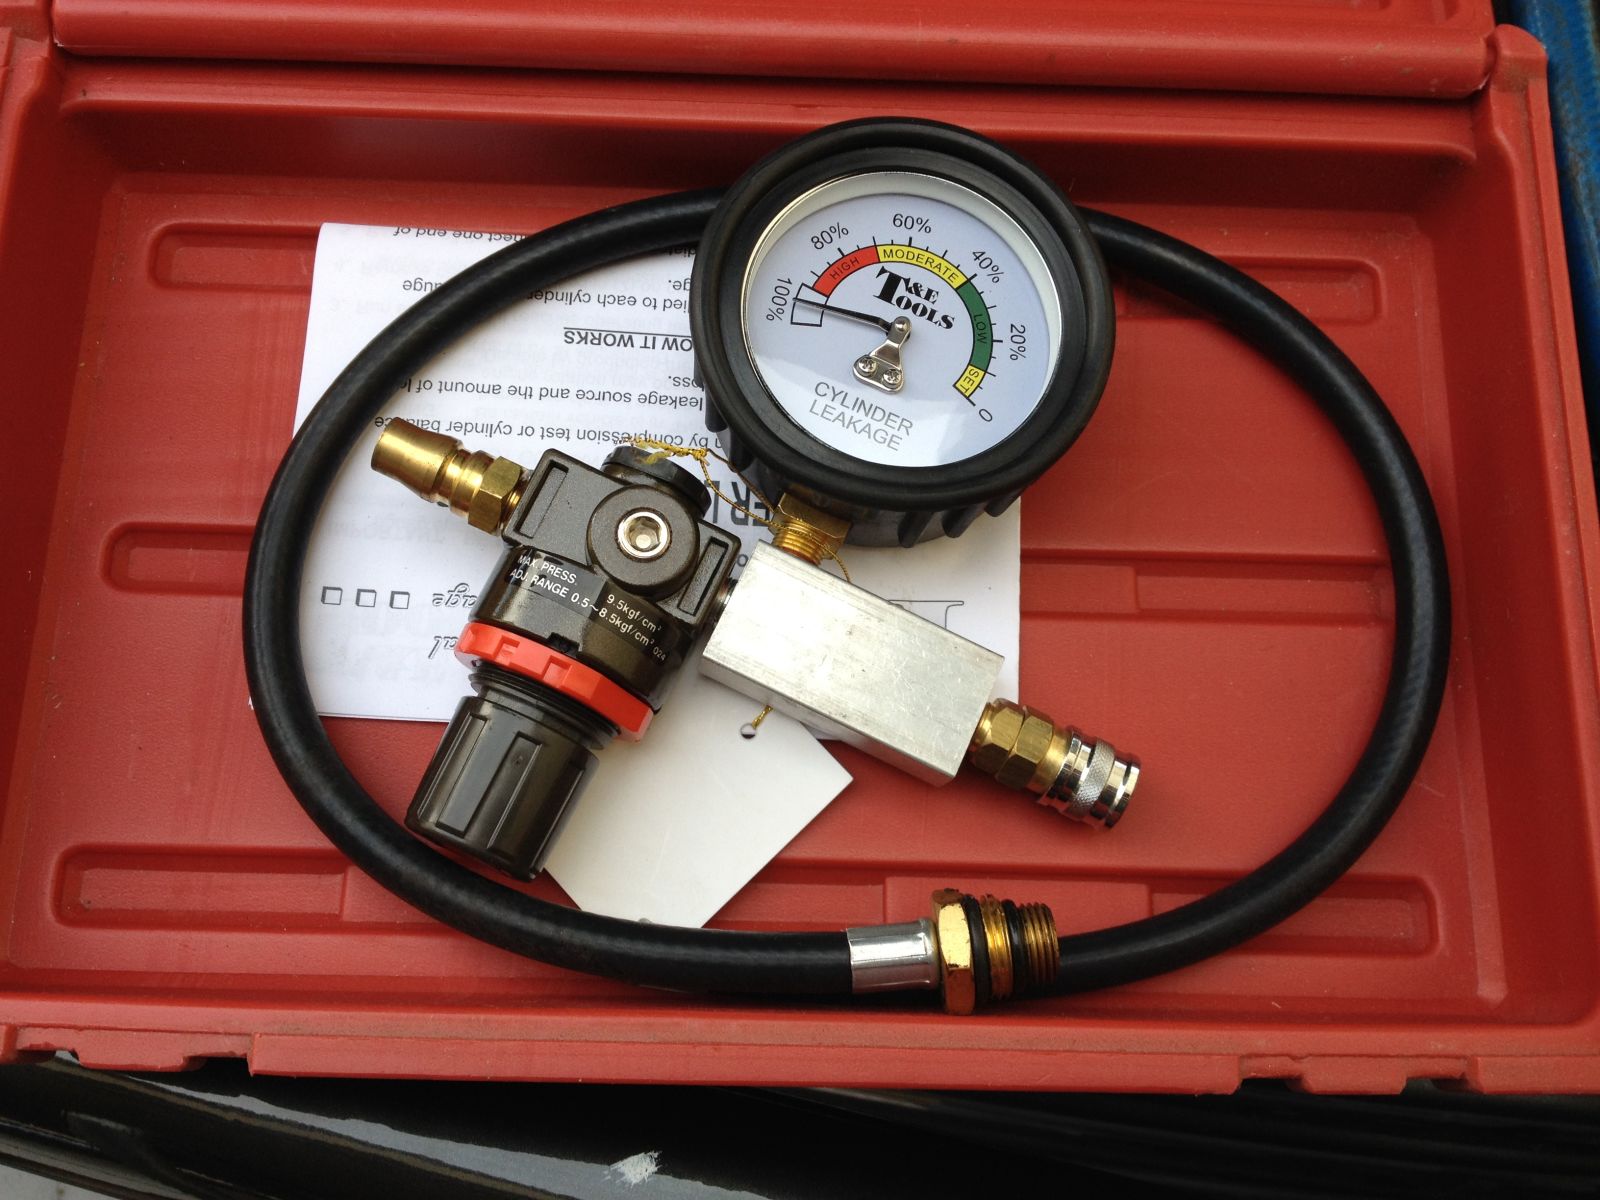
You hook up the air line and set the gauge.
Now you will need to wind each cylinder around to Top Dead Centre on the compression stroke, so get a socket and ratchet on the crank pulley bolt and wind it round in the direction the engine turns (clockwise for most, I think Honda’s are anticlockwise).
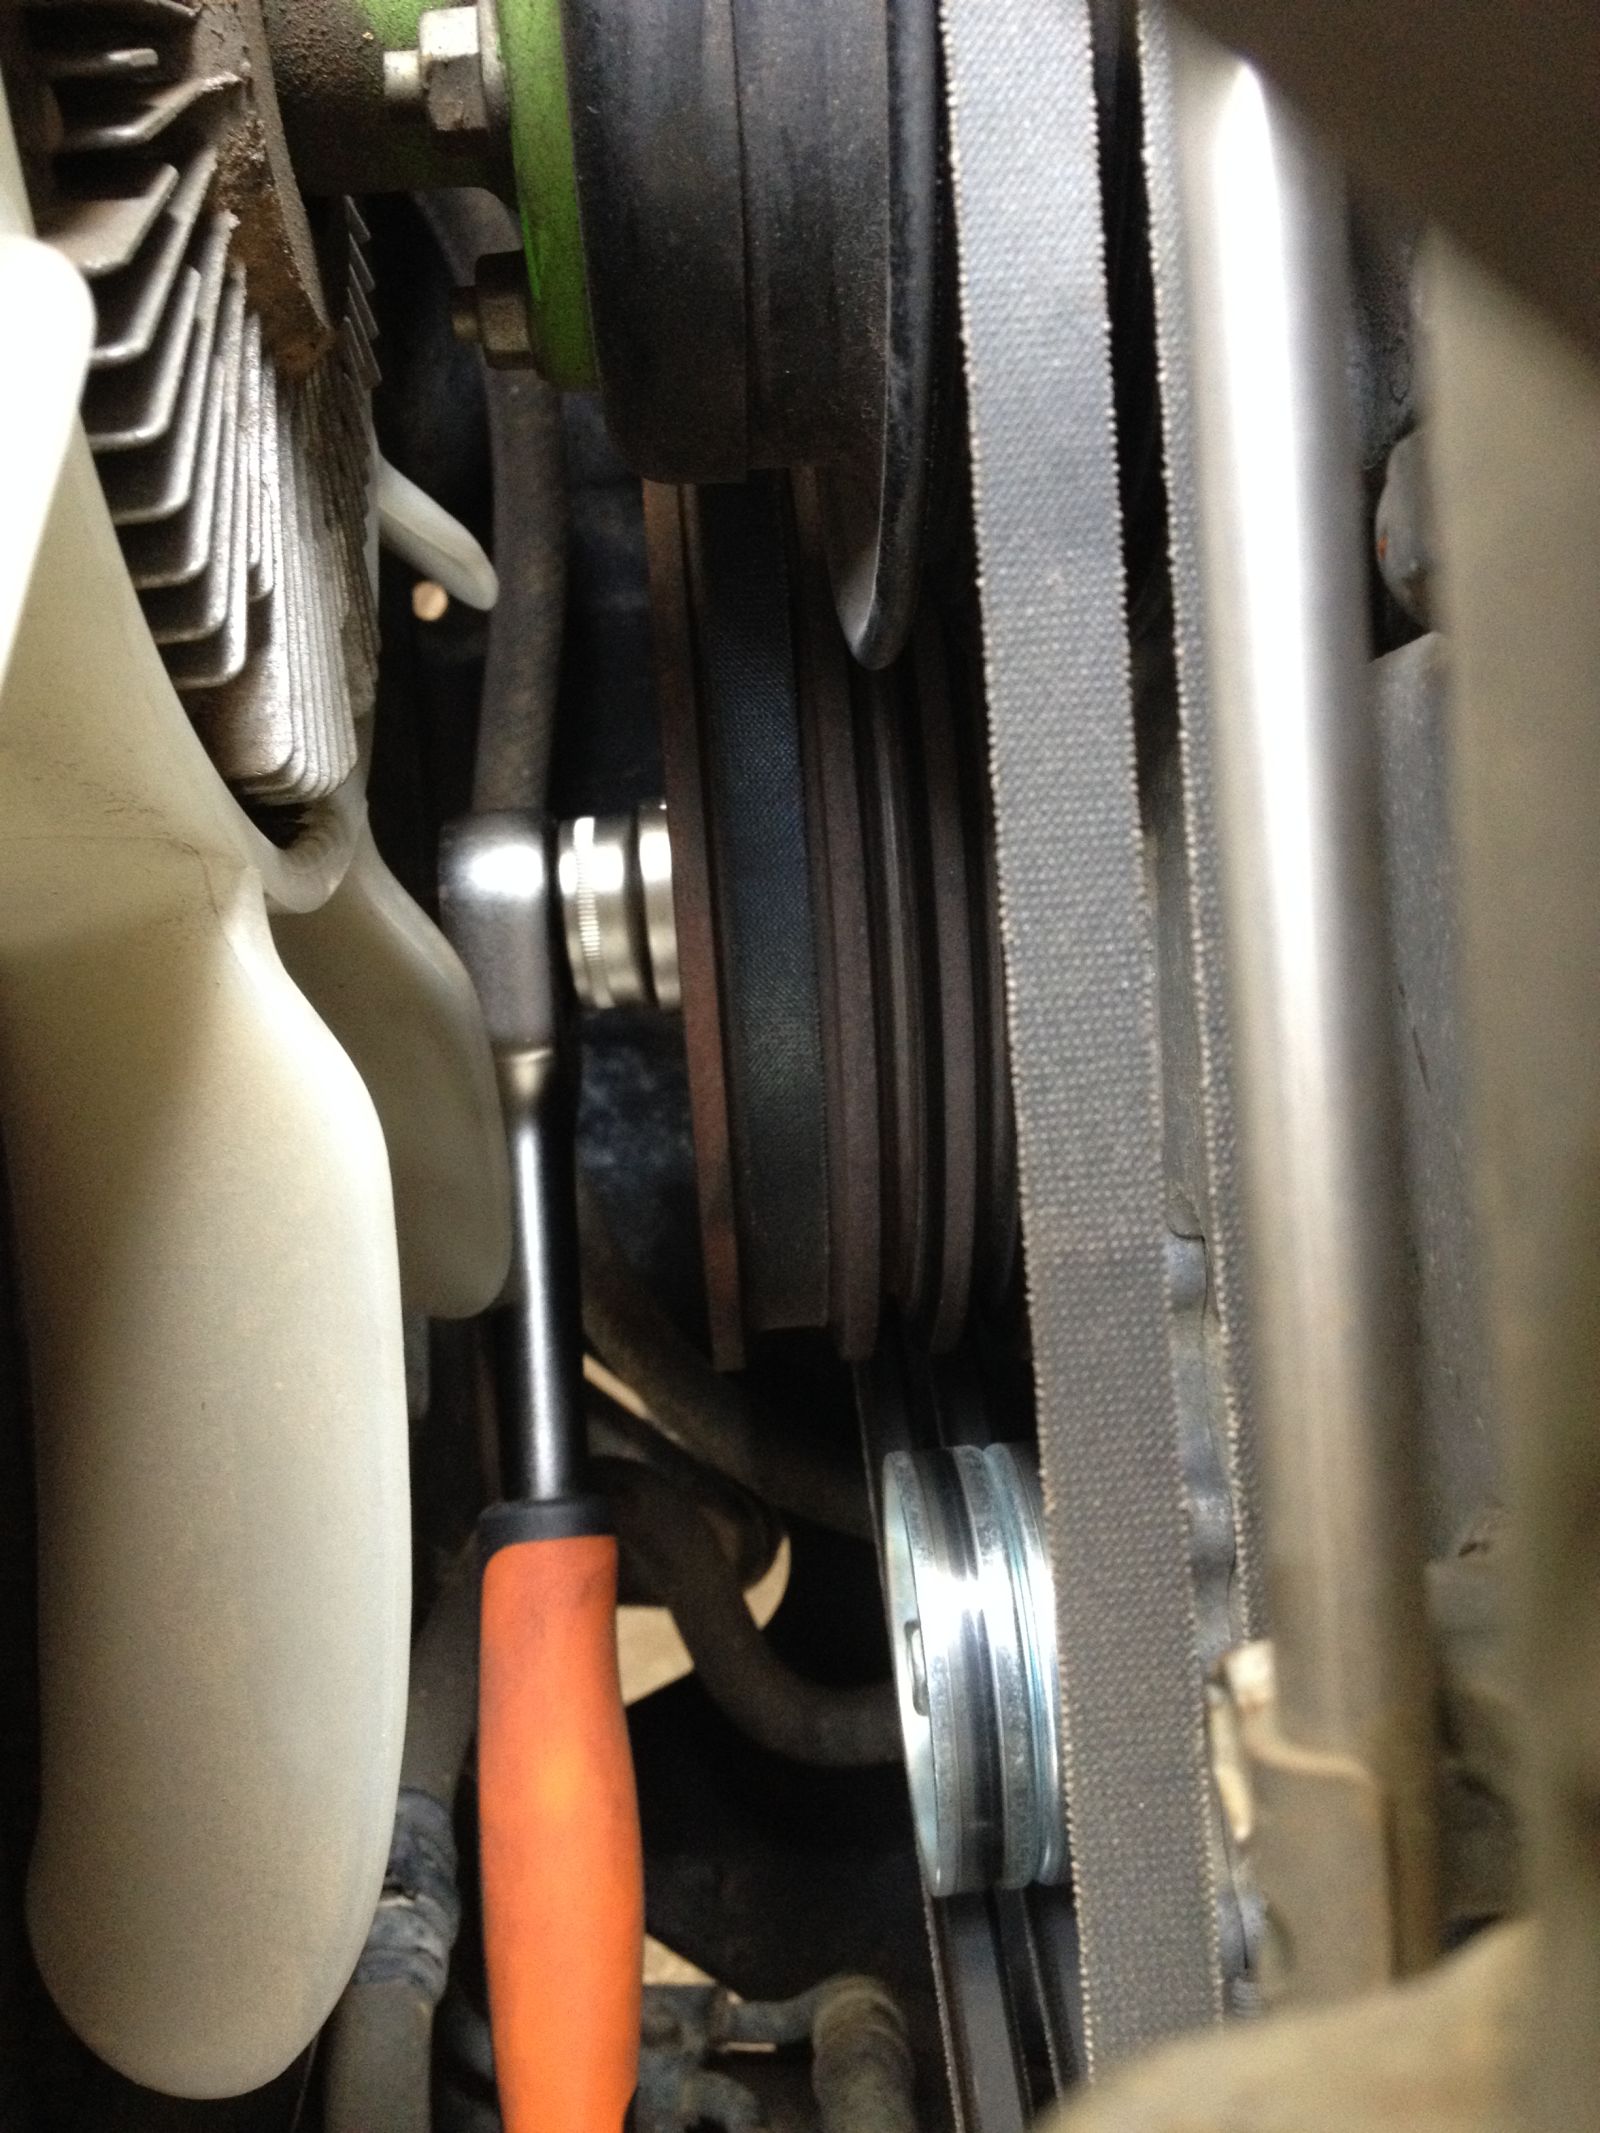
Once at TDC you are ready to test, wind in the adapter tube and then connect the gauge (if the gauge goes straight to 100% leakage you probably just have it on exhaust TDC, it pays to familiarise yourself with how a four stroke engine works, suck, squeeze, bang, blow and all that)
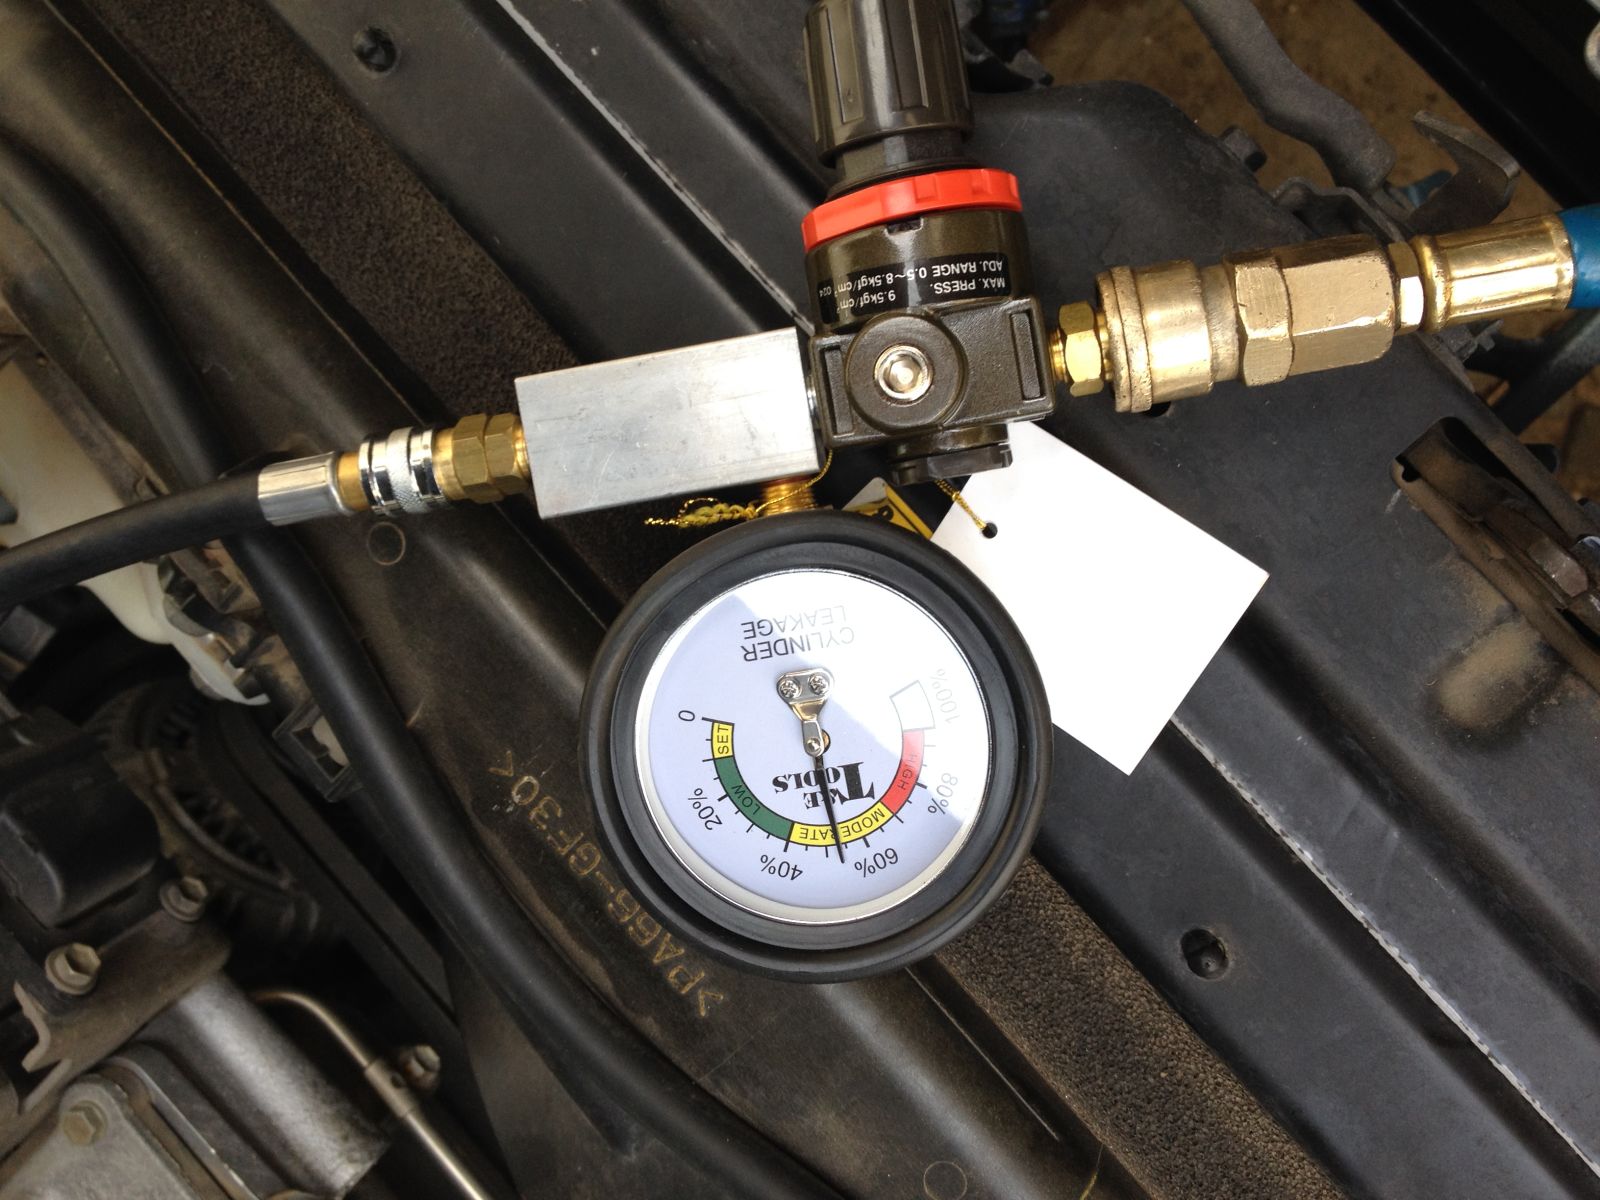
You will get a reading something like this.
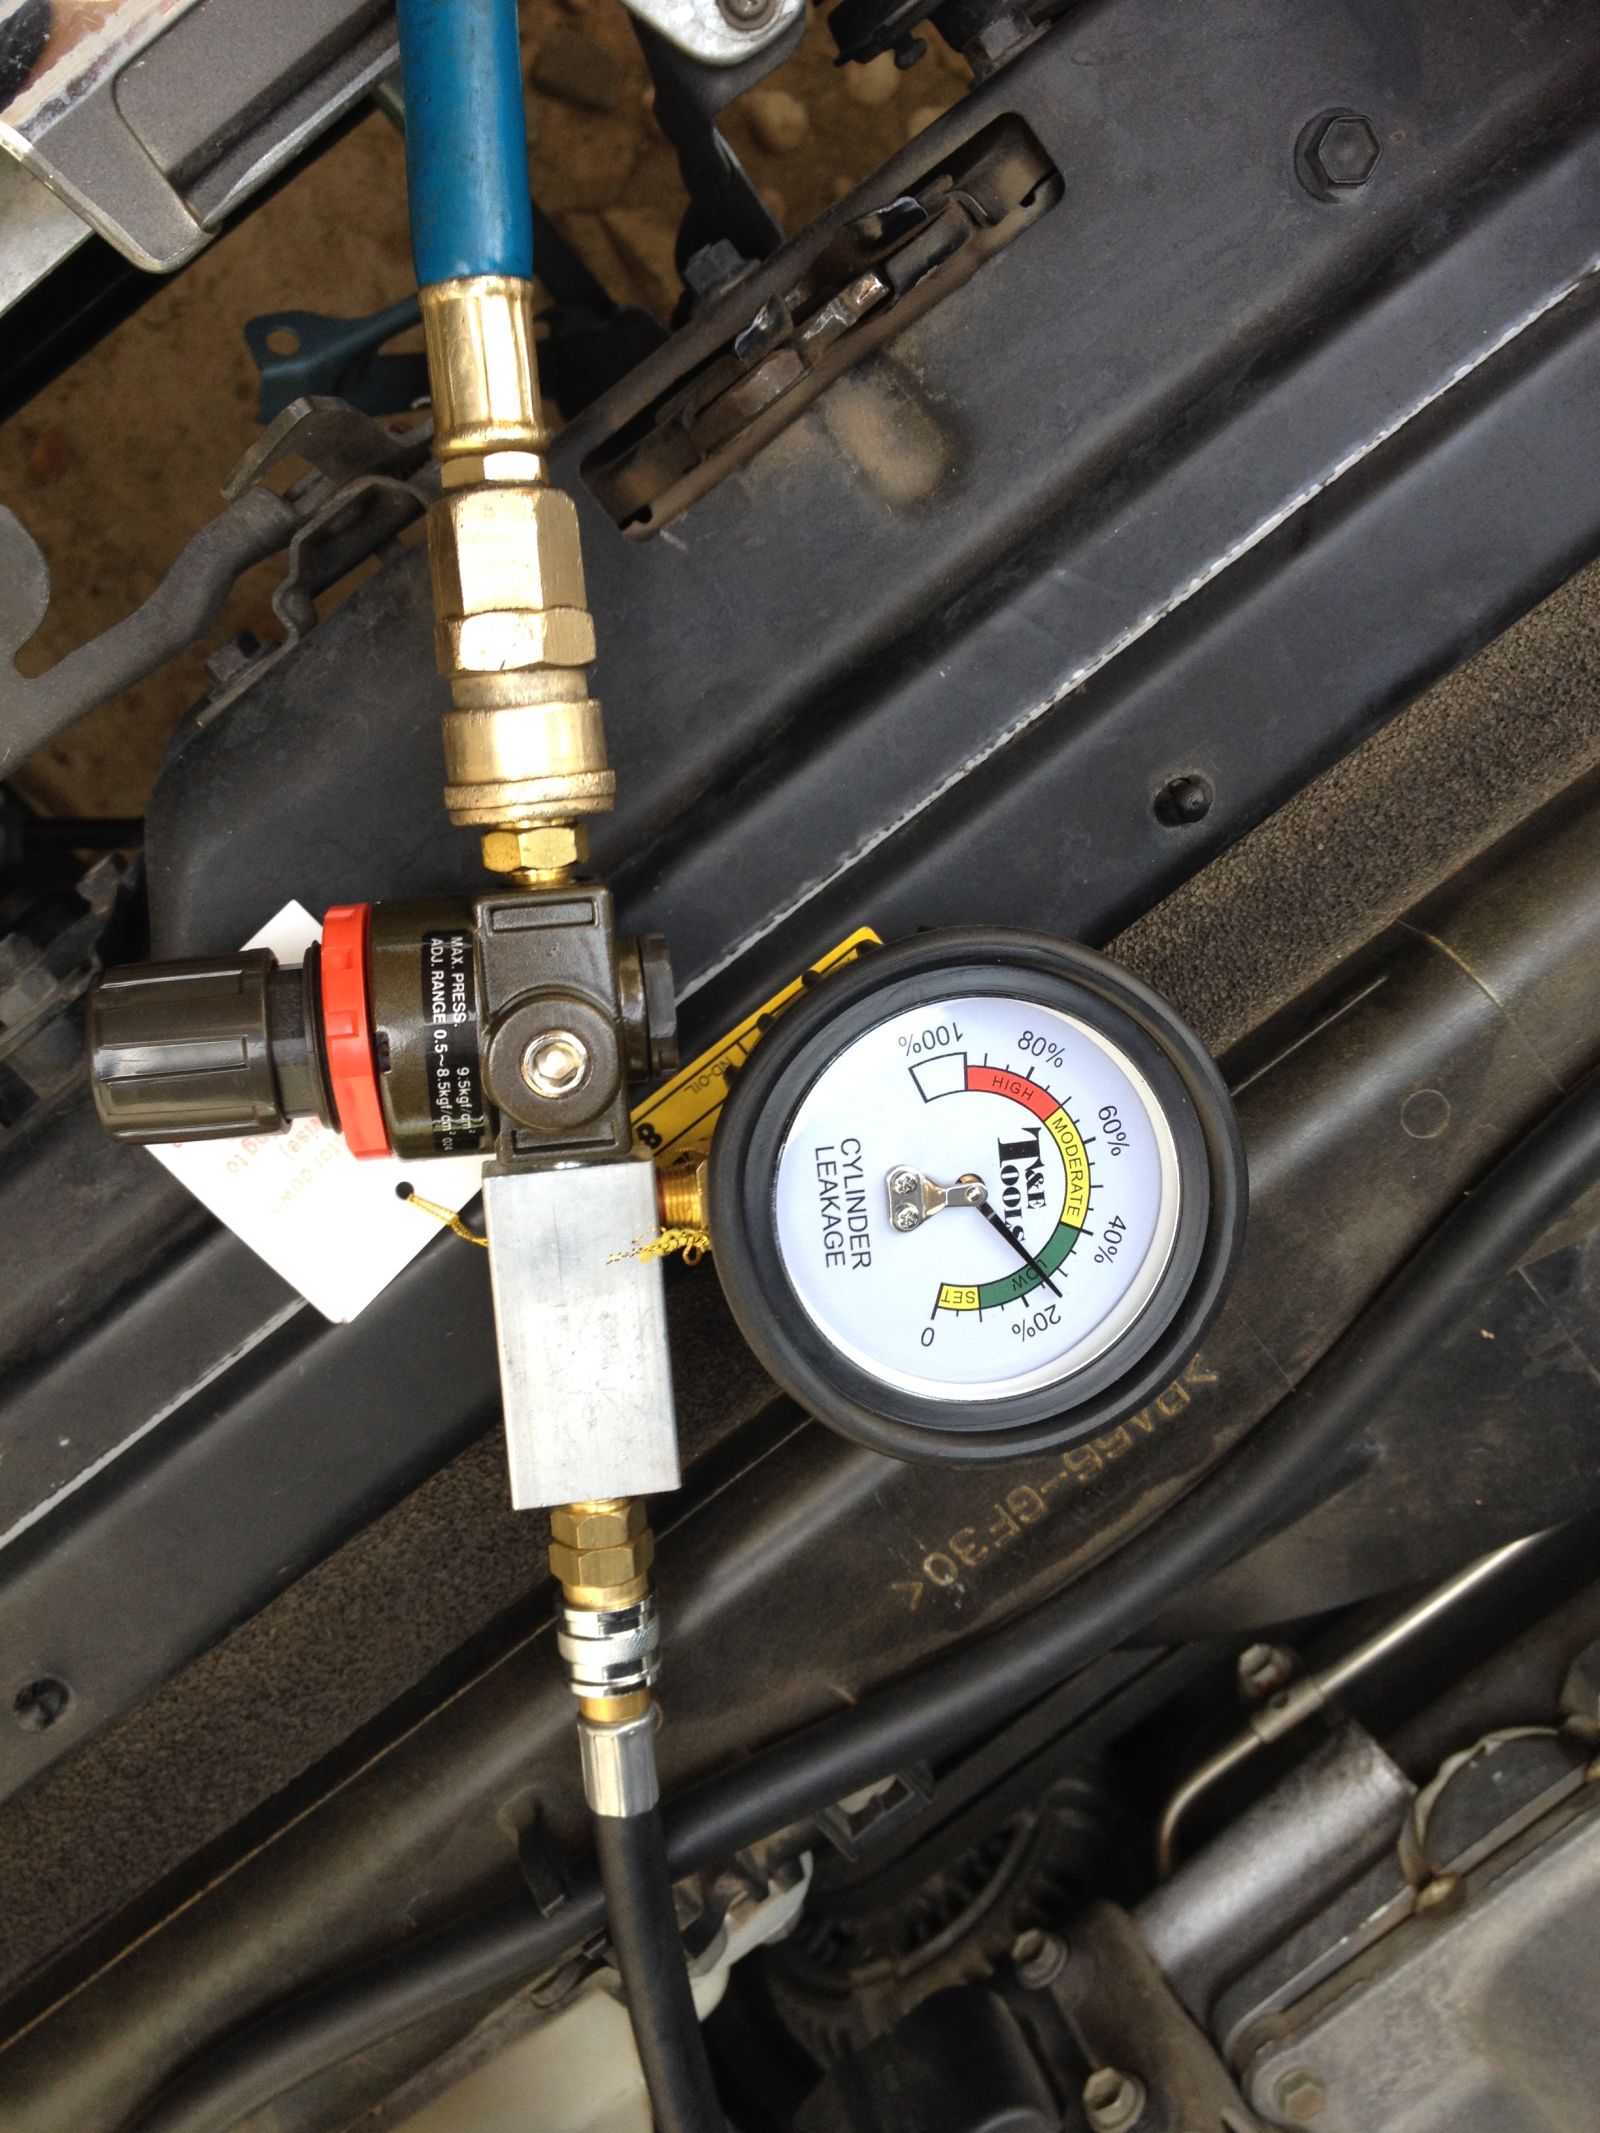
The gauge is pretty straight forward to read. Unfortunately this was the best of the readings.
Other cylinders were higher, anything over 40% I investigate further. Using a length of hose as a stethoscope, you can listen to either:
- Engine oil dipstick - worn piston rings/cylinder bore
- Inlet manifold/throttle body - inlet valves
- Exhaust pipe - exhaust valves
- Radiator/cooling system- cracked bore/headgasket
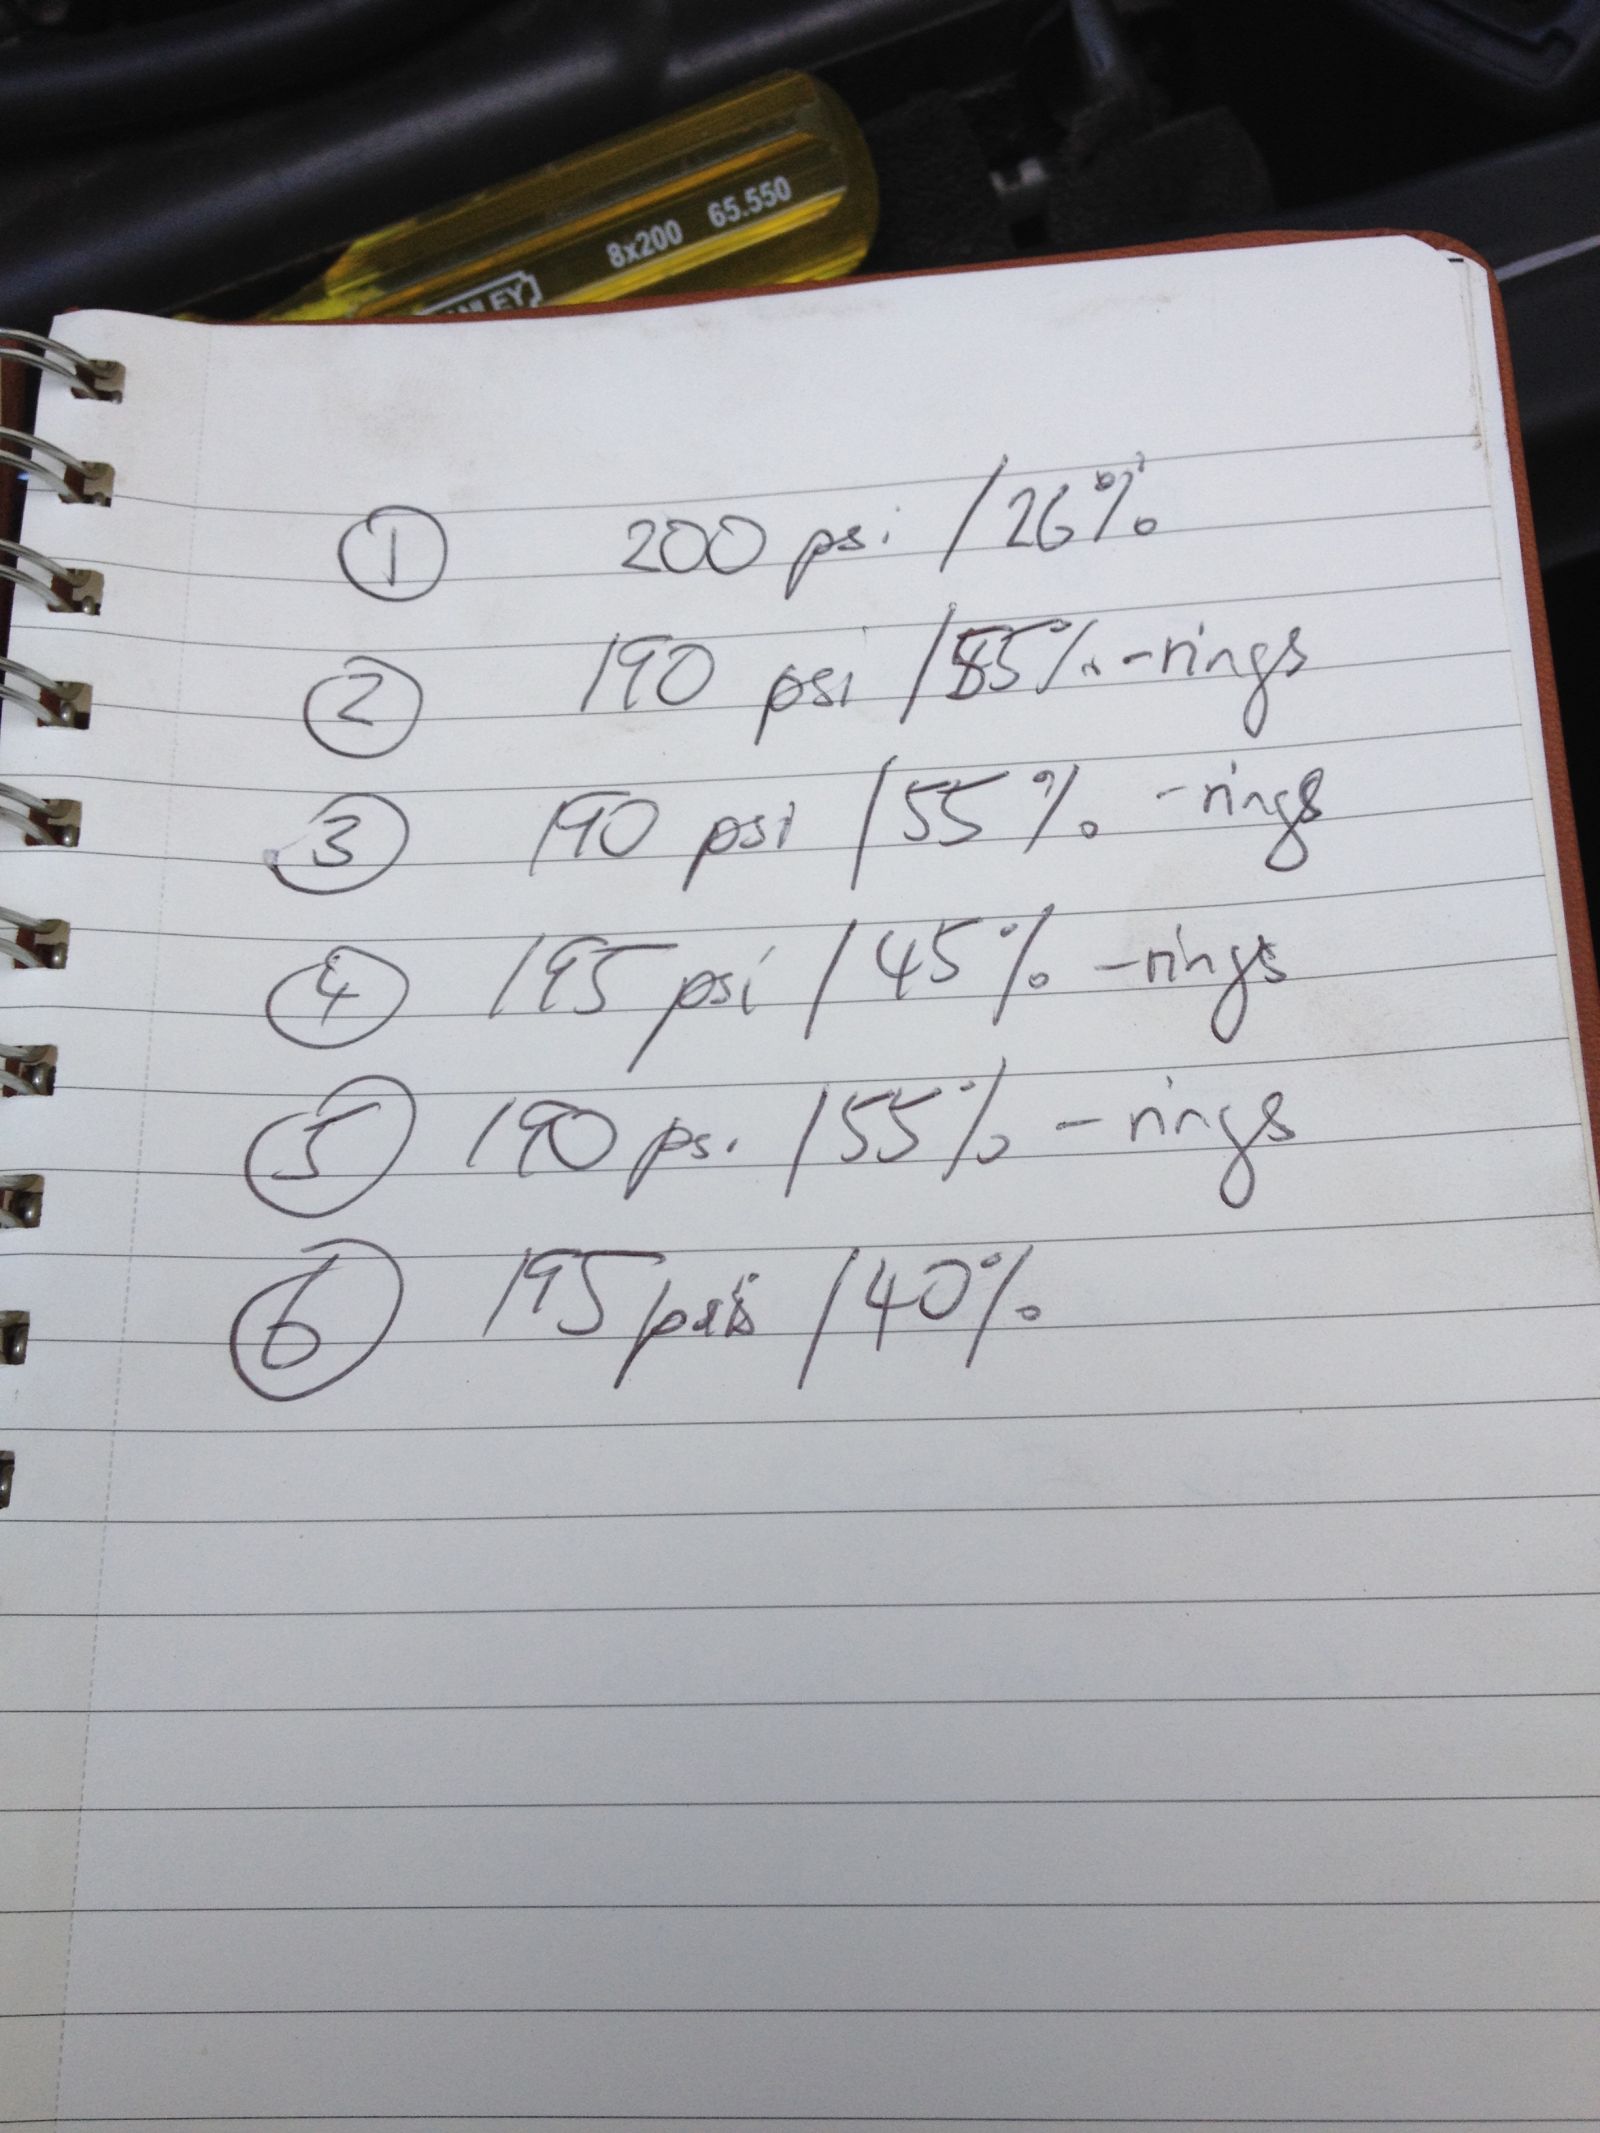
Ok, so everything is still in the ‘moderate’ range. Any leakage was past the piston rings. Should I be concerned? Maybe. This is right on the border for me of acceptable vs needs attention. The truck is nearly 15 years old, but it has ‘only’ done 190,000km with a full Toyota service history. Am I suprised? A little bit. Is this what I was expecting? Nope.
These things are renowned for doing starship kilometers. I have a little theory that my truck runs very rich (too much fuel in the air/fuel ratio) maybe not all the time but at idle it stinks of raw fuel. I need to get it on a dyno and see what the mixtures are doing (too much fuel washes the oil from the bore, hence increased bore wear) and keep an eye on these readings, if in two years it hasn’t changed, it will probably go to 500k km no problem, but if not i need to get it diagnosed and then the bottom end refreshed.
Better to know now than later I guess.
{Edit: On re-assembly make sure you take the socket/ratchet off the crank pulley bolt before you start the engine, otherwise shit gets ugly.}