
Ok but seriously. I’m going to stop saying “this is my last bike post” because clearly it is not. Apparently I either like rebuilding old bikes or... am a cheap bastard looking for a decent bike for very little money.
(It is the second one.)
For a little history, bored a couple months ago I bought a 60s Schwinn Varsity, the universal punching bag of the road bike world, and some air tools for a grand total of $50. The bike needed a ton of work to get road worthy and I did most of it. It was a neat learning experience going from cars to bikes.
When the Varsity had to go to the shop for a couple weeks, I decided to buy a second bike, a Schwinn World Sport, and give it the same treatment. With the what I learned from the Varsity, the build of the World went a lot smoother and I ended up with a better bike overall, if a bit uglier.
However in discussion with TheRealBicycleBuck here on Oppo he correctly surmised the 21" World and Varsity were too small for me. Odd, because I found the Varsity with flat bars quite comfortable, but the narrow drop bars on the World seemed to compound the fit issues and make it mildly uncomfortable to ride.
BACK TO CRAIGSLIST!
I quickly located a 25.5” frame bike that fit my MO: Cheap and neglected. I was a little nervous about that big of a frame size jump, but second hand bikes seemed to be either 21" or 25.5", which nothing in my price range inbetween.
Did I consider a new bike? Of course not. Even if I could find one (apparently I’m not the only one taking up cycling during the lockdown) have you seen how much those suckers cost!? I could buy a car for that!
But I digress....
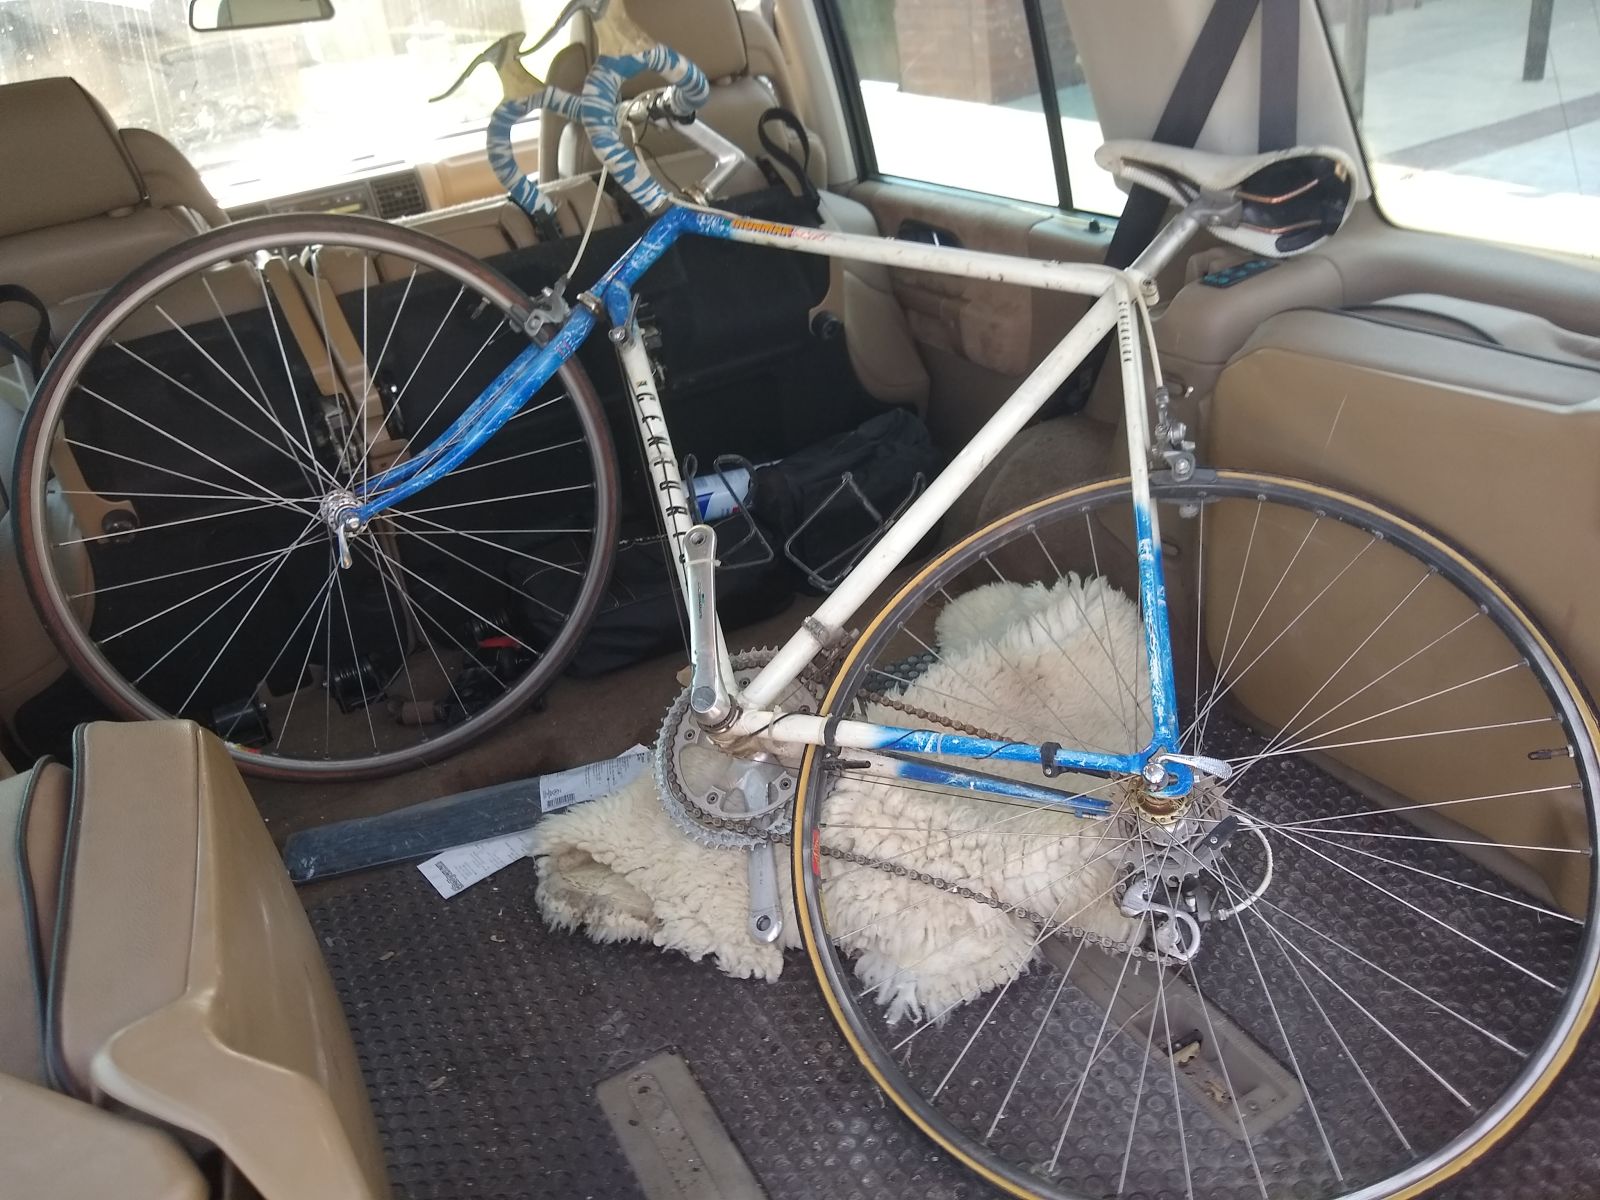
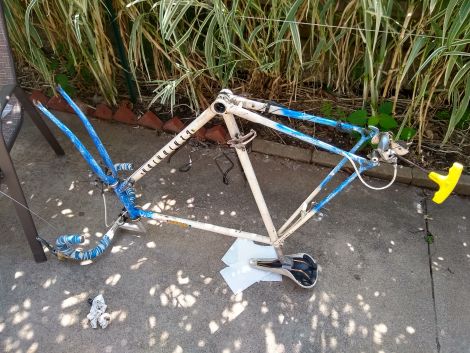
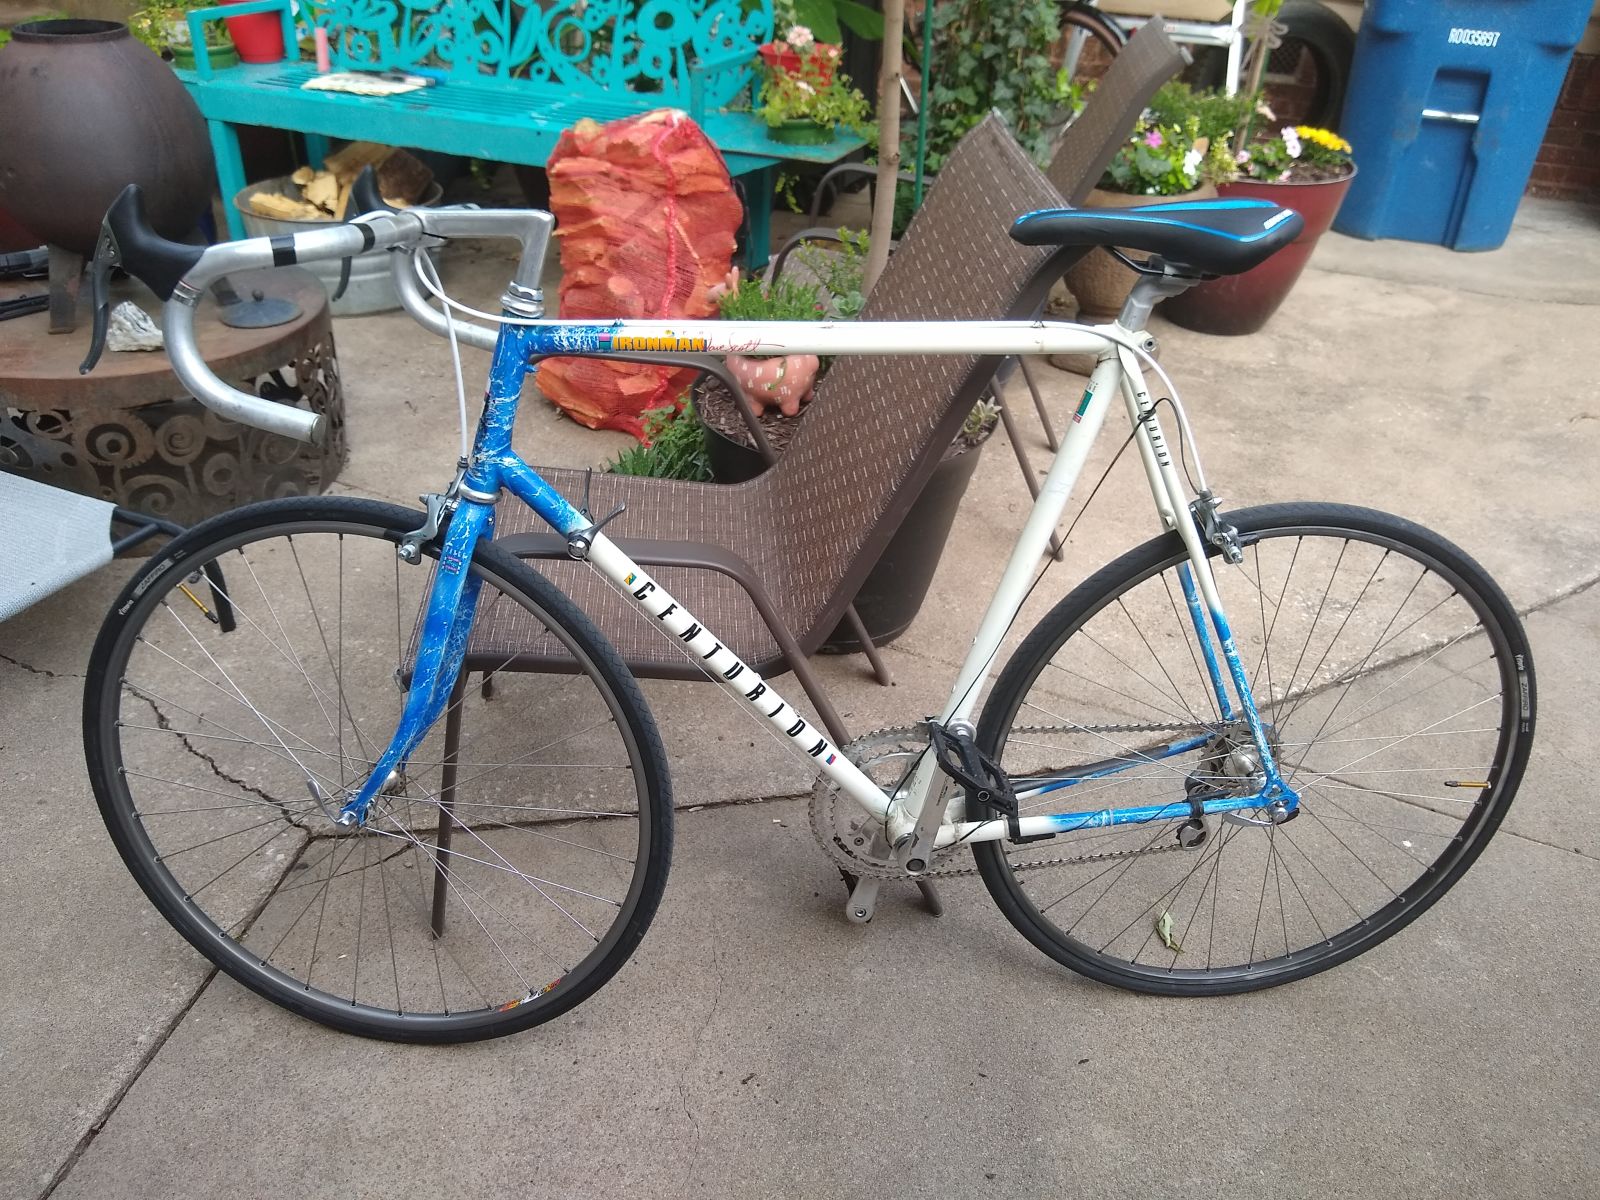
The bike in question was a 1989 Centurion Ironman Master Blue Water. Quite the name but also quite the bike. A quick google revealed that unlike my two Schwinns, this one might not earn me the ire of the bike community as it was, apparently, a decent bike in its day.
This all went down in late July, so I actually don’t remember a lot of the specifics. I think he had it up for sale for $150, which seemed high for a bike that needed a lot of work, but the internet assured me it was an OK deal.
I arrange to meet the seller in a dark alleyway to took a look at it. Like the Schwinns, it appeared to have been stored in a blast furnace for the last 30 years, with the heat getting to it so bad the rear freewheel was actually seized and all the rubber parts were disintegrating. You could even see where the grease had seeped out of everything over time...
Apparently the bike was this guy’s neighbor’s and though some odd deal it was given to him and he just wanted to get rid of it. Ok cool, well now that I know what your cost basis is....
Anyway, the wheels were true and the frame seemed like a good fit, if maybe a little too tall. Also upon picking it up I was astonished how light it is compared to the Schwinns. I would guess half weight but I think the internet would tell me I’m wrong. Either way, even in its broken, neglected form it felt like a better ride than the other two. Pretty much everything on the bike was Shimano, which I have had mixed experiences with in the past. I’d always heard they were a well respected brand, but the shifters on my Specialized mountain bike in college never really worked right after the first hundred miles.
Anyway.
I would like at this point to say I became a master negotiator and got this one for under $30, like the other two. What actually happened is I asked him what he wanted for it and he immediately came down to either $60 or $80, I don’t recall which so for the sake of argument let’s say $80. I felt this was plenty fair and handed over the cash.
(Sidenote: I negotiated hard on the World and ended up quibbling over $5. I felt shitty about it afterwards, so have adopted a different approach since. I was going in prepared to spend $100 on this bike so everything under that is beer money IMO.)
Let the work begin
Well, like the others this one needed a lot. Specifically it needed: new bearings (crank, wheel, headset, freewheel), new pedals (completely missing), tubes, tires, seat, brakes, chain, hoods, cables, and cable housings.
Unlike the other two it came with a pretty full featured, if a little dated, trip computer that includes cadence, which is neat. A new battery got the computer up and running, so I figure with some light repairs to the sensor wiring I’d be good to go.
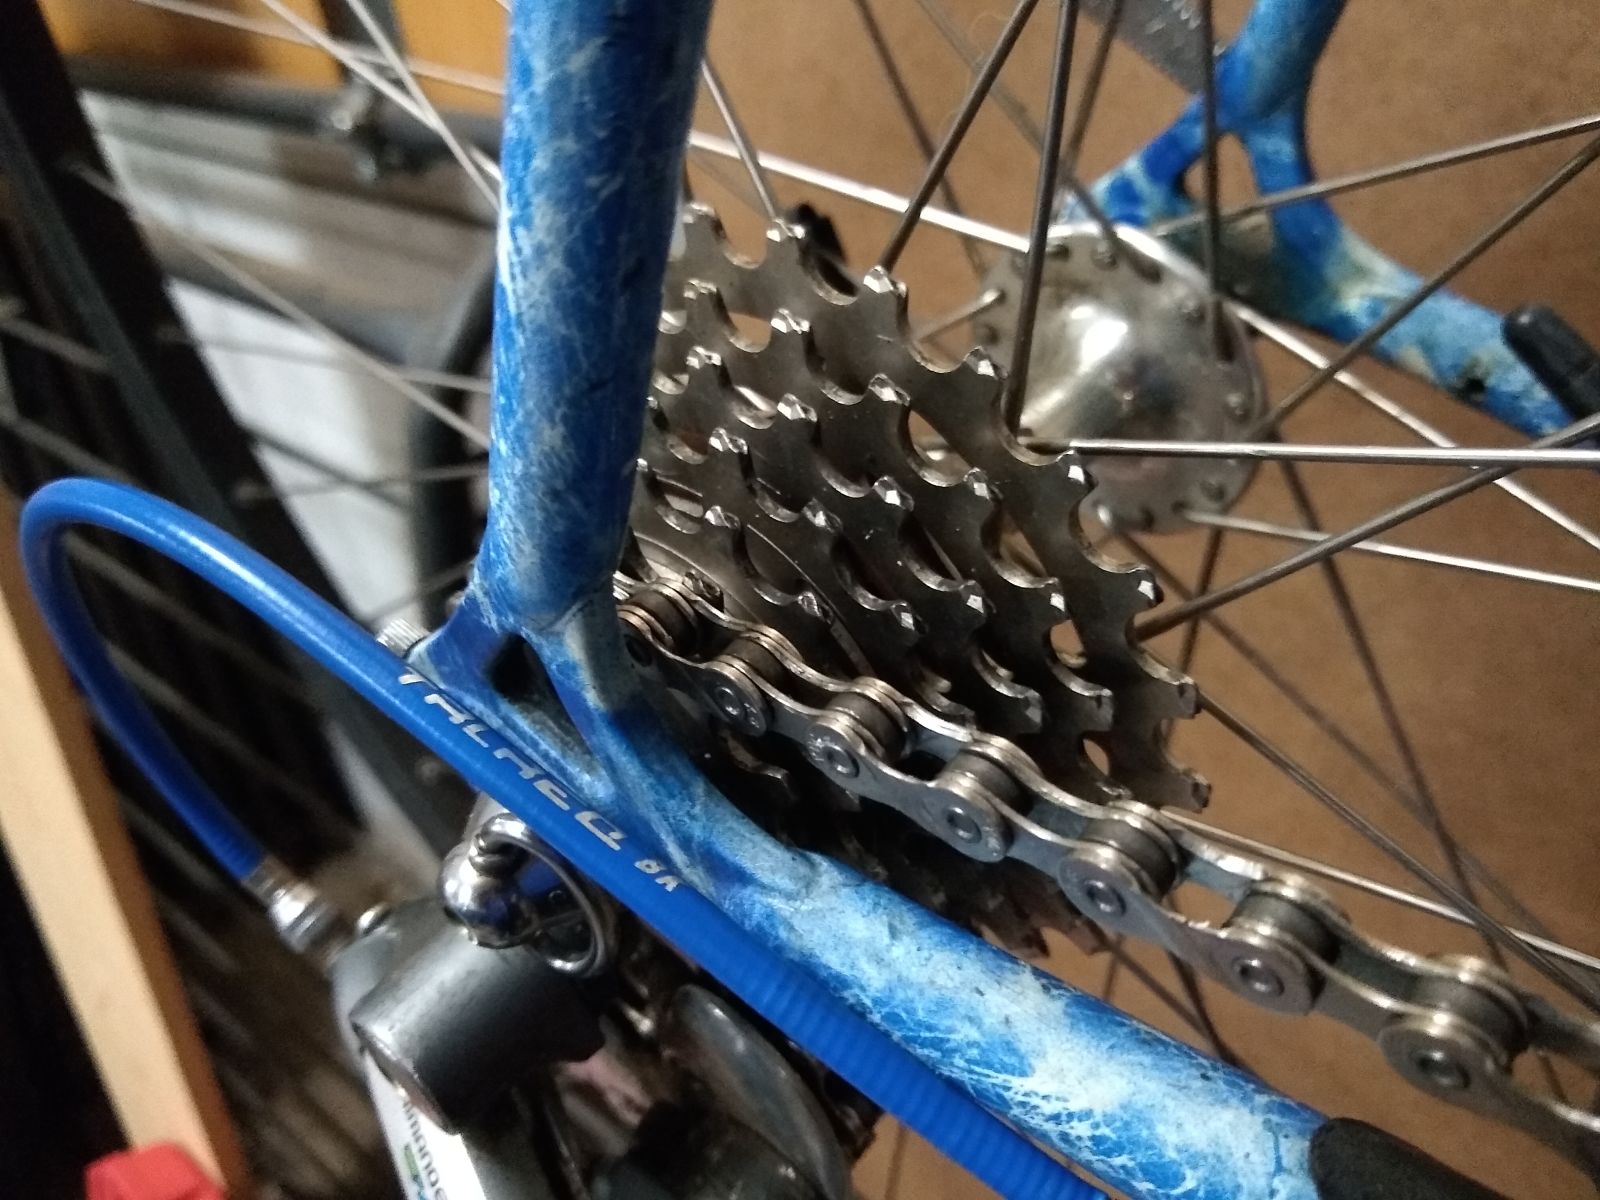
Second repair was to tear into the seized freewheel. Oddly the internet (I know, I need to stop going there...) suggested this bike should have a rear cassette, so either the internet is wrong or, more likely, the rear wheel + gearing got swapped out at some point. This is somewhat supported by the front wheel being Araya and the rear being... crap I don’t remember. Something French I think.
Unlike the older bikes someone had done some part swapping on this one. Good for them!
Pulling this freewheel apart was a new experience for me! The outer (smallest) gear occluded access to the nuts and blocked access to the removal tool. So either there was a trick to this or I was missing something...
It was kind of both?

I remembered reading somewhere that you could sometimes un-thread gears from a freewheel. Or maybe always? Anyway, lacking a 2nd chain wrench, I cut the chain off the bike (the chain broke my chain breaker which was... odd, so the angle grinder avenged it), wrapped the chain around the outer gear and secured it in a table vice. Then, using an actual chain wrench, I managed to un-thread the outer gear, revealing a setup that was closet to what I’m used to.
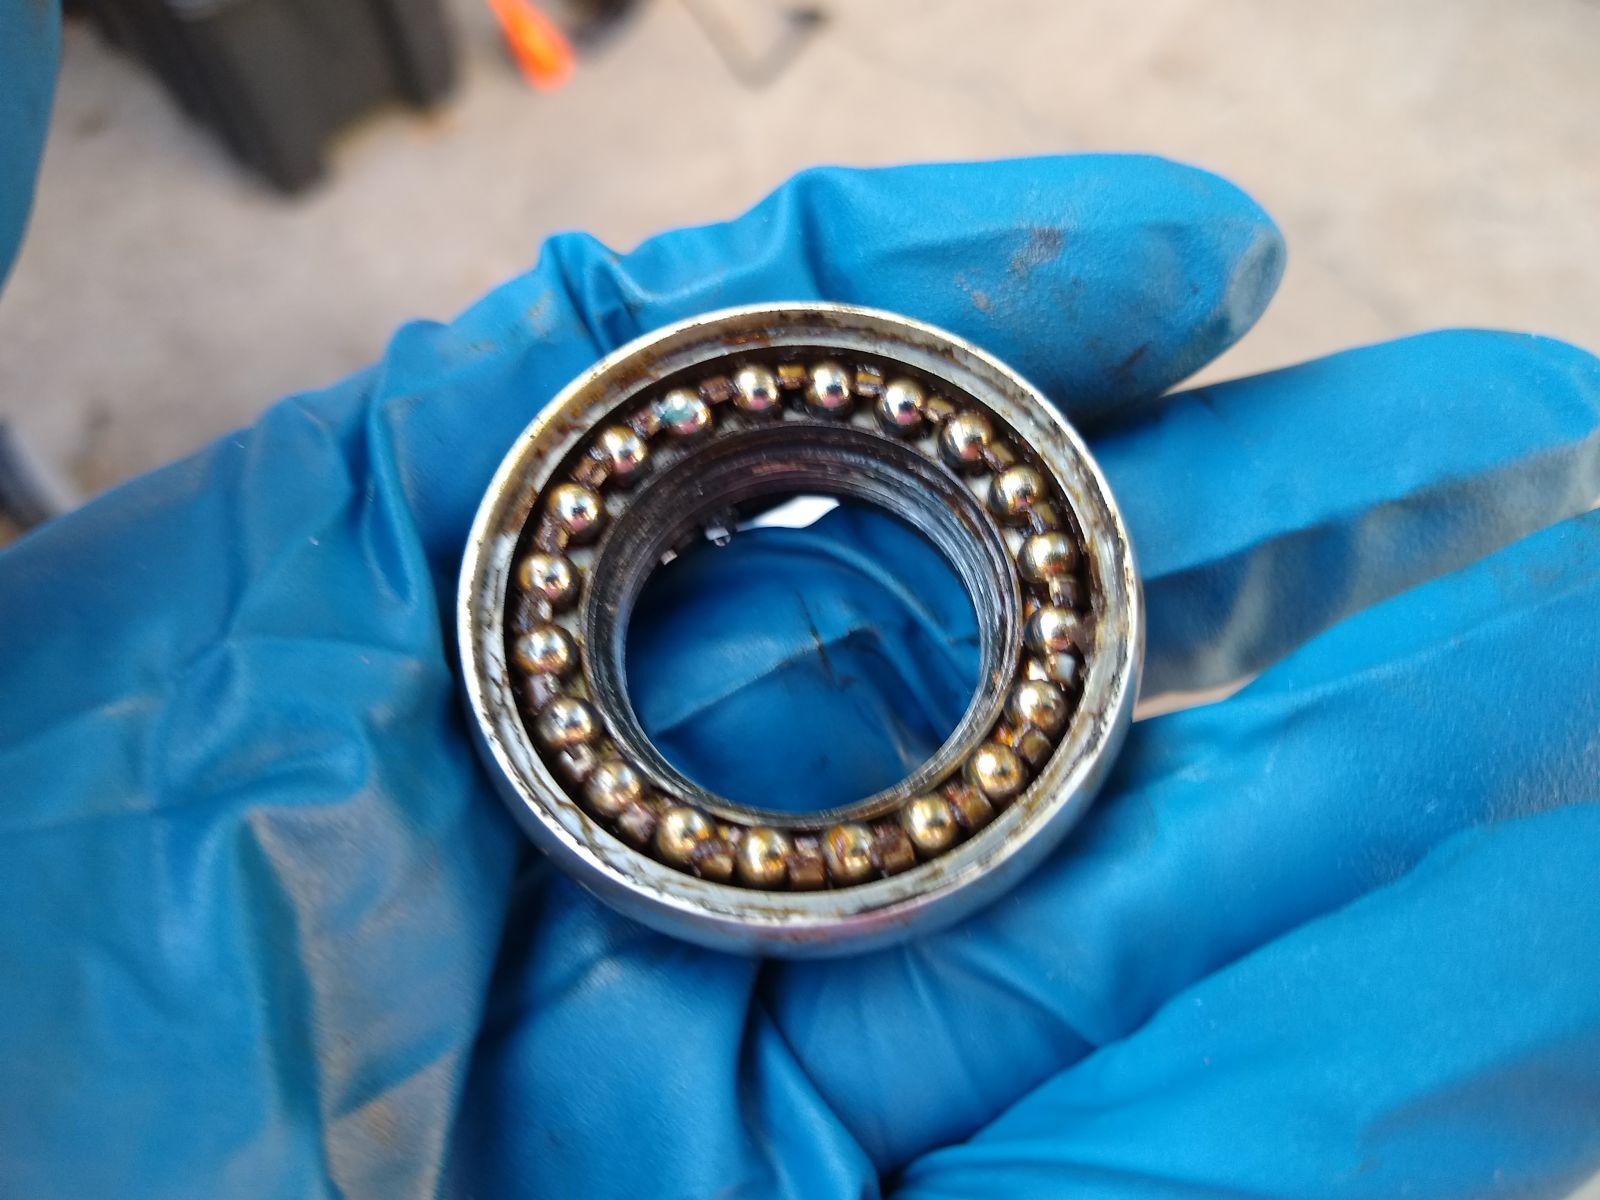
The freewheel popped off without much fuss and I soon had access to the sticky, sticky bearings.
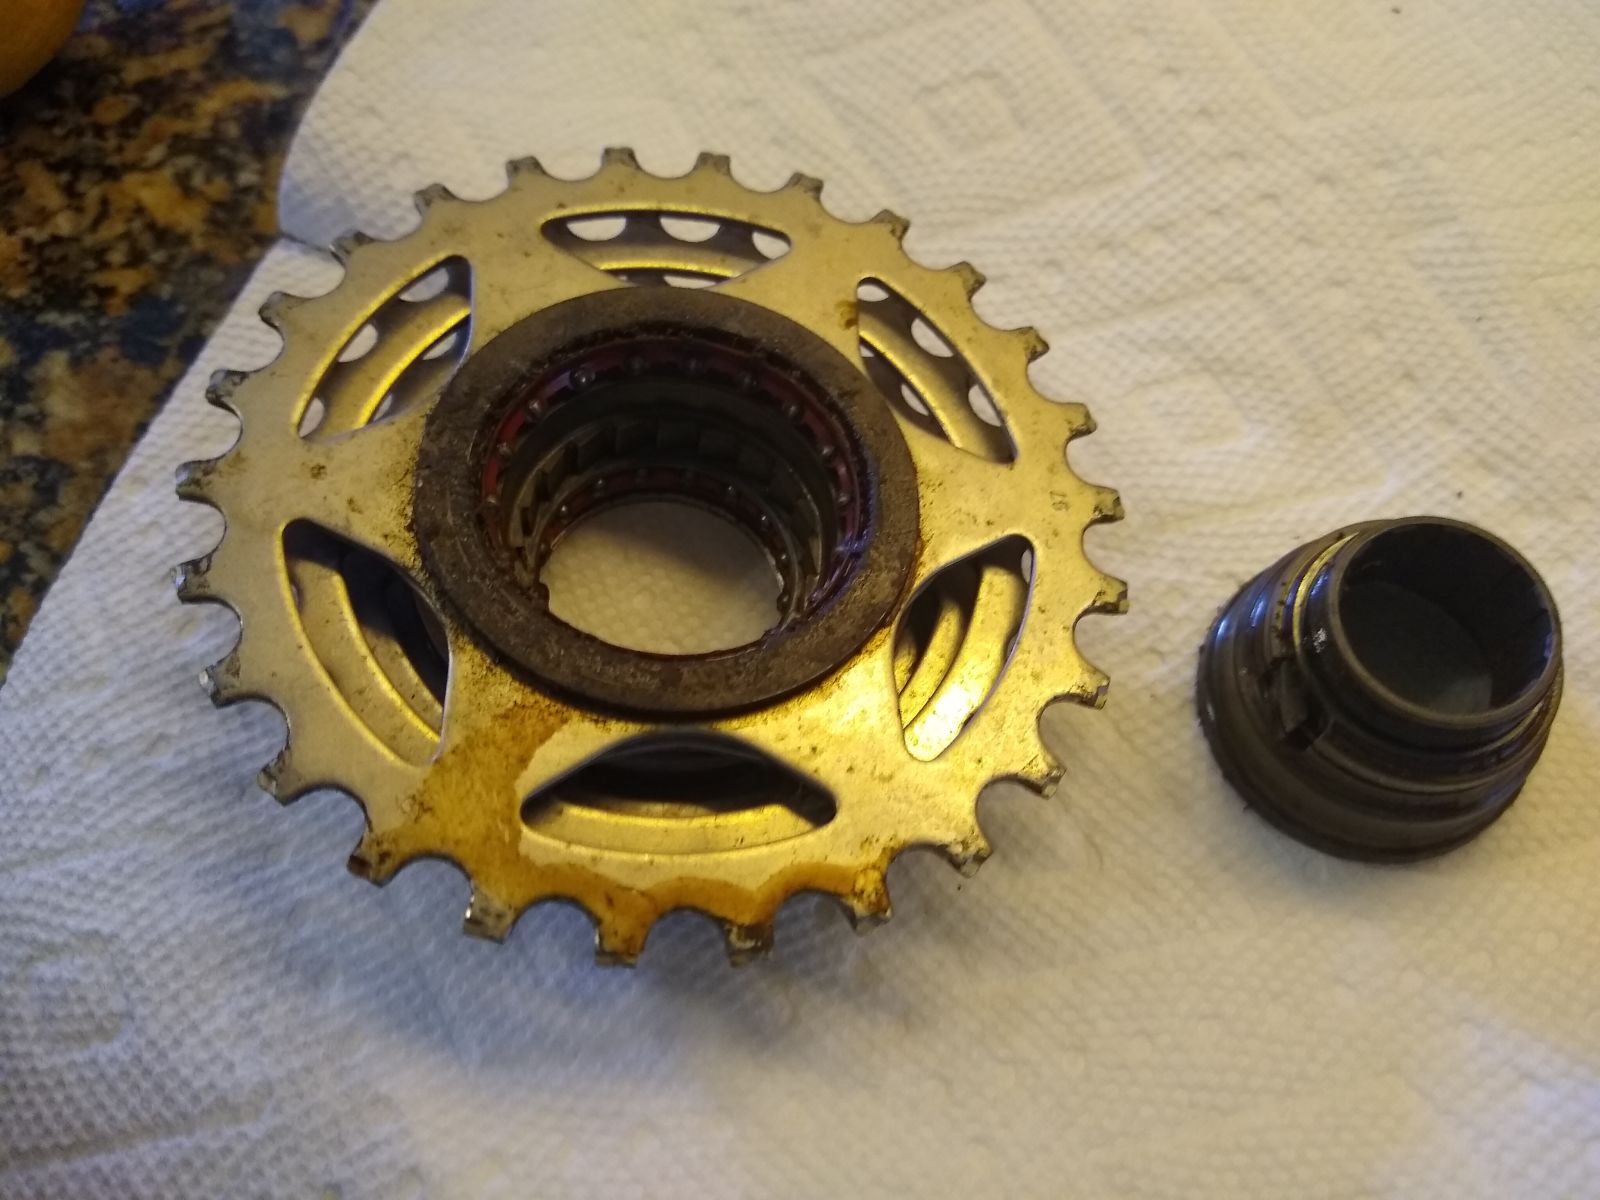
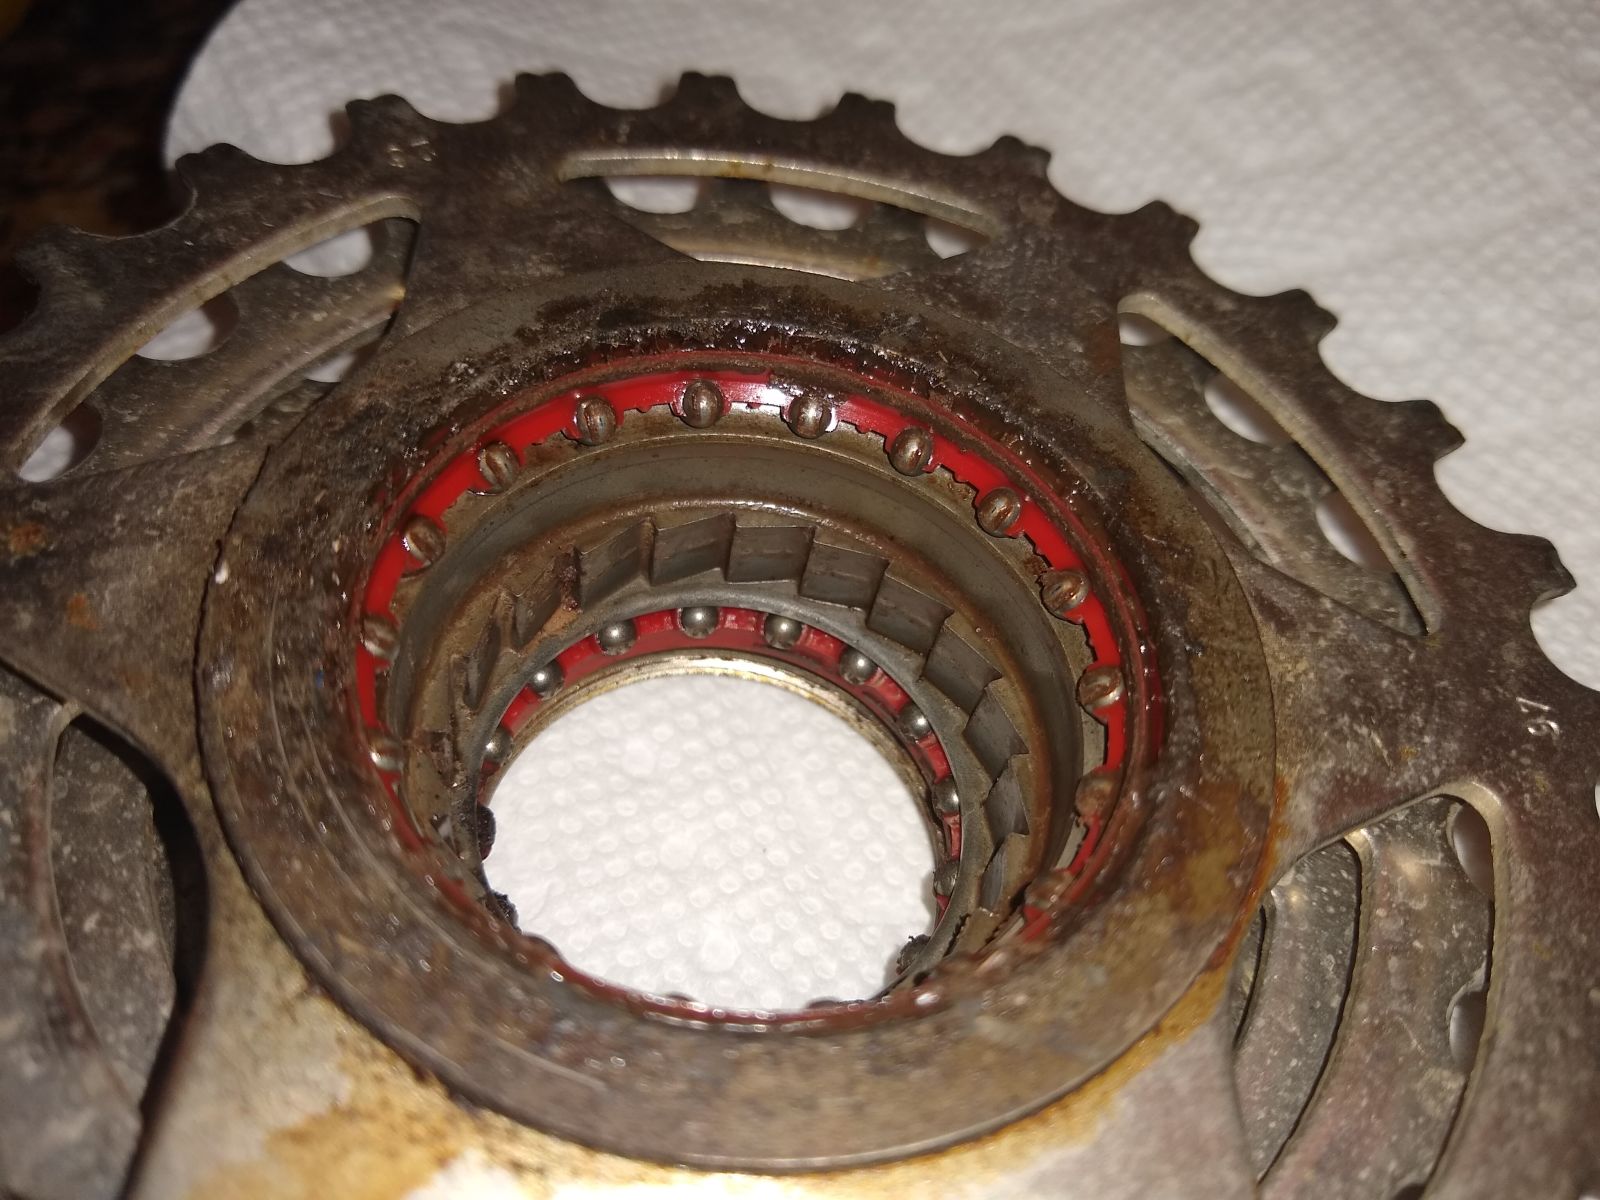
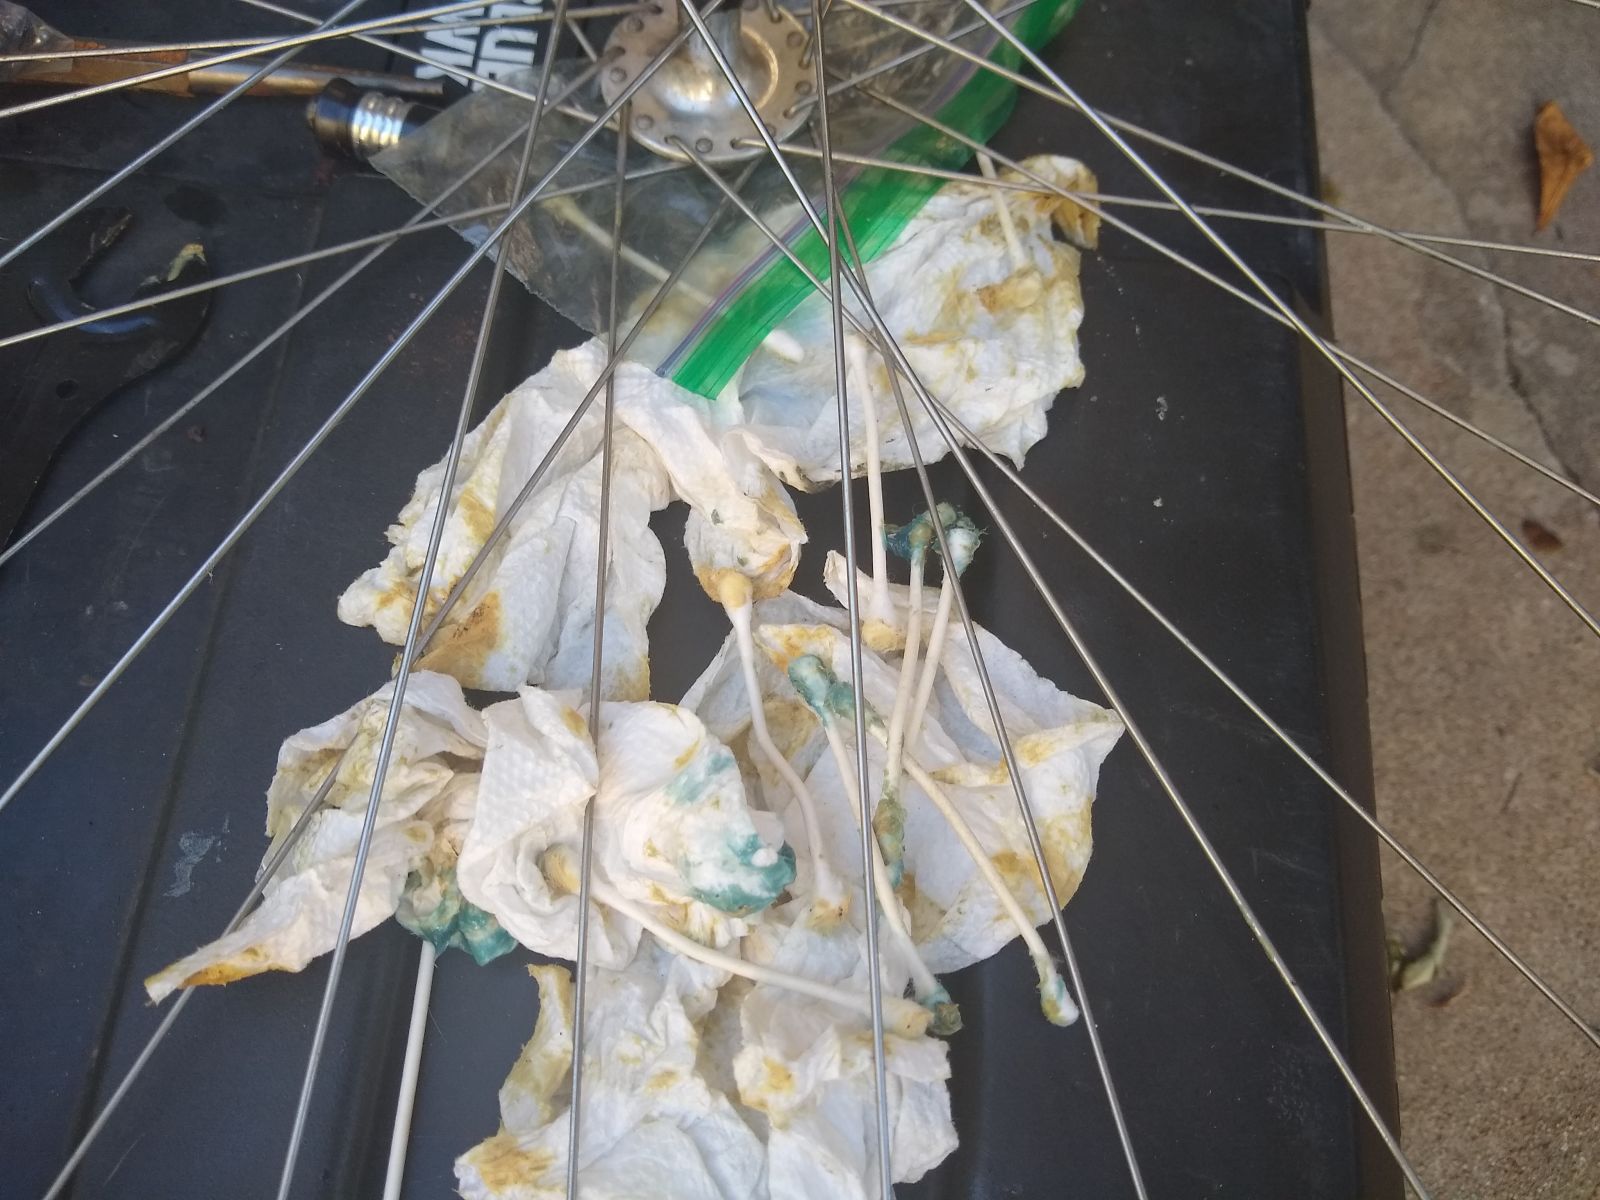
In truth, everything looked pretty good! Clearly the grease had all turned into glue at some point and everything was VERY sticky, but otherwise the internals looked practically brand new. The bearings were... unlike anything I’d ever seen, with the balls suspended in the plastic race with sockets. Creepy and weird, it was not immediately apparent if the balls could be replaced or if I needed to replace the entire assembly. Some prodding with a pair of tweezers revealed the balls could be unseated, so I quickly* popped them all out, degreased the assembly, and new ones in.
*Ok by “quickly” I mean over the next couple months. Lots of work travel these days...
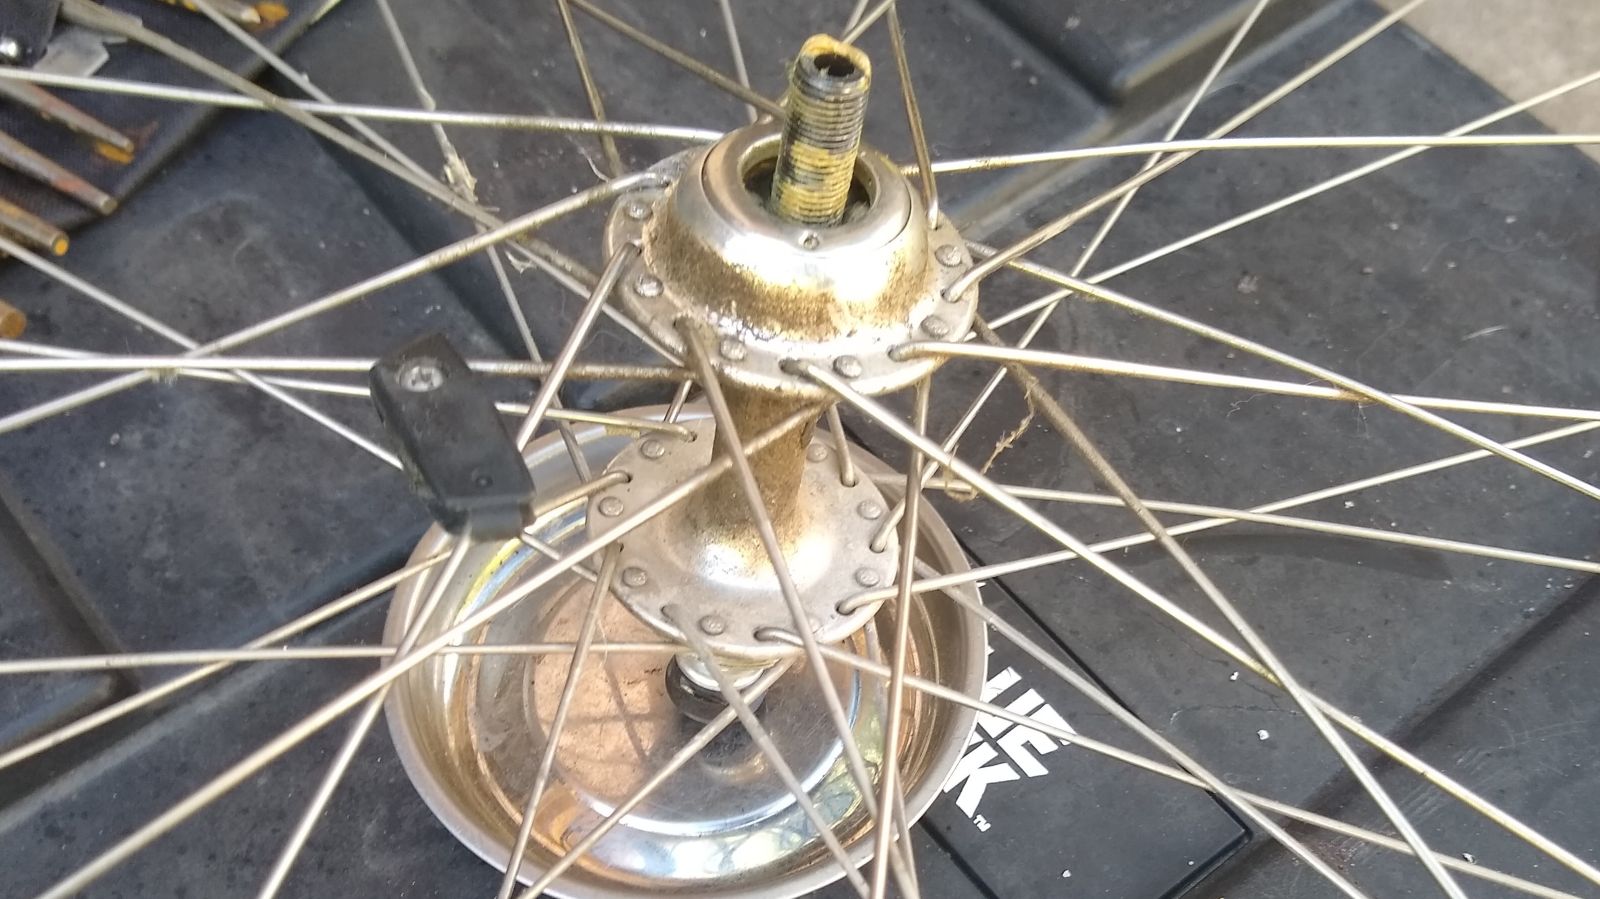
That done, I set about the semi-mundane task of replacing the wheel bearings. No big surprises there except the grease had gone quite milky which was... odd. Also I couldn’t figure out how to get the dust caps/cups off to clean out the old grease and didn’t want to risk damage, so I just did the best I could with them on, replaced the balls, and repacked everything with grease.
Next up was doing the shift cables, which were pretty easy except I’d only worked on friction shifters to this point and these were like... spring-loaded selectable indexed or friction shifters... which was a little strange but ultimately straightforward... at least to replace the cables. TBD if I got the adjustment right. (Hint: I didn’t.)
Next up I cracked open the crank. And by “cracked open” I mean “spent several hours trying to figure out if it was just stuck, reverse threaded, or both.”
It was both.
Once I had enough whiskey in me to apply the appropriate amount of muscle, I was greeted by two very unusual and very crusty bearings. I forgot to take a picture, but unlike the World and Varsity, the cage on these was very slim, allowing the balls to contact both races.
I didn’t have these, so the next day I was off to the local bike shop for bearings, tubes, and tires.
TO THE GOOD LOCAL BIKE SHOP!
Good news is they had the bearings! $2.50 each!
Bad news is they didn’t have tires.
Good news is they had tubes! $15 for the pair!
Additional good news is they’d sell me used tires for $7 each. Yes please!
Walking out having spent $35 after expecting to spend closer to $100 felt pretty good!
I repacked and reinstalled the crank, after spending an embarrassing amount of time dealing with one side not threading only to realize I’d got them backwards and was trying to reverse thread something into a forwarded threaded hole. Luckily I’m nervous enough about cross threading I didn’t force the issue and managed to see my error before fucking up the threads.
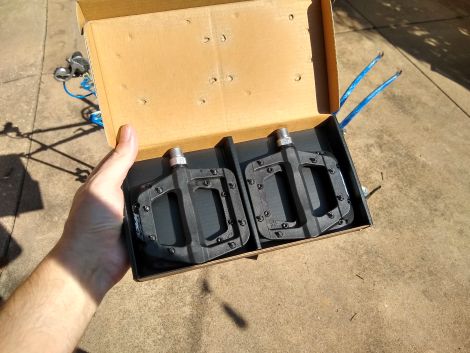
Afters I went ahead and installed my new pedals. Unlike previous builds where I wanted to keep it vintage, I went ahead and bought modern pedals for this guy.
After much deliberation I ended up with the RaceFace Chester pedals. I did consider buying the much reviewed knockoffs brand Fooker, but apparently blatant IP theft has gotten to Fooker’s head these days and they only cost $10 less than pedals they are blatantly copying inspired by. I also considered buying knockoff knockoffs, but I’m not sure I want to see how far that rabbit hole goes.
In the end, $45 for a good set of pedals felt like a good price and I like supporting the people who inspired so many knockoffs.
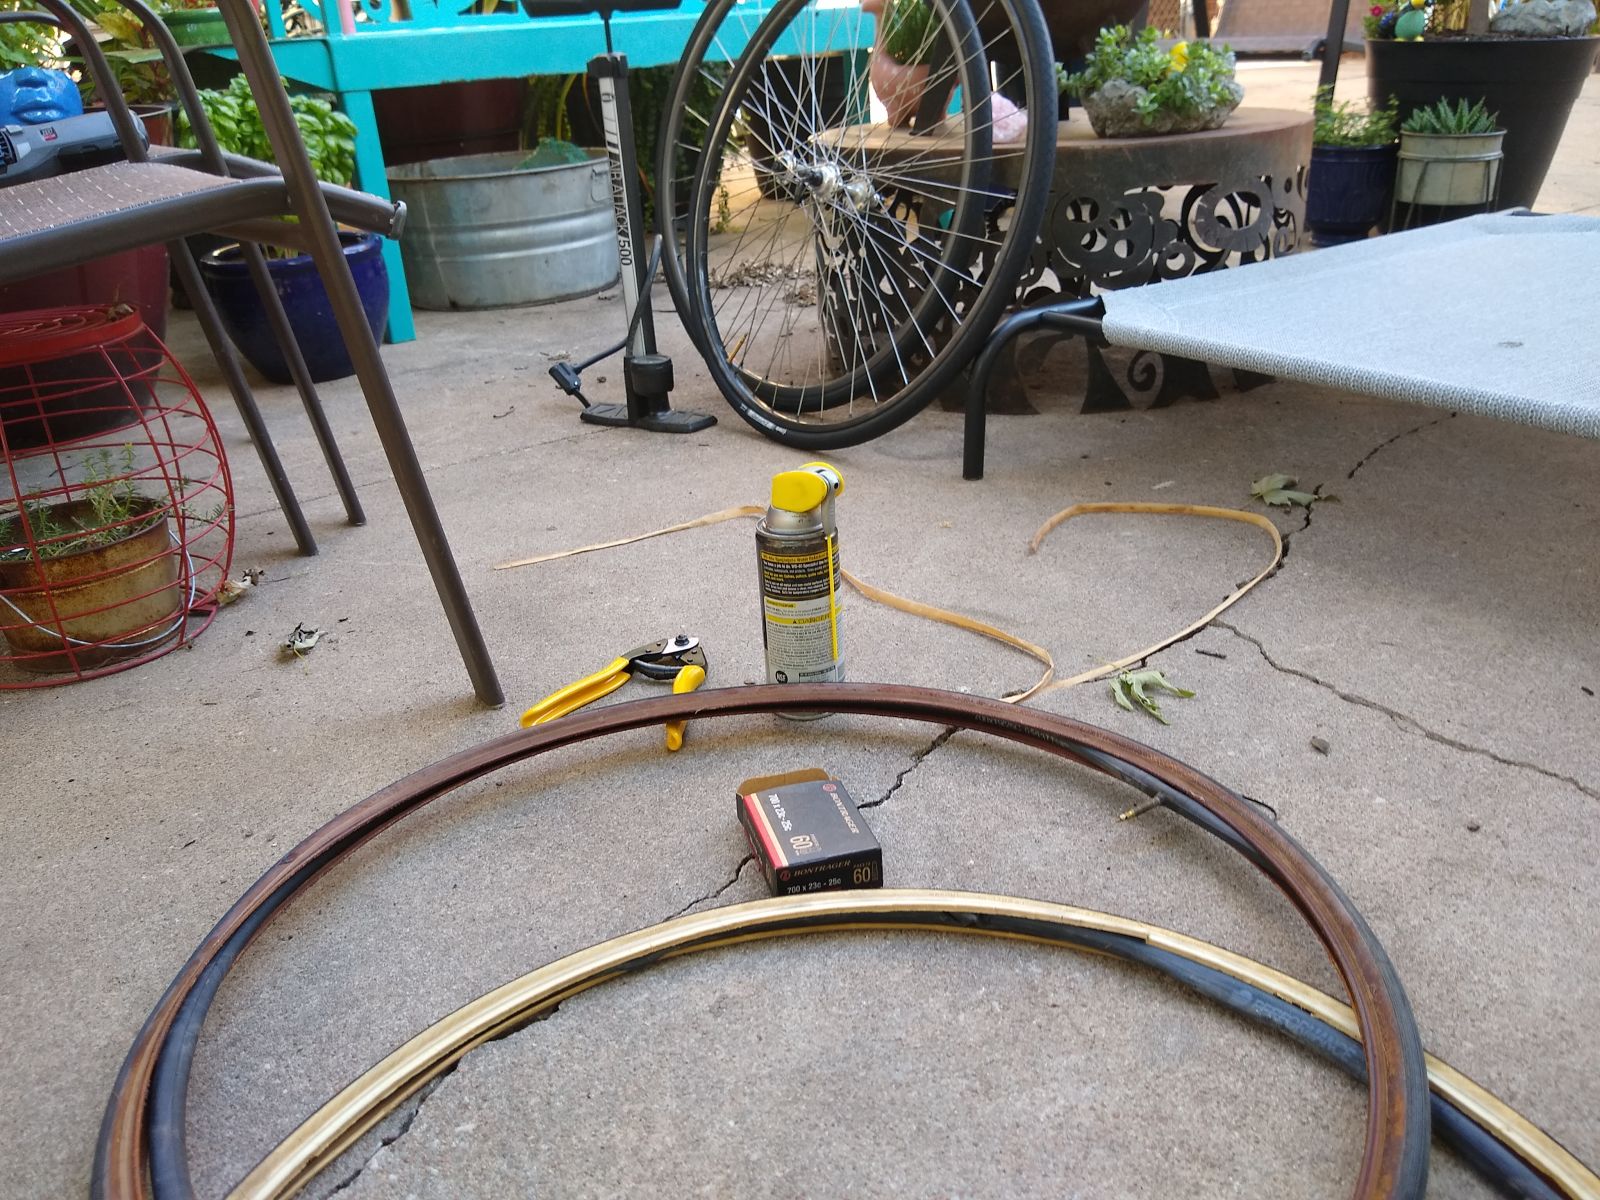
Then the bike and used tires got a much needed scrub, then I installed the new tires. Apparently I was ill prepared for the tenacity of 700c wheels or what, but I COULD NOT get the old tires off. I ended up cutting the cords.
The new tires, similarly, DID NOT want to go on, but after much struggling and a little lube, the tires were on and this bike was starting to look like a bike again.
After slapping on a new chain without much fuss, I had a real question: To replace the headset bearings or to not replace the headset bearings. On the one hand given the condition of all of the other bearings they probably need it. On the other I don’t want to.
Decisions decisions.
Oh why not!?
Actually taking the fork off and getting the bearings out proved much easier than expected, and I quickly had them out, degreased, cleaned, repacked, and back in.
Easy! (Except after my first ride I had to re-tension those....)
Next up was to do the brake cables, guides, hoods, and pads. Just grab my cables...
Huh.
Would have sworn...
Crap! What I thought were brake cables were actually shift cables.
Oh well. At least I can replace the hoods while I wait for the bike shop to open...
Huh.
Would have swor- GOD DAMN IT!
I didn’t order hoods. Or, rather, I DID order hoods... for a different bike. Heh.
Oh look, the Shimano R600 brake levers that are on there don’t have replacements readily available. Crap.
Well being that it is late on Saturday, my choices are to wait for several days for the hoods to come in... or go to the snooty, overpriced local bike shop tomorrow as they’re the only ones open on Sunday.
Ultimately I decided if I delayed a bike project for several days because I didn’t like that LBS, then I’m letting the terrorists win.
But also giving them money is letting them win so....
TO THE SNOOTY BIKE SHOP!
The next day, with much trepidation, I headed over to the bike shop. I was, eventually, greeted and asked what I needed.
“I need hoods for Shimano R600 brake levers please!”
“Ok I’ll look.” And so he did.
“We don’t have them.” He continued “You said R500 right?”
“Nah man, R600.”
“Ok I’ll look.” And so he did, again.
“We don’t have them!” He returned, again.
“Oh man that sucks. Just to double check, I think the part number is 1055. Can you double check you don’t have any 1055s please?”
“Oh hey here they are!” and returned with the blessed parts in hand.
“Cool! How much are they?” I ask as if I wasn’t going to buy them no matter what.
“Oh I don’t know. People don’t usually buy hoods.” He replied, staring blankly.
Eventually he went over to his POS and after an amount of time that could only suggest they’re using dial-up to Romania to check prices, he informed me they’re $12. Excellent.
“Ok I’ll take those and two road bike cables please!”
After another dial-in to the far corners of the universe, I was greeted with my total: $26
“What,” I interrupt, “How’d we get from $12 to $26?”
“Uhh... let me check.” and more staring at the computer is done. “Oh the brake cables are $6 each.”
I made a sound that I can only assume made them think I was about to be unwell, commented on their apparently healthy margins on these things, and decided to go ahead with the purchase. To their credit, they are VERY nice cables... though not what I would call 6x what the place down the street charges nice.
Back to the build!
After returning home I set to work replacing the brake cables....
...and immediately realized I only had 4mm white brake cable housing. No 5mm in sight.
Luckily Amazon could get it to me the next day, so I waited and contemplated the nature of $6 brake cables.
The next day I finished off the brake cabling, installed new brake pads, re-adjusted the shift cables, and installed the new hoods and seat, all without fuss.
I went to repair the broken wiring on the trip computer and quickly realized it was going to be more trouble than it was worth. The insulation was pretty much done for and the tiny gauge wires going two the two pickups seemed like they’d be difficult to solder. Luckily replacement brackets with wiring are still available, so for $25 I got one of those on order.
So... I think this means it was time for a ride!?
And so I did.
And it was... interesting
The bike glides much, much more than the World or Varsity. You can certainly tell it is both a better bike and a better rebuild than before. The bike rode smooth and quiet, the brakes were nice and grabby, and the steering was direct... if a little twitchy.
It wasn’t all good, mind you. The shifters were woefully out of adjustment and something about the riding position was very... stretched for me. Something about the geometry had to be changed for this bike to work. Oh and the freewheel didn’t freewheel very well. It didn’t cause a problem, but the chain would get some slack in it before the freewheel would start turning. Odd. I found out later when cleaning the garage I’d left out a shim when rebuilding it, so that is likely why.
Back to the workshop!
After consulting some more the BicycleBuck, I decided to change out the stem. Turns out they’re not very expensive and going from the relatively long reach of the stock one to something shorter might fit my body (long legs, short torso) a little better.
After struggling a bit to get the drop bars through the new stem, I finally got the 0(ish) offset one fitted and the bike was transformed! I didn’t even bother trying the others I’d bought. This one was a keeper. Comfort was up, control was down. After a few test rides tweaking the angle and brake lever location, I was finally happy with the location and fit!
Getting close now!
I put the bike on my newly purchased wall rack (I’m too cheap for the real thing... which is dumb) and pulled the rear wheel off. A little fussing with the impact and I had the freewheel back off, disassembled, reunited with its lost shim, and reassembled. And now it freewheeled correctly! I think the problem was part missing shim, part being overzealous with the grease and that getting into the pawls.
Since it was already on the rack, I went ahead and adjusted the rear derailleur. I haven’t had a chance to dig into how to do this yet as the Schwinn’s derailleurs work... fine. The Centurion’s, however, did not. Mainly the indexing had no relation to the gears and I couldn’t access the lowest (largest) or highest (smallest) gears. A quick trip to youtube told me this was likely a mix of adjustment and cable tension. After getting the cable tension where I was happy with it, I adjusted the high limit screw until I could access the smallest gear.
At which point said gear wedged against the frame.
Well fuck.
I’ll be honest, at this point I was pretty stumped. Either not having the outer gear and freewheel 100% maximum TIGHT was causing a problem or somehow I’d missed a spacer on reassembly? Only I didn’t disassembly that side of the axle?
Heh. The end of this build open road was calling, so rather then seek out the “correct” solution, I threw a washer on that axle. After refitting, suddenly I should shift into high gear without binding to the frame.
Hooray!
A little more tweaking and I eventually got the bike moving through all the gears smoothly and directly. The indexing was even on point!
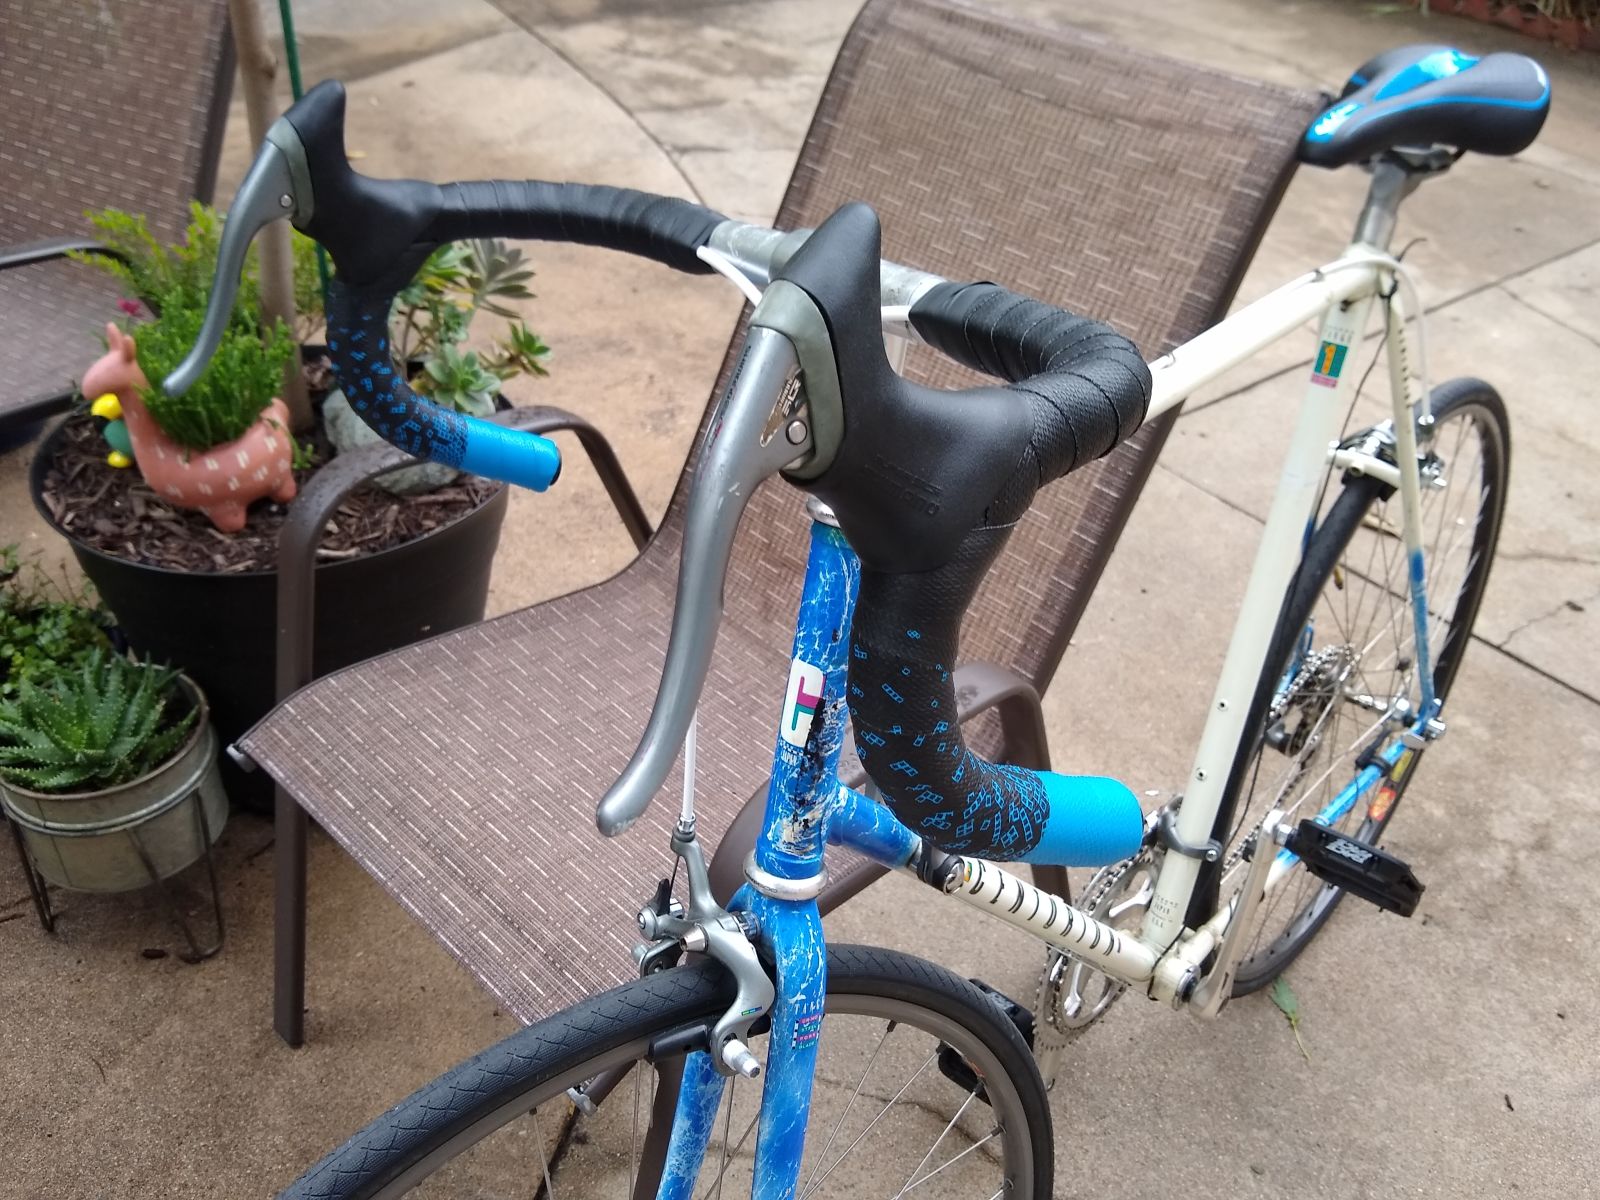
Calling that a win, I went ahead and wrapped the drop bars and called this build finished!
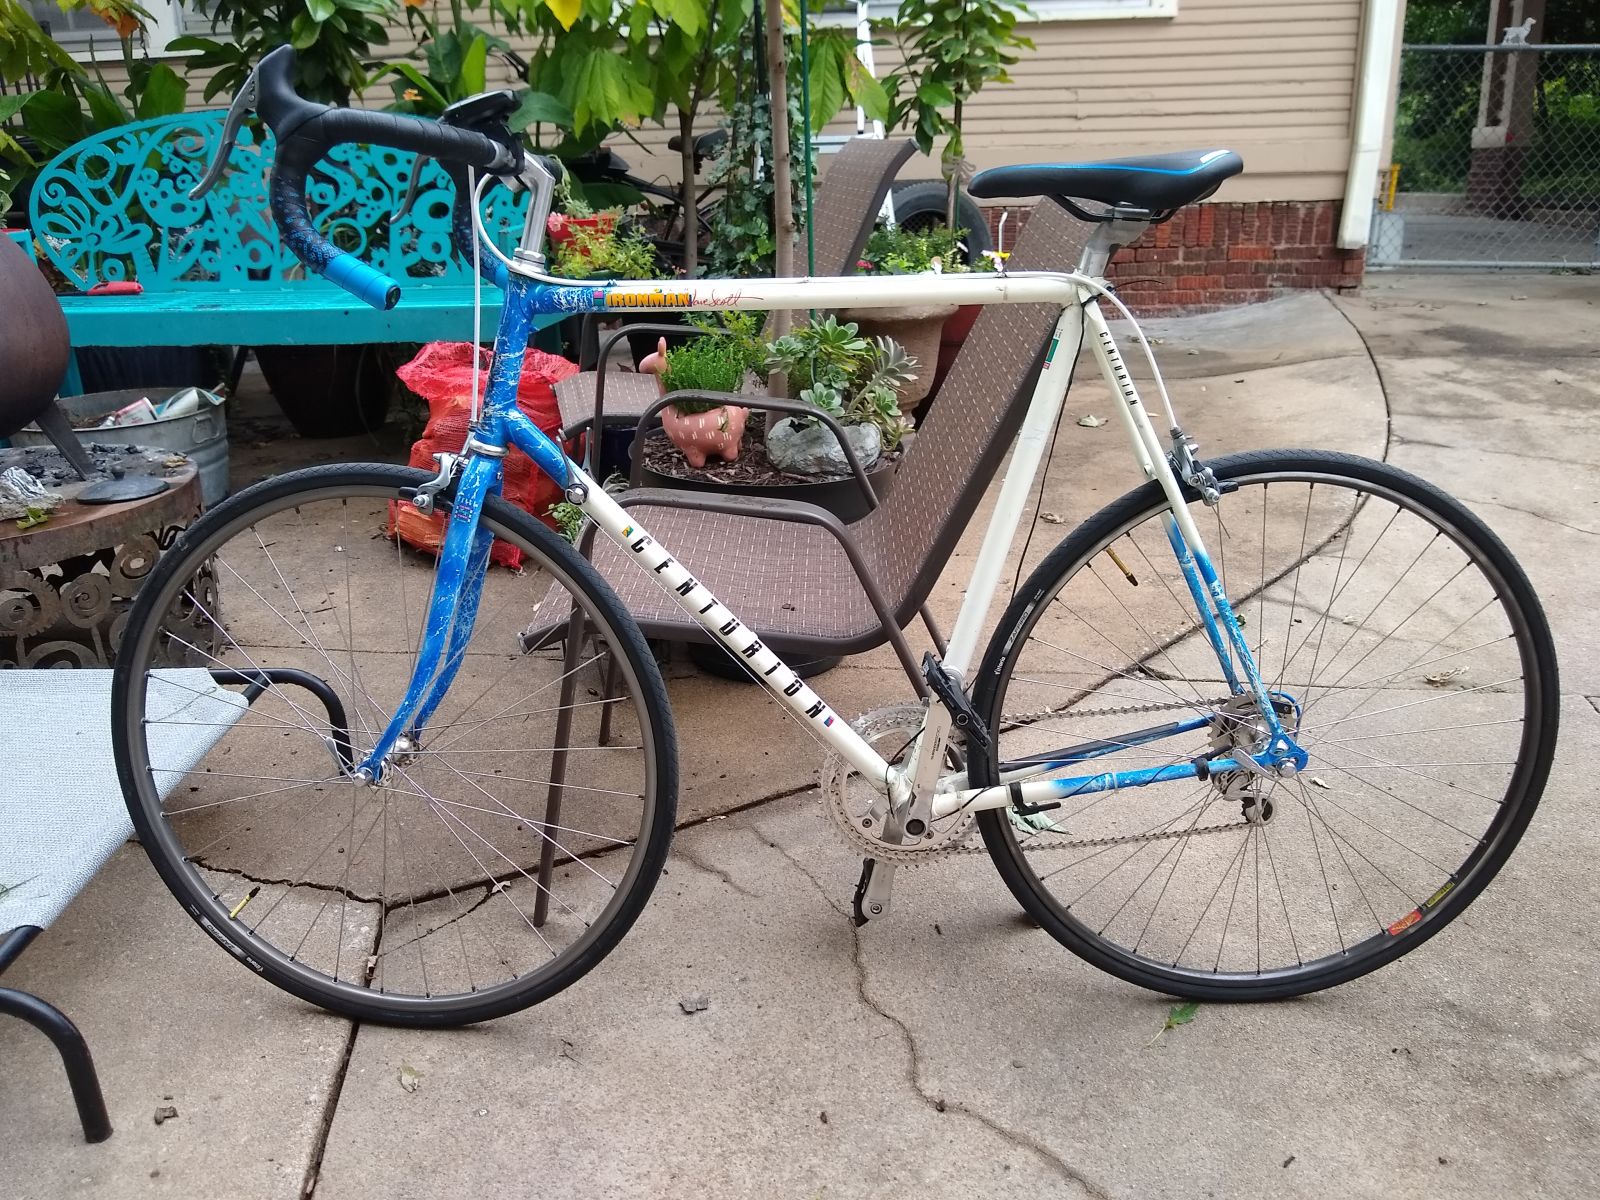
Still to do
I’m not super happy with the color scheme on this one. The blue+black+white works in concept, but the center seems orphaned from the rest of the scheme. I think using blue brake cable housing would have helped, but I’m not going to go through the trouble of changing it at this point.
Looking at these pictures the angle of the drop bars seems a little... off... so I need to check that.
I also need to put some miles on it and recheck all the bearing tolerances. Seems like I am a little over-zealous with the grease and as they wear in they push the excess out and loosen up.
I also need to install the new sensor harnesses to get the old trip computer up and going, but that shouldn’t take long.
Cost break down
Because why not?
- Bike - $80 (probably?)
- Bearings - $7
- Grease - $7
- Pedals - $45
- Seat - $16
- Bar Tape - $16
- Chain - $17
- Tires - $14
- Tube tape - $1
- Tubes - $15
- Crank bearings - $5
- Hoods - $12
- Shift cables - $2
- Cable housing - $12
- Brake cables - $1,000,000 (or $12)
- Stem - $15
- Grand total: $276
Not too shabby considering how much more this bike cost than the other two! Now this doesn’t include tool costs, spares, or bench stock... but heh. Overall I’m happy with the build and look forward to getting some miles on it!
What is next?
I think I’m done here for real real.
Next up is to swap parts between the World and the Varsity, building up the world as a more “casual” bike with flat bars and fenders and building the Varsity for easy sale. Then I’m going to try to sell the Varsity to get back down to 2 bikes, which I feel is the right number.
Oh who knows maybe I’ll be back on here in a month with a new build.
Who can say?