1968 C10 Restoration Update - Part 17 - Going Back Together

Illustration for article titled 1968 C10 Restoration Update - Part 17 - Going Back Together
Photo: Author

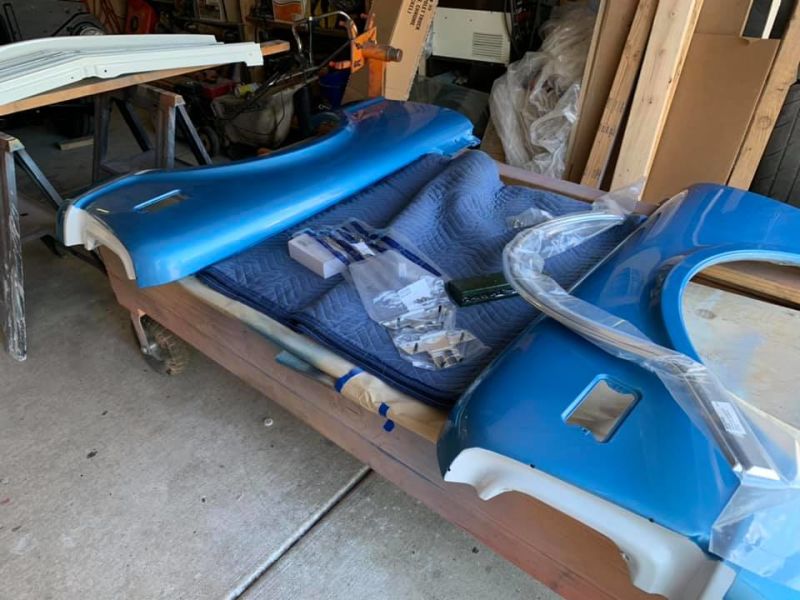
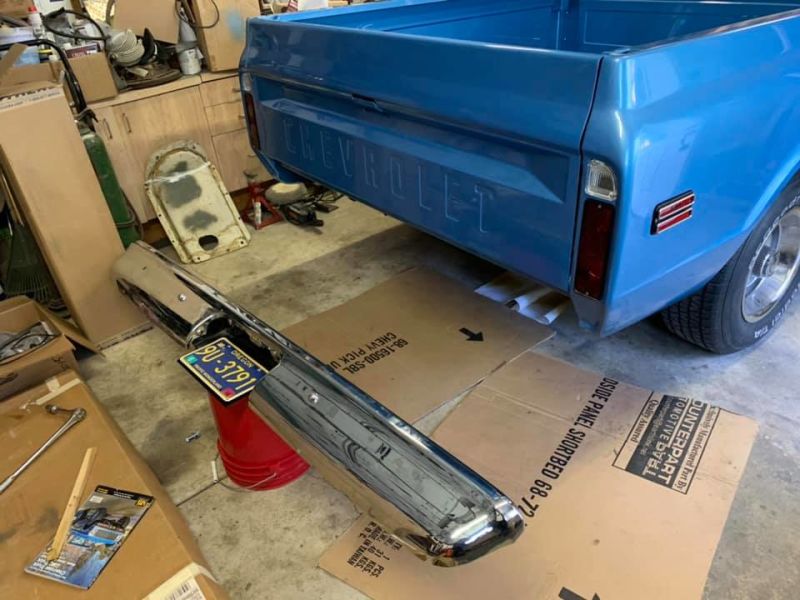
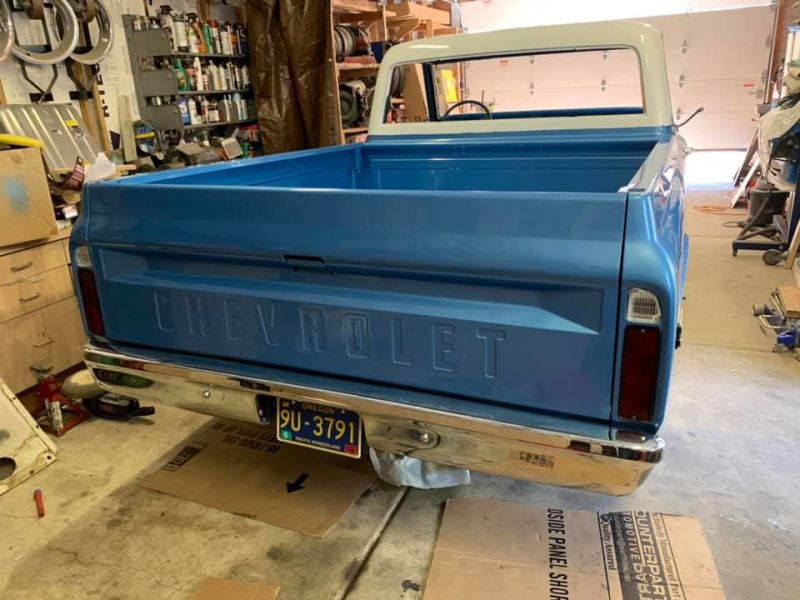
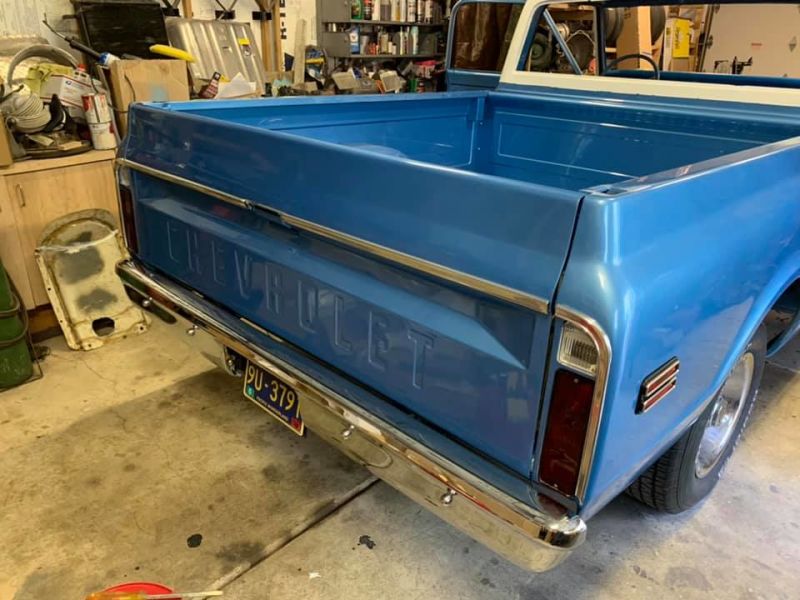
Well its been a few since I posted an update on my 68 C10 project, so here is what has been happening on the pickup. Since the last update here began working on the back of the truck first adding the rear bumper and tail moldings.

Advertisement
Illustration for article titled 1968 C10 Restoration Update - Part 17 - Going Back Together
Photo: Author
Illustration for article titled 1968 C10 Restoration Update - Part 17 - Going Back Together
Photo: Author
Advertisement
Illustration for article titled 1968 C10 Restoration Update - Part 17 - Going Back Together
Photo: Author

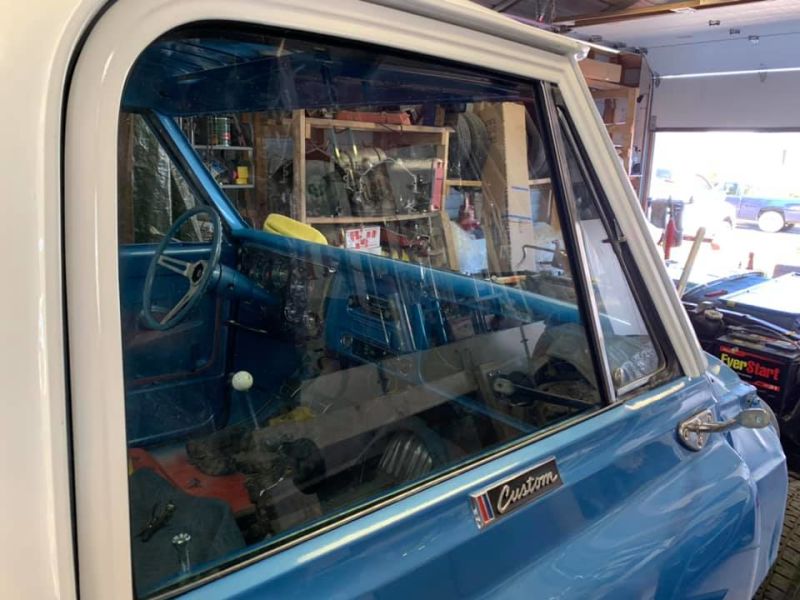
From there decided to hold off on the side bed molding until I put the front fenders on to run a sting line to get the trim straight. So the next plan of attack was the cab and getting some glass put back into it. Started with tearing the wing windows apart and installing new seals and then putting them back together.

Advertisement
Illustration for article titled 1968 C10 Restoration Update - Part 17 - Going Back Together
Photo: Author

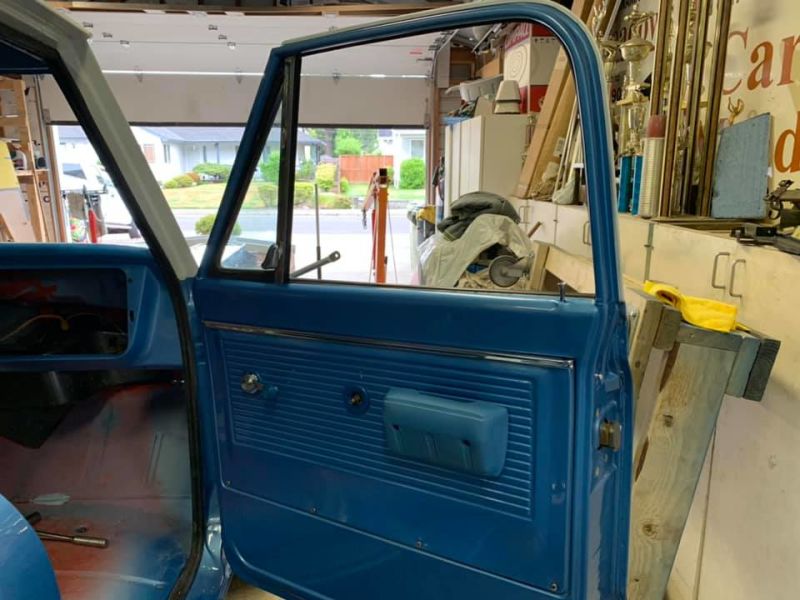
Then pulled the regulators out and cleaned & greased them, then started putting the doors together. Forgot to take pics of that but did get the glass into the doors.

Advertisement
Illustration for article titled 1968 C10 Restoration Update - Part 17 - Going Back Together
Photo: Author

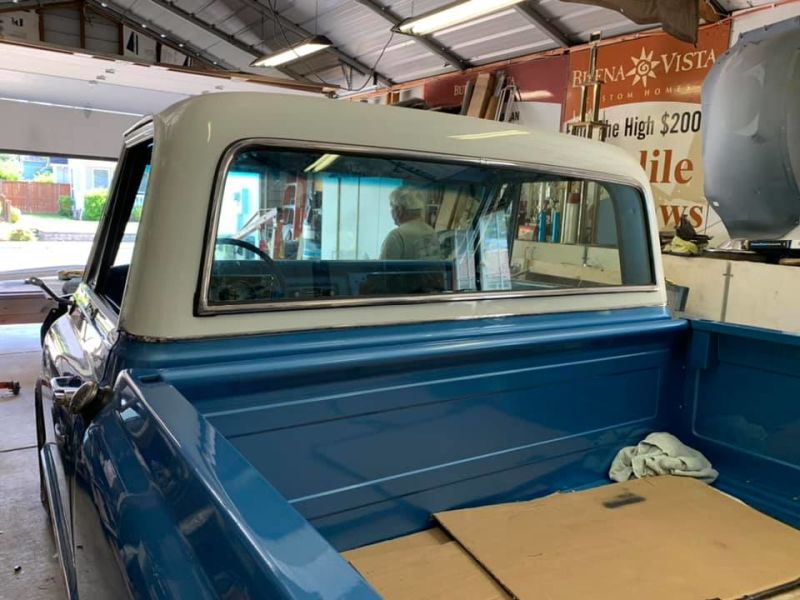
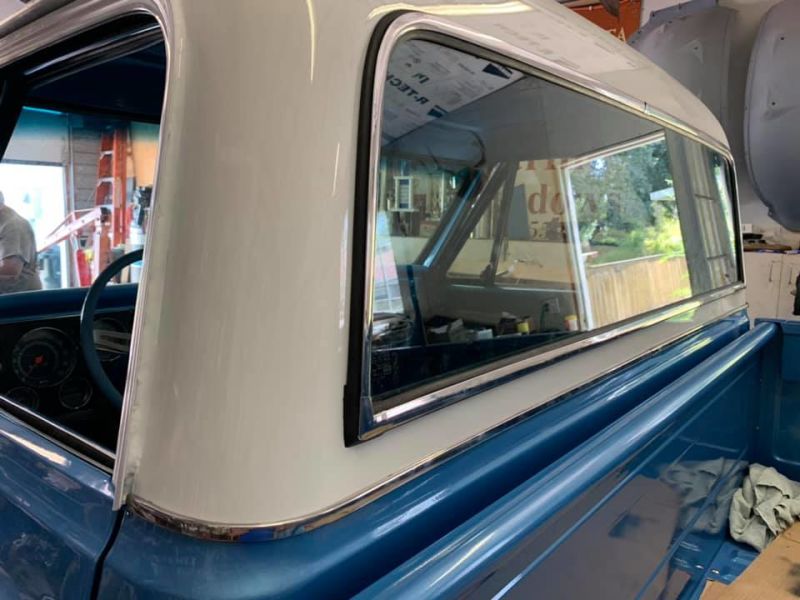
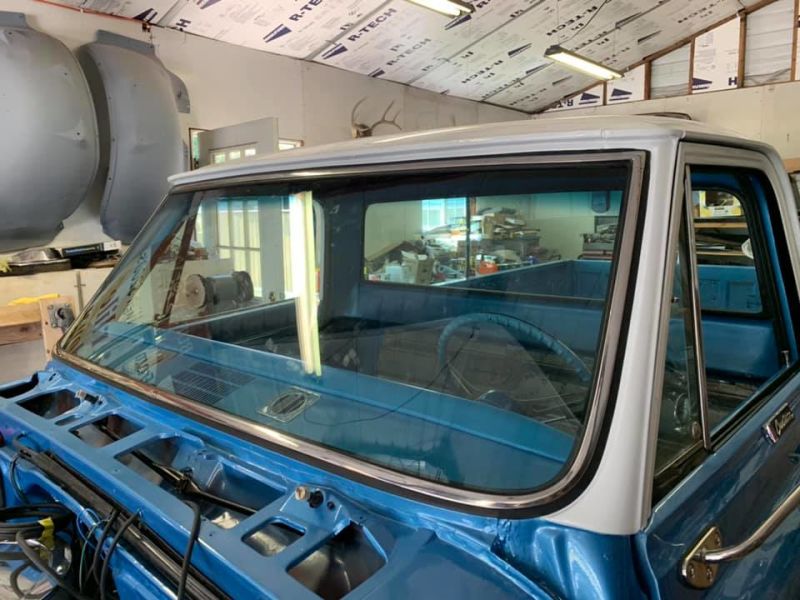
From there the next challenge was pulling the front windshield and rear glass in. These trucks have a rope seal that you pull in over a pinch weld and normally they are not that bad, but this truck is equipped with the deluxe stainless trim that fits in the seal and it makes it a real pain to install as the trim likes to try and pull out of the seal all the time. It took most of a day but the glass went in and I didnt break it, lol.

Advertisement
Illustration for article titled 1968 C10 Restoration Update - Part 17 - Going Back Together
Photo: Author
Illustration for article titled 1968 C10 Restoration Update - Part 17 - Going Back Together
Photo: Author
Advertisement
Illustration for article titled 1968 C10 Restoration Update - Part 17 - Going Back Together
Photo: Author

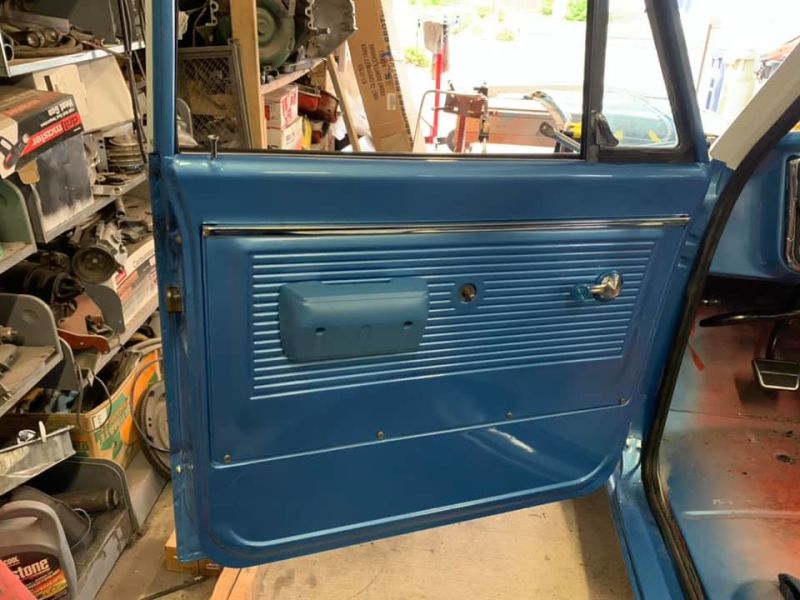
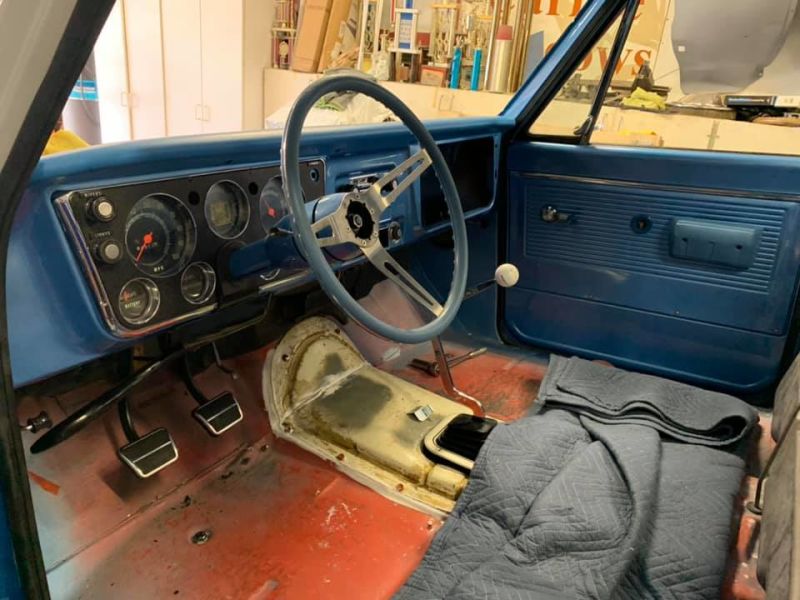
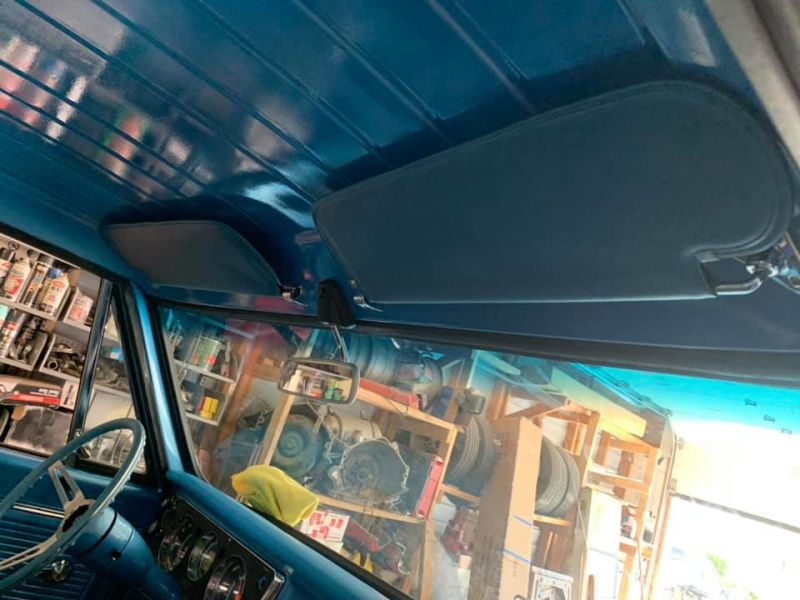
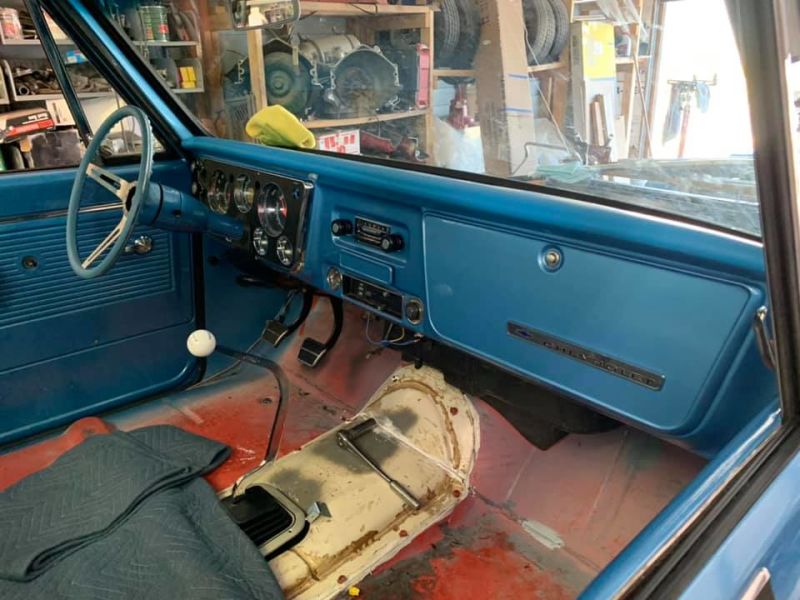
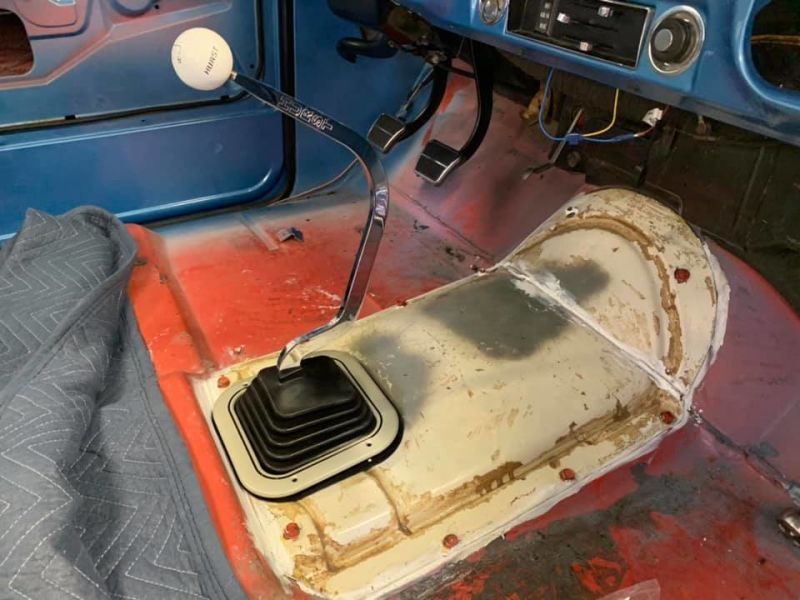
From there went back inside of the cab and put more of the interior in. I am now waiting to get the seat recovered and the carpet to show up so I can finish the interior. I go all my linkage and back up light all hooked up, so I put the floor hump in and sealed it up. Test fitted the boot and retainer and was happy they worked. I guessed right when I saw this setup in its original car, but its in now, the door panels are installed, sun visors are in, glove box lid is on so the dash is now complete.

Advertisement
Illustration for article titled 1968 C10 Restoration Update - Part 17 - Going Back Together
Photo: Author
Illustration for article titled 1968 C10 Restoration Update - Part 17 - Going Back Together
Photo: Author
Advertisement
Illustration for article titled 1968 C10 Restoration Update - Part 17 - Going Back Together
Photo: Author
Illustration for article titled 1968 C10 Restoration Update - Part 17 - Going Back Together
Photo: Author
Advertisement
Illustration for article titled 1968 C10 Restoration Update - Part 17 - Going Back Together
Photo: Author
Illustration for article titled 1968 C10 Restoration Update - Part 17 - Going Back Together
Photo: Author
Advertisement

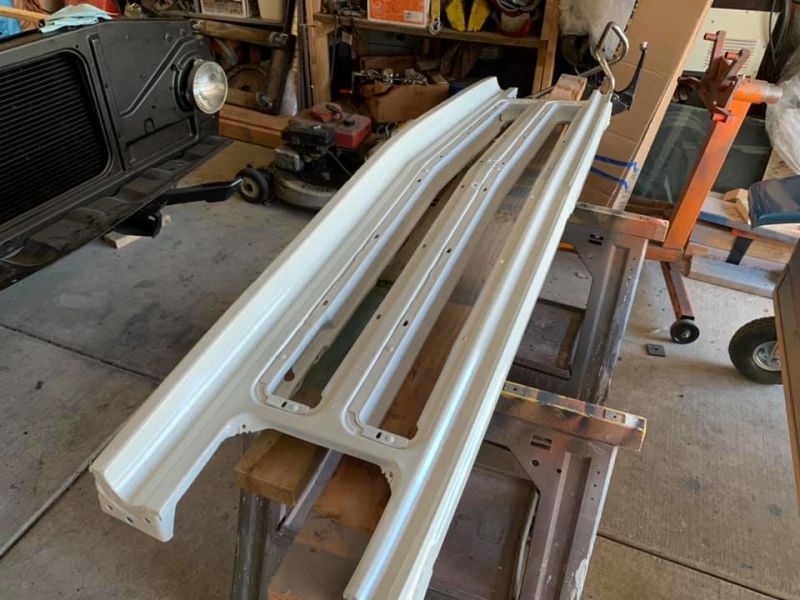
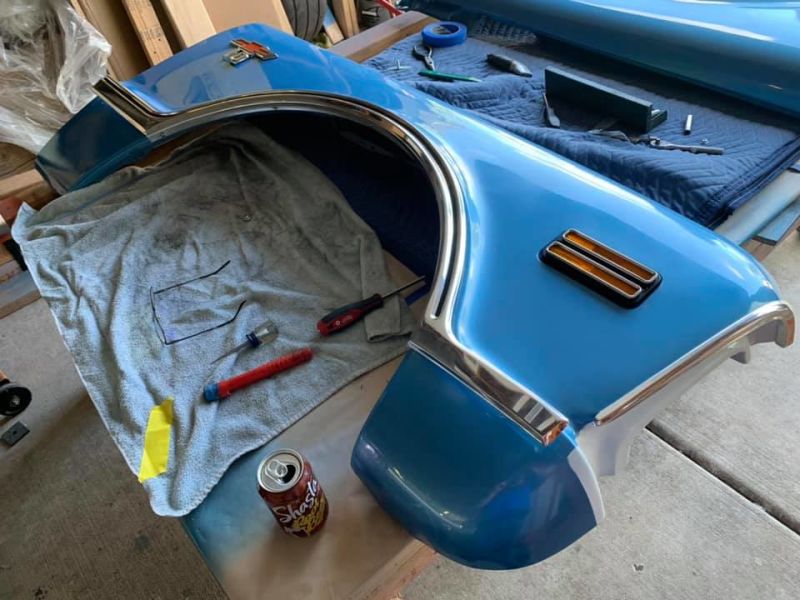
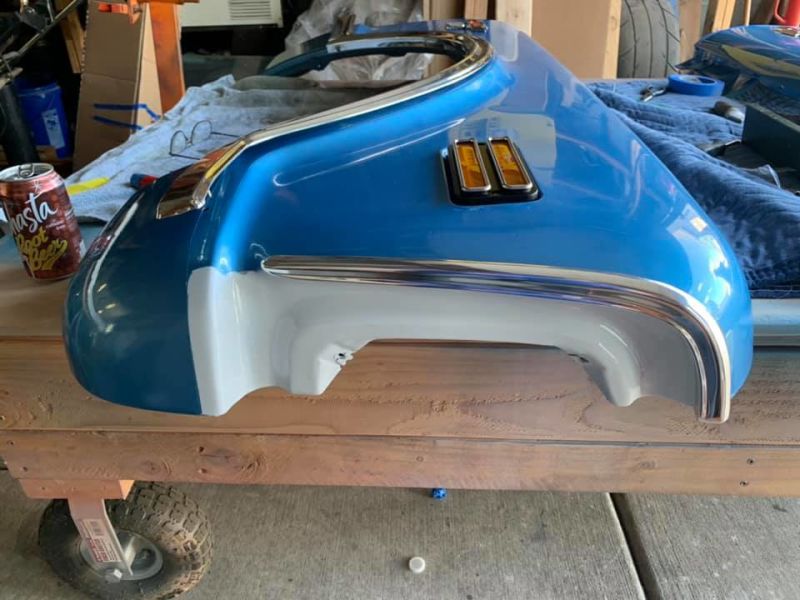
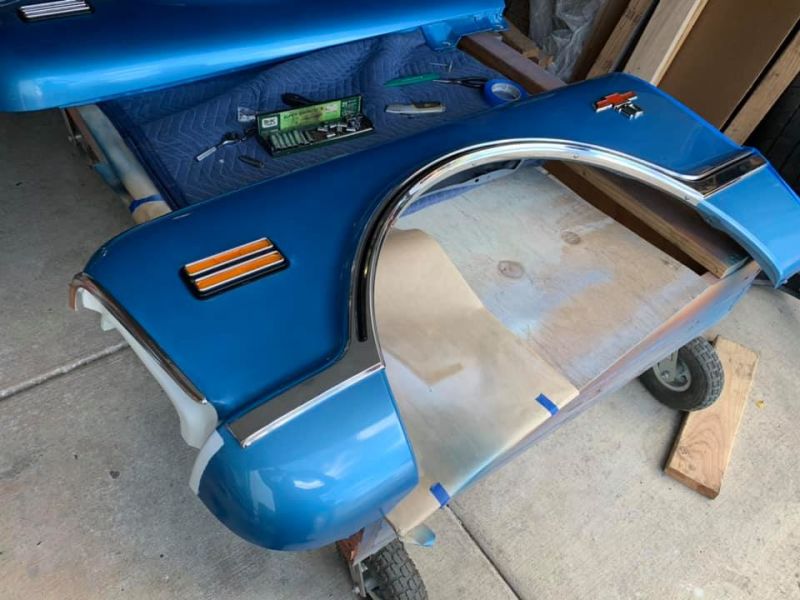
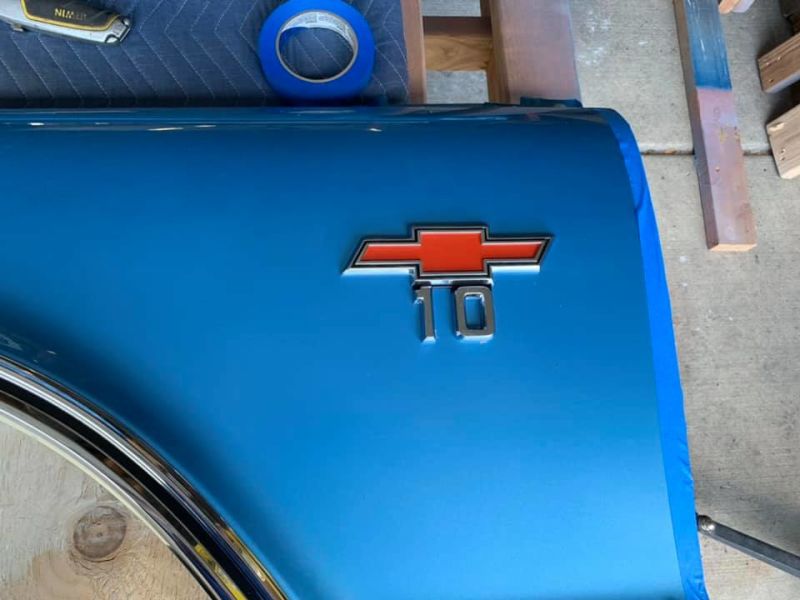
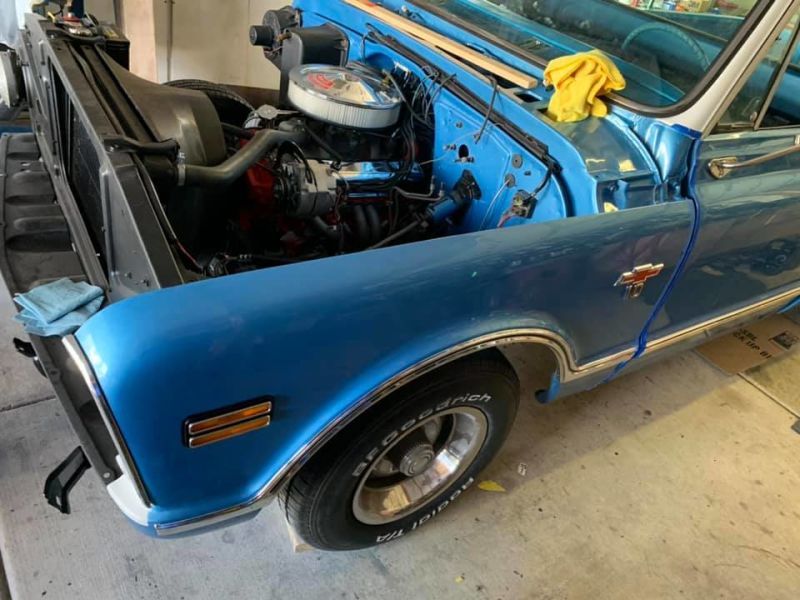
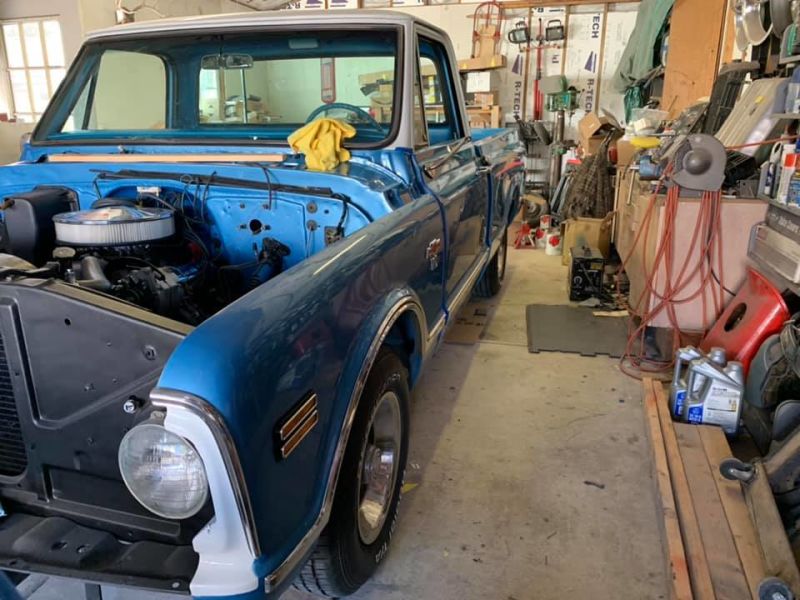
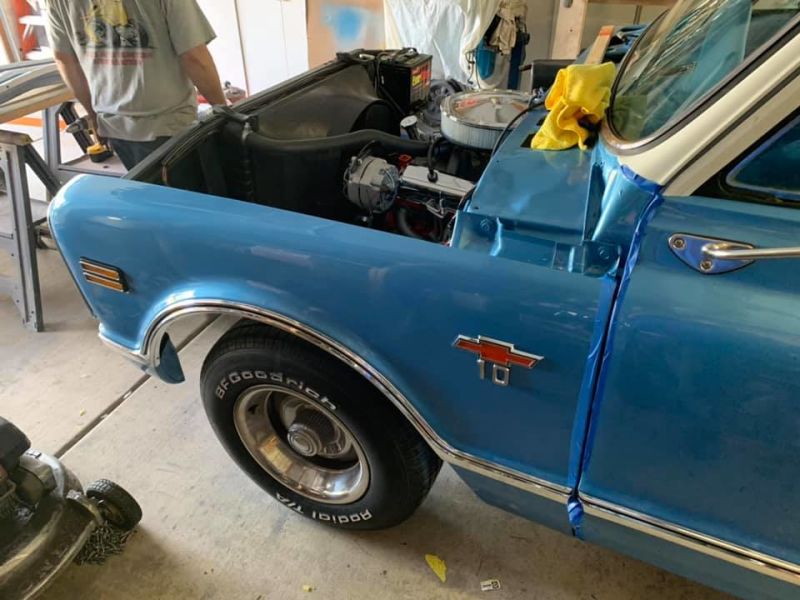
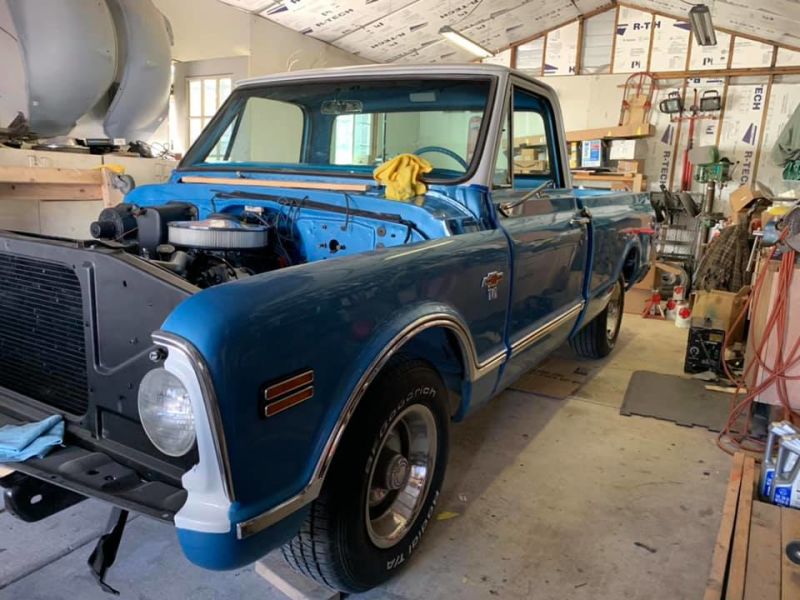
From the cab it was time to turn the nose of the truck and that is where I left off yesterday as the shop got to hot to work in. Pulled the fenders out and began putting on the molding on the them as they need to be on the fender before its bolted on as you can’t get to many of the fasteners at that point. The driver fender went together easy enough, the driver side trim is being stubborn and I had to walk away from it before I damaged something in my frustration, lol. So then decided to mount the driver fender and see how well the paint matches and if the trim would line up, luckily it lined up perfectly. Still needs a little shimming but will do that once the other fender goes on.

Illustration for article titled 1968 C10 Restoration Update - Part 17 - Going Back Together
Photo: Author
Advertisement
Illustration for article titled 1968 C10 Restoration Update - Part 17 - Going Back Together
Photo: Author
Illustration for article titled 1968 C10 Restoration Update - Part 17 - Going Back Together
Photo: Author
Advertisement
Illustration for article titled 1968 C10 Restoration Update - Part 17 - Going Back Together
Photo: Author
Illustration for article titled 1968 C10 Restoration Update - Part 17 - Going Back Together
Photo: Author
Advertisement
Illustration for article titled 1968 C10 Restoration Update - Part 17 - Going Back Together
Photo: Author
Illustration for article titled 1968 C10 Restoration Update - Part 17 - Going Back Together
Photo: Author
Advertisement
Illustration for article titled 1968 C10 Restoration Update - Part 17 - Going Back Together
Photo: Author
Illustration for article titled 1968 C10 Restoration Update - Part 17 - Going Back Together
Photo: Author